|
Unimax
|
www.onthewaymodels.com |
Sherman M4A1 |
|||
| Kit #: 87013 |
Review by
Danilo Carli Edited by Francesco Giovagnorio |
||||
|
Unimax
|
www.onthewaymodels.com |
Sherman M4A1 |
|||
| Kit #: 87013 |
Review by
Danilo Carli Edited by Francesco Giovagnorio |
||||
 |
|
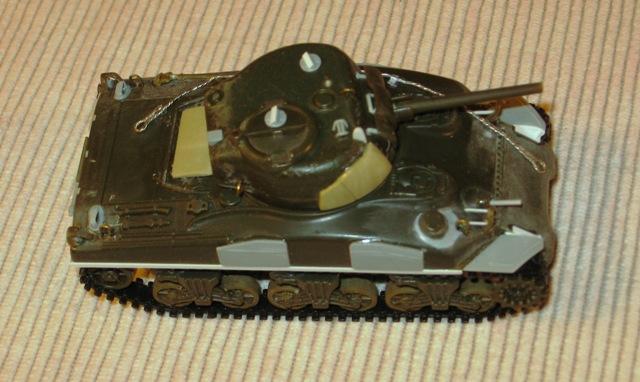
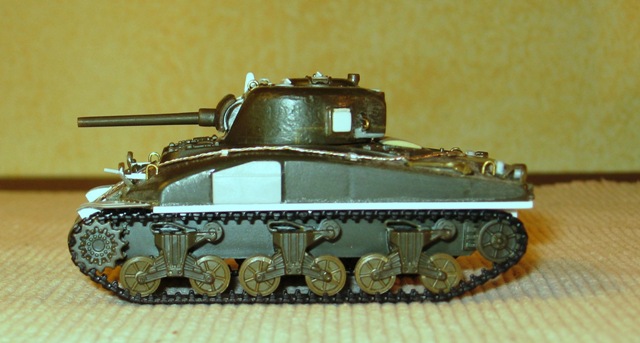
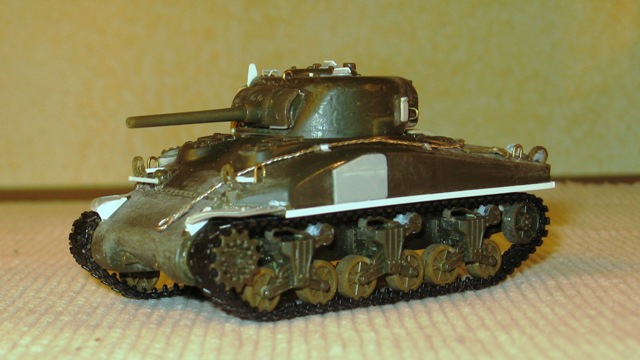
The kit is boxed with a photo of the model on the cover. In the box there were the instructions, three olive drab mouldings (A for the bogies, B for the hull and C for the turret), the hull in the two conventional pieces and the tracks in black soft plastic. The mouldings were clean, flash free and individually packed. The tank reproduced in the kit is a late production Pressed Steel Car small hatch M4A1 with the high bustle turret (the serial range I suppose should be between 3069997 and 3070396, being tank 3070149, /200 and /232 of this type for sure). The dimensions are quite correct but some details are really poor, but nothing that can't be solved with a bit of work for some or ignored without big problems for others. The real problems of the kit are, according to the production batch proposed, that the turret is too tall and that the loader's hatch is missing and every appliqué armor is missing too. (According to the production batch proposed they were of the cast-in type.) To make this model, a good documentation source is needed. Usually I consult the Hunnicut book, but a very good (and costless) source on the net can be found here. I didn't use the tanker figure: it is strangely oversized. The basic works I made are listed below.
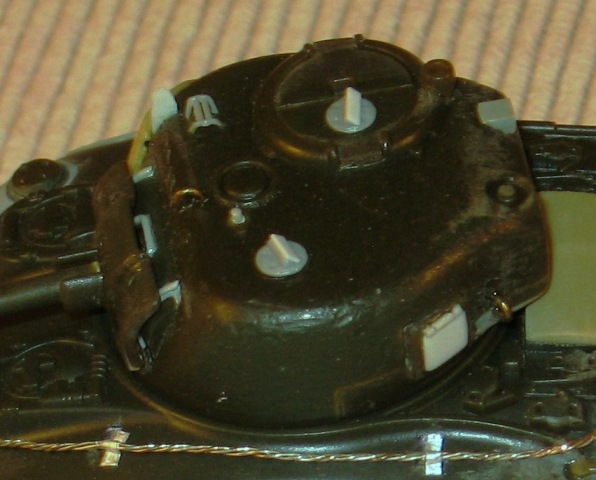
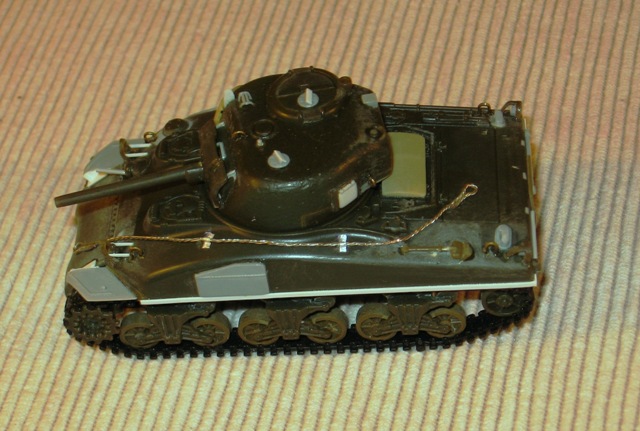
Turret The turret is the high bustle type, but wrongly without the loader's hatch. To be used like a high bustle turret, you have to add it. But you have also another possibility: modify the back to make a low bustle turret and have an M4A1 of a different batch. I chose this way. The turret dimensions are fundamentally correct, but it stands a bit tall because of a raised base on the hull. To work on the turret is the easy way to restore the correct configuration. I filed the lower edge to have a turret that was 10 millimetres high. The flat front is a bit too much forward. I filed it back a millimetre and restored the right curves. The bulging cast-in armor is missing, and has to be added following the photos. Having chosen a low bustle turret, I had one of these three choices: no appliqué armor, welded appliqué armor or integrally cast armor. I made the welded ones with plastic. Pay attention: if you choose to make a low bustle turret with the integrally cast armor don't use the pistol port C10 and close the hole with plastic. The M43A1 mount was widened on the left side to the edge: the bolted flange was only on the right side. I've also added the vertical reliefs that stay on the mount, behind the mantlet. The mantlet which is too sharp was made smoother by sanding the corners, being a cast piece. I've added also some little details:
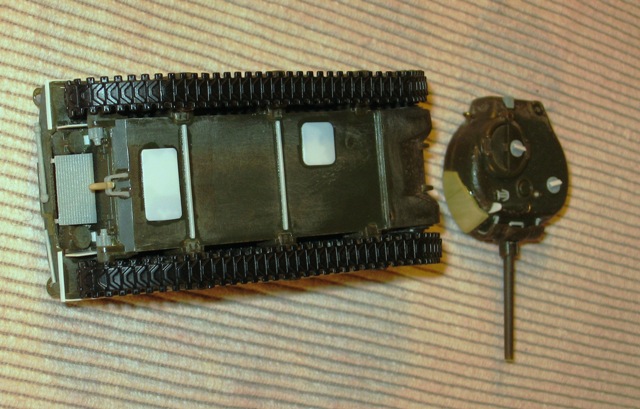
Hull In the hull the integrallt cast armor plates are missing; if you follow the type proposed add them on both sides following the photos. Having chosen a low bustle turret with the welded appliqué armor for my M4A1, I had to add the welded appliqué armor also to the hull. Having the Dragon appliqué for spares, I used them. The front air fan bulge stands out too sharply. I made it smoother with putty after having cut off the cover that was reassembled after sanding. The transmission cover B7 is of the pointed cast type and has a gap that I filed away to make it flush with the bow. The towing points were repositioned a millimetre back too. The front fenders are curved and not straight. I've changed them with Dragon spare parts. Then I added the structure on the vertical inner sides. The back fenders were removed. I didn't use the piece number B4 (which is correct for a large hatch hull) and the hole on the bow was closed. I felt that the belly needed some work as well, even if it is not always visible. I've erased the removable bolted plates and changed them with others made from plastic sheet in the right positions. I've also added the two transversal rods. Again I've worked on the details:
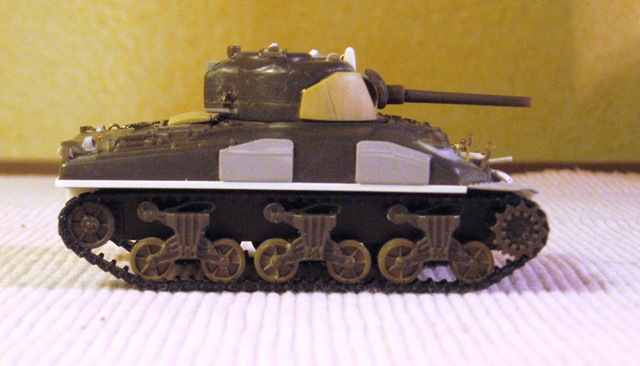
Wheels and tracks The bogies aren't bad, but the wheels are wrong. They are of the open spokes type, but with six holes. I've changed them with an Esci/Italeri set. The sprockets have the wrong number of teeth (one is missing like in the Esci/Italeri kits). I've used them: the error isn't so visible and the tracks lie very well in them. The tracks (the T48 rubber blocks type) are a bit narrow, but are fine and can be glued.
Decals There are only two white stars for an anonymous 3rd Armored Division vehicle in Normandy. No bumper codes, speed numbers or serial numbers are present. For my M4A1, I had to use another source.
Conclusions For a war gamer it is a usable kit out of the box. From a modeller's point of view, it needs works and some spare parts from other kits to have a good replica. Any way, I've found it an interesting kit to build, like others that don't give you any little piece already made. Strictly speaking, to really make the proposed version I had to keep the high bustle turret, add the loader hatch and the cast armor; keeping this in mind the other works described are the same.
Review sample purchased by the author.
|
| Back to Unimax Kit List | Back to Construction Reviews |
Article Last Updated: 04 September 2013 |
Back to Home Page |