| Flyhawk |
Pz.Kpfw.
II Ausf. L Luchs |
|||
Kit : # FH3003 |
Review by F. Giovagnorio |
|||
| Flyhawk |
Pz.Kpfw.
II Ausf. L Luchs |
|||
Kit : # FH3003 |
Review by F. Giovagnorio |
|||
.jpg)
|
|
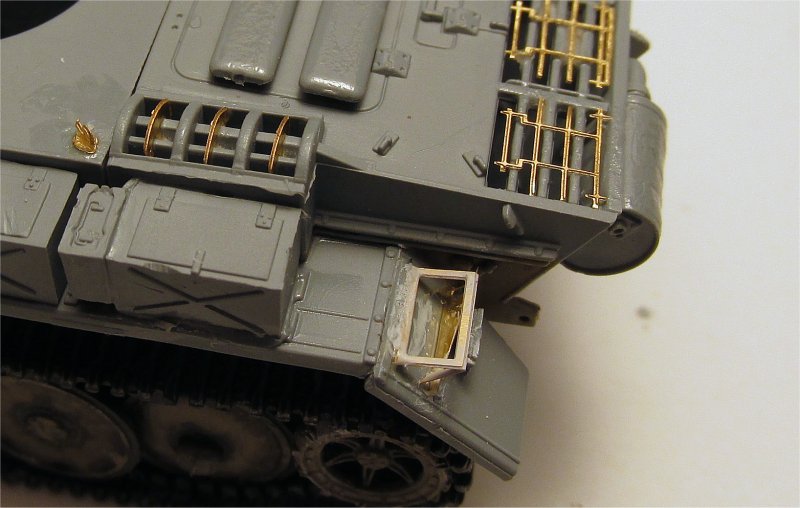
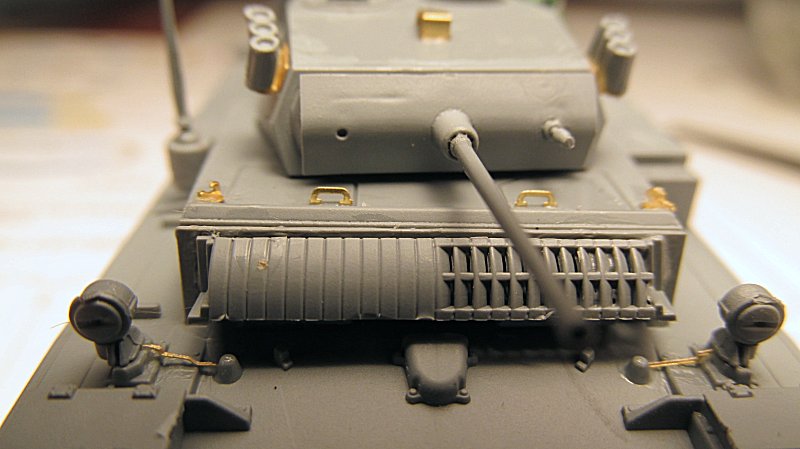
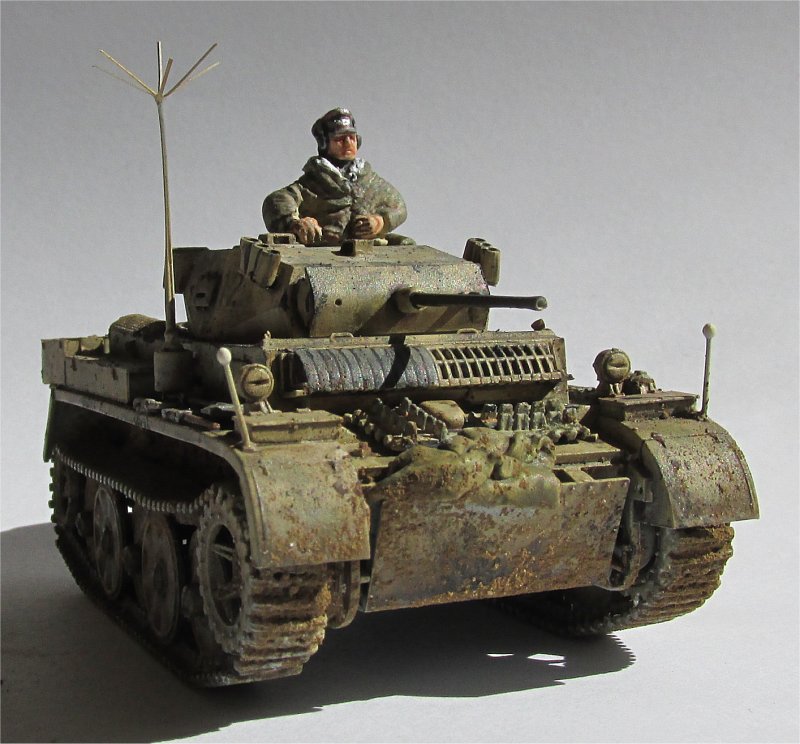
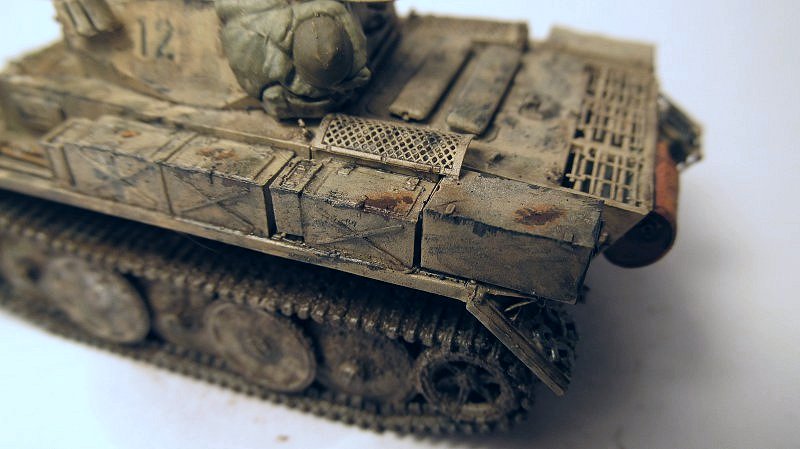
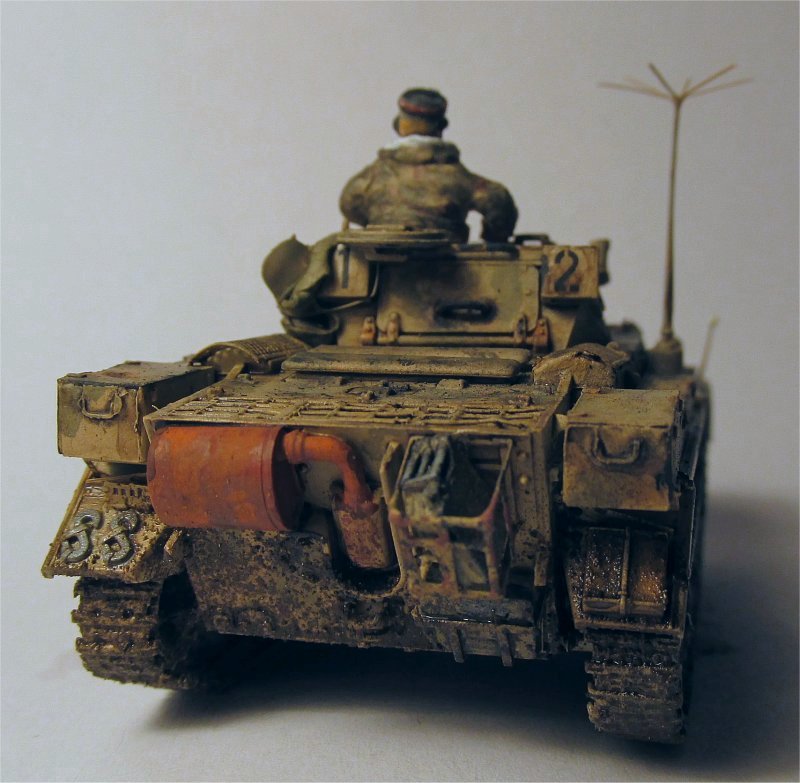
In his preview of this kit Rob Haelterman provided a general analysis of the model and some info about historical background. He already pointed out that this kit lets you build one of those vehicles serving in the eastern front with the 4th Pz.Div, characteristically fitted with an extra armor plate attached to the hull front, spaced out far from the hull. Another typical aspect of those vehicles was a set of replacement segments for the rear idler, held in place above the driver's visor by a steel rod; most vehicles carried different combinations of rubber and steel segments.
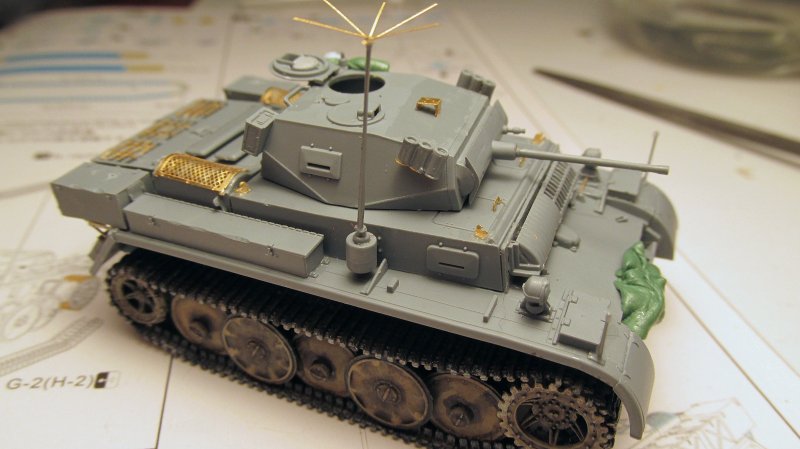
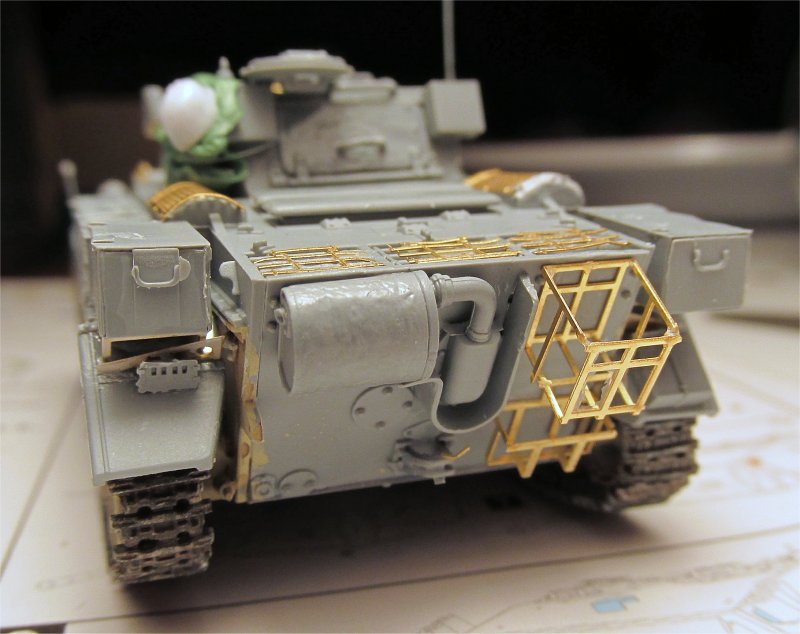
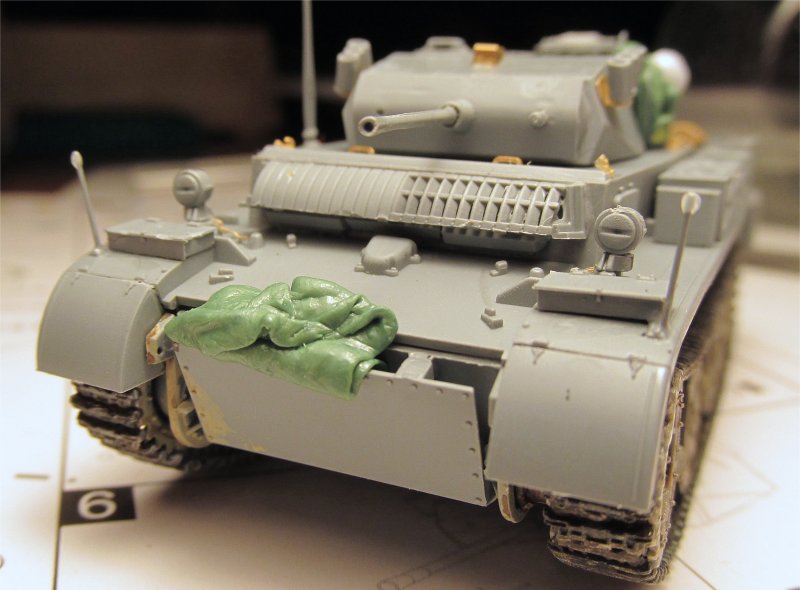
There is a number of PE sub-assemblies conveniently pictured in separate squares in the instructions, with PE parts identified in cyan color. It must be said that some can be left where they are because there are plastic equivalents already in place (the four lifting hooks in the hull - PE 4/5 - and the handles on the front hatches - PE 11), but most of them can not be avoided, or the final model will look rather fast-build and not very similar to the real vehicle. In case you want to use the PE parts in place of the plastic ones, the latter have to be carefully removed with a scalpel, to avoid destroying details or leaving scratches, then each PE part has to be bent and positioned. For example, in the first one of the following pictures you can see the plastic handle of the hatch still in place, while in the last picture you can see the definitive PE ones, along with PE hooks and electric wires for the front lights.
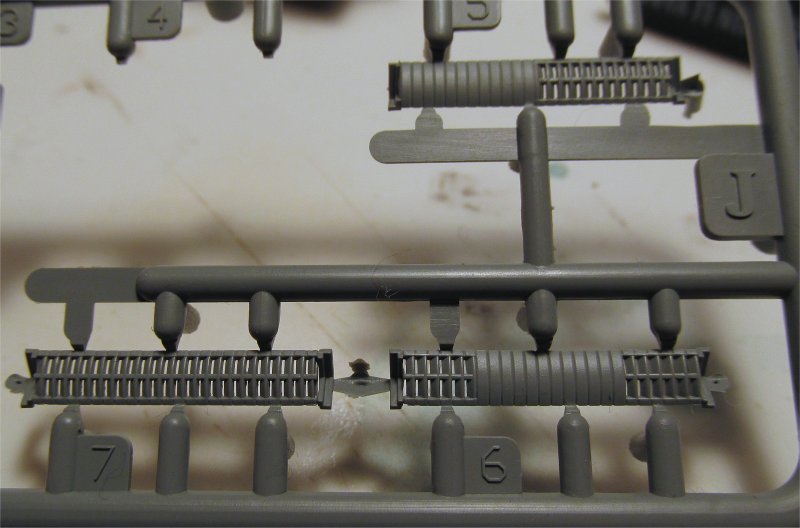
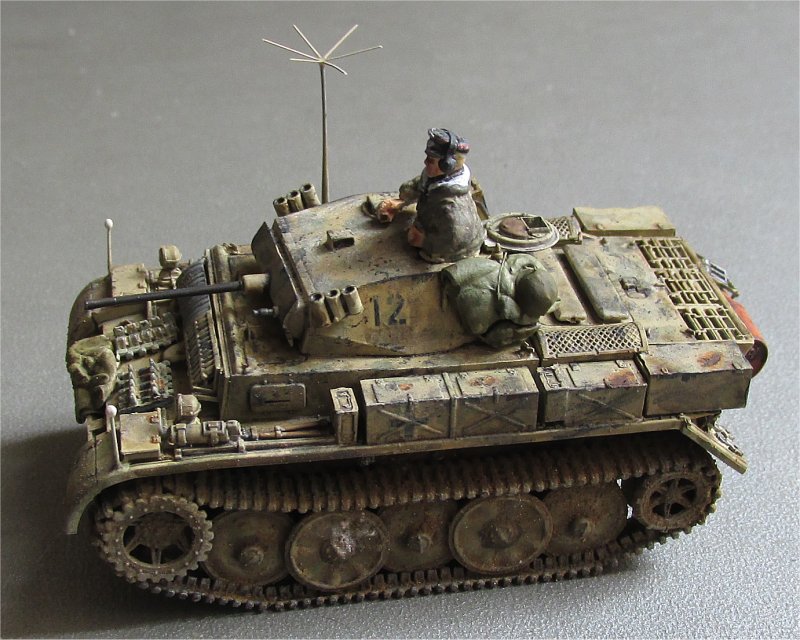
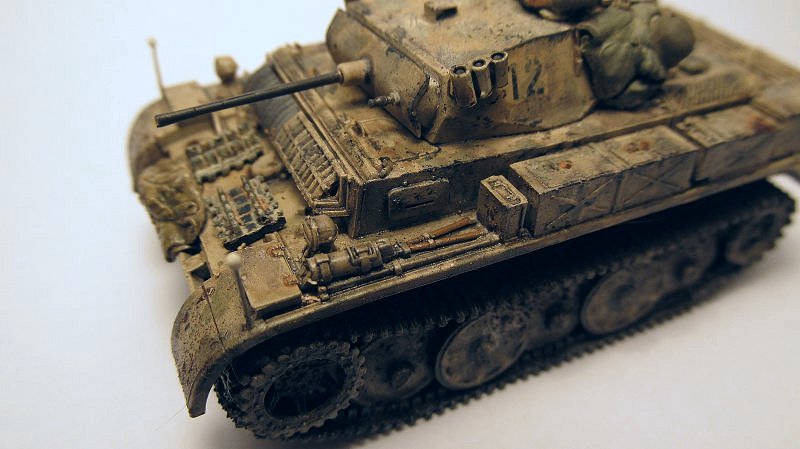
Since the vast majority of the kit is identical to the previous one already built by Rob Haelterman, I am not going to repeat all the details he pointed out already. As a general suggestion, I would only repeat that the kit is perfectly engineered, but it is so finely crafted that every single piece needs a special attention, so an extreme care is needed when separating pieces from the sprue and when cleaning them before glueing them together. Also, follow the instructions very carefully because many pieces might look identical while being different - the rule of thumb, as stupid as it might sound, is that if they have different numbers, they are, well, different. A particular note of merit goes to Flyhawk for not having been lazy and given a single possibility for the set of idler segments to be mounted above the visors: three different combinations are provided instead, from which you can choose, reflecting all possible combinations seen on real pictures. Also, the detail on jerrycans is the best I have ever seen, with separate handles which increase realism to the maximum extent.
Other differences between this one and the "early" Luchs previously released by Flyhawk lies in the external stowage, because the position of tools and jerry cans differs somewhat. This naturally means that PE parts to be used in both kits are different too. Talking about PE parts, it seems that the six spokes of the star-shaped antenna (PE-13) should have a more acute angle with the rod than showed in the instructions - see real photos. Assembling hull and wheels is quite straightforward: I am not going to repeat what you can find in the aforementioned review. I would just say that sprocket wheels (K14-15-16-18) should see their two halves firmly inserted to avoid teeth misalignment, yet this does not happen because the squared peg-hole combination is a bit loose, so be careful. Taking your time, in some days of work the model will be complete. I added some extra stowage sculpted from kneadatite/green stuff, trying not to obscure any of the very fine details. When mounting the commander's hatch in open position, I had to fill a very visible ejector hole. You might notice that the width indicators are built from scratch: this is a warning to never mount very fine parts until the very end ...
Weathering is quite heavy because these vehicles looked very worn on real photos.
Conclusion
|
| Back to Flyhawk Model Kit List | Back to Construction Review Page |
Article Last Updated: 18 May 2017 |
Back to Home Page |