|
Mk.IV Female |
|||
Kit # 5002 |
Review by
- Al Magnus
|
|||
|
Mk.IV Female |
|||
Kit # 5002 |
Review by
- Al Magnus
|
|||
 |
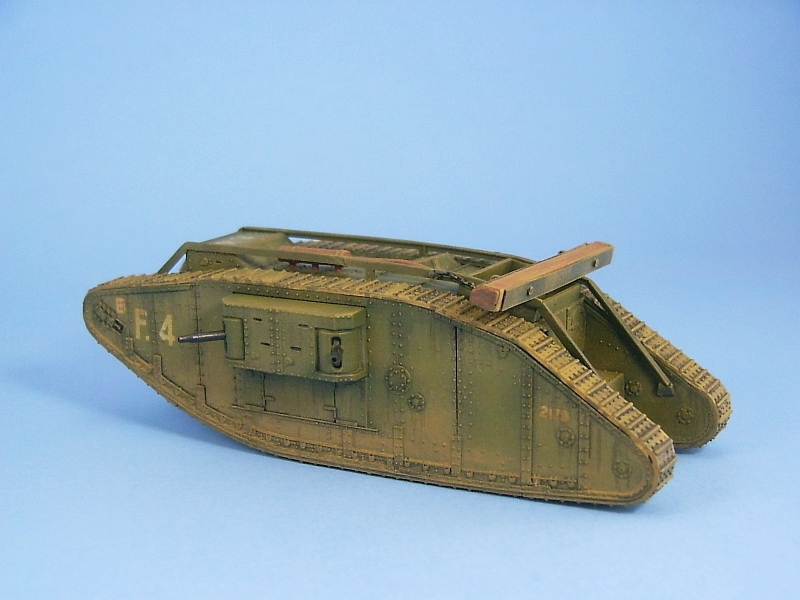
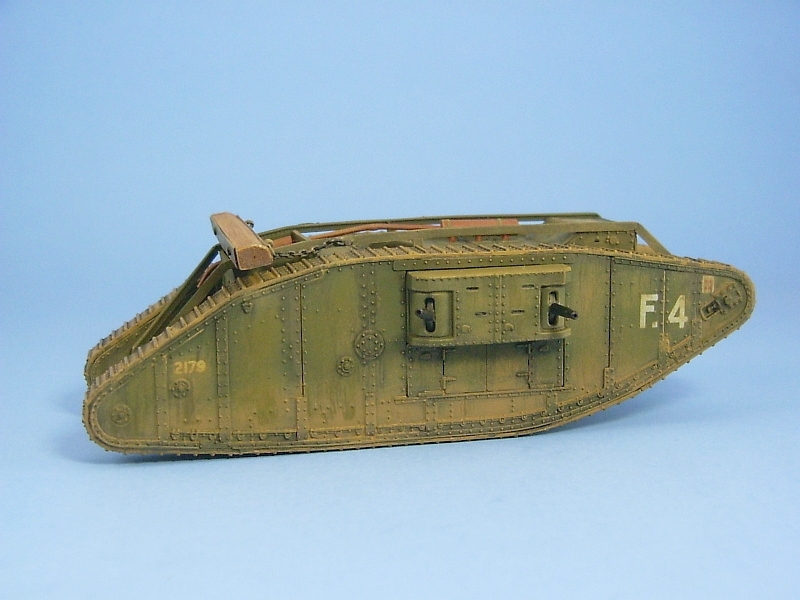
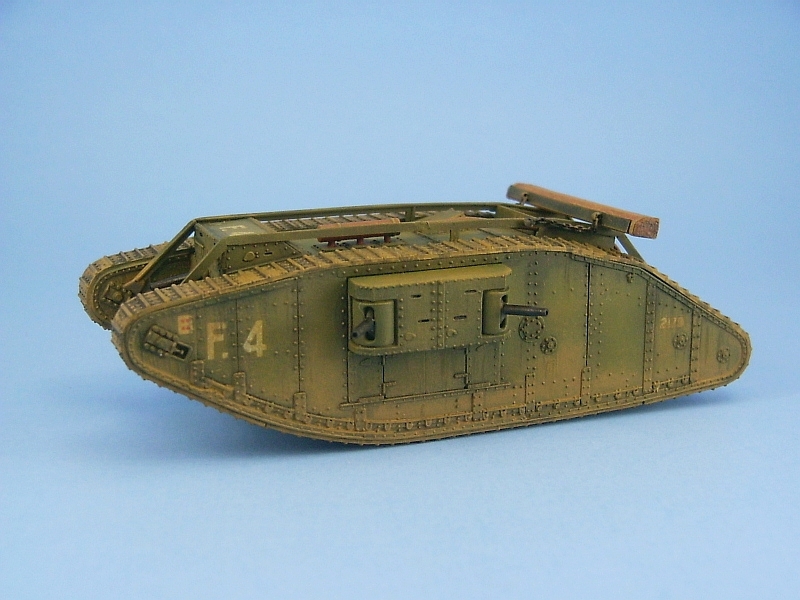
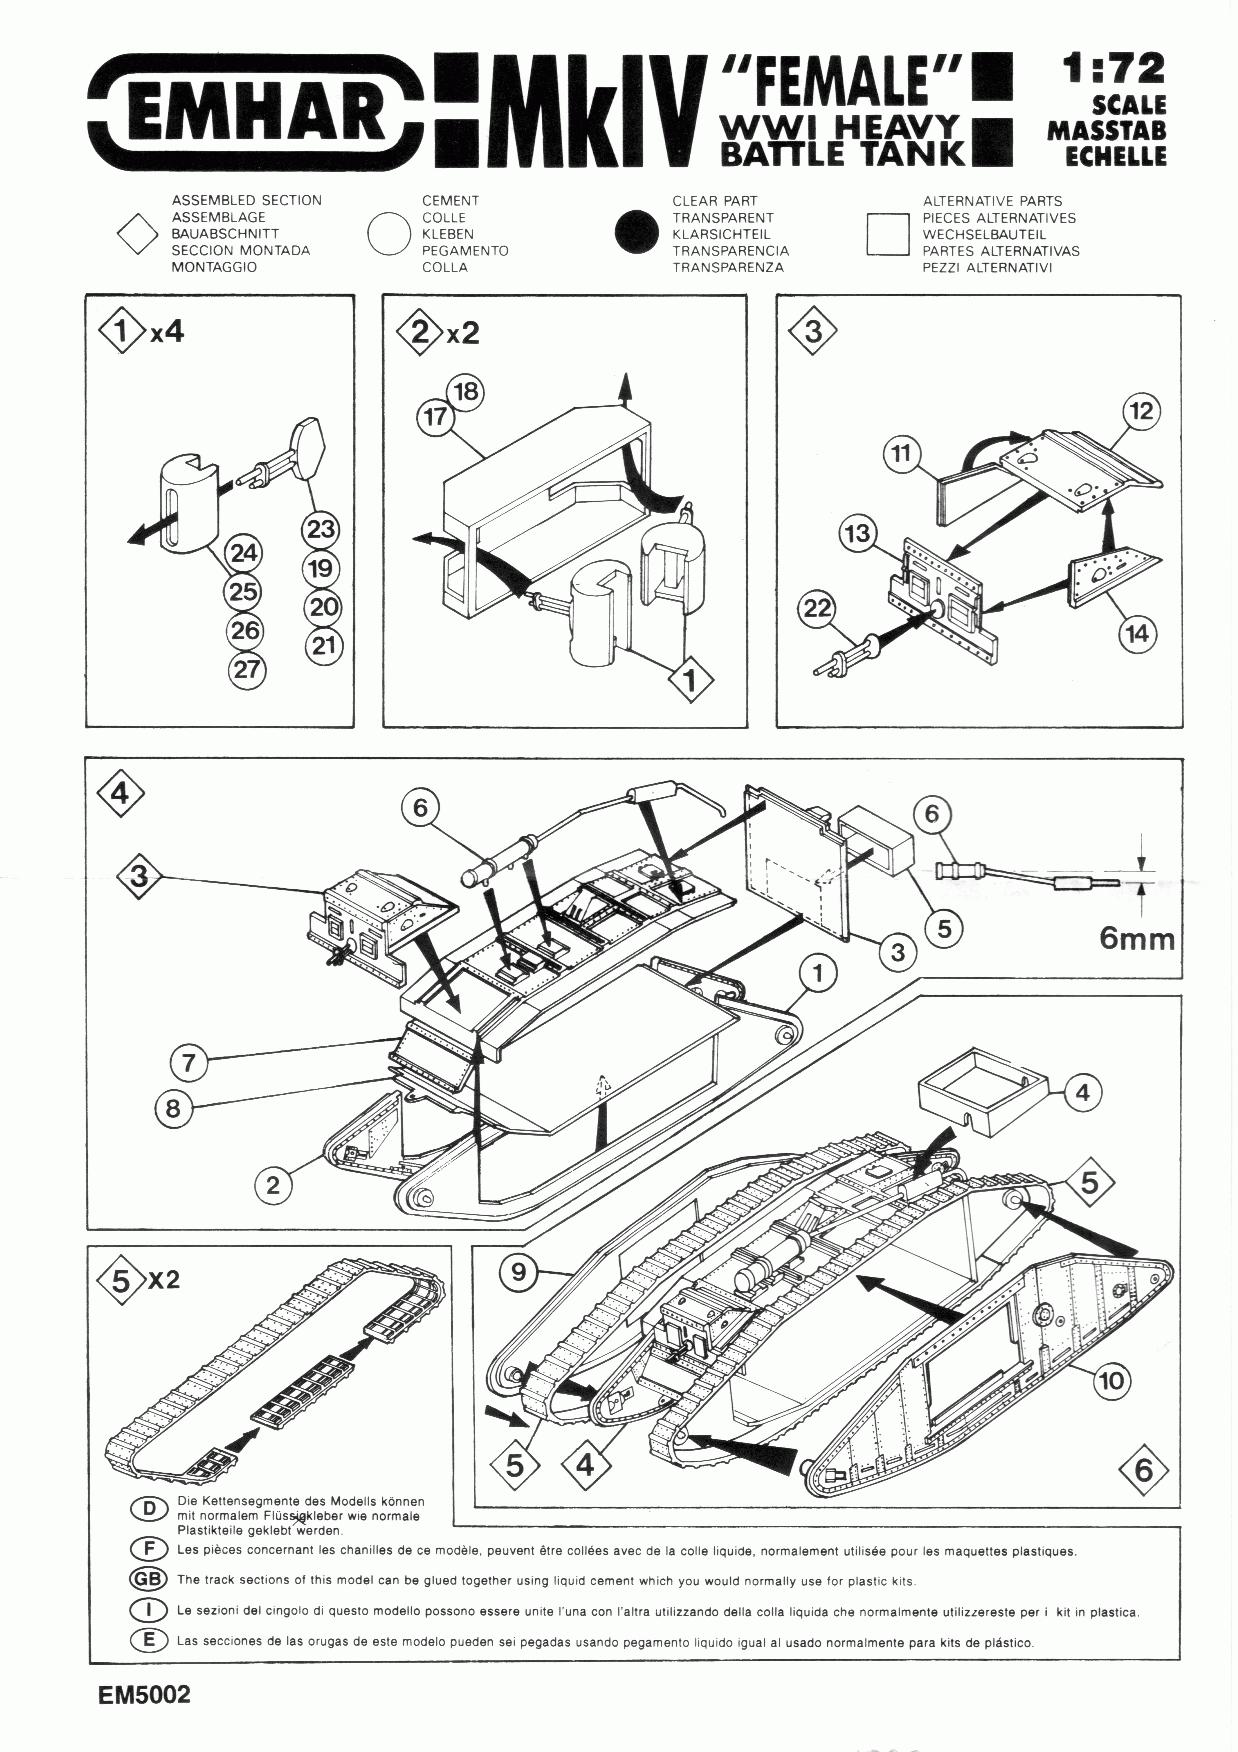
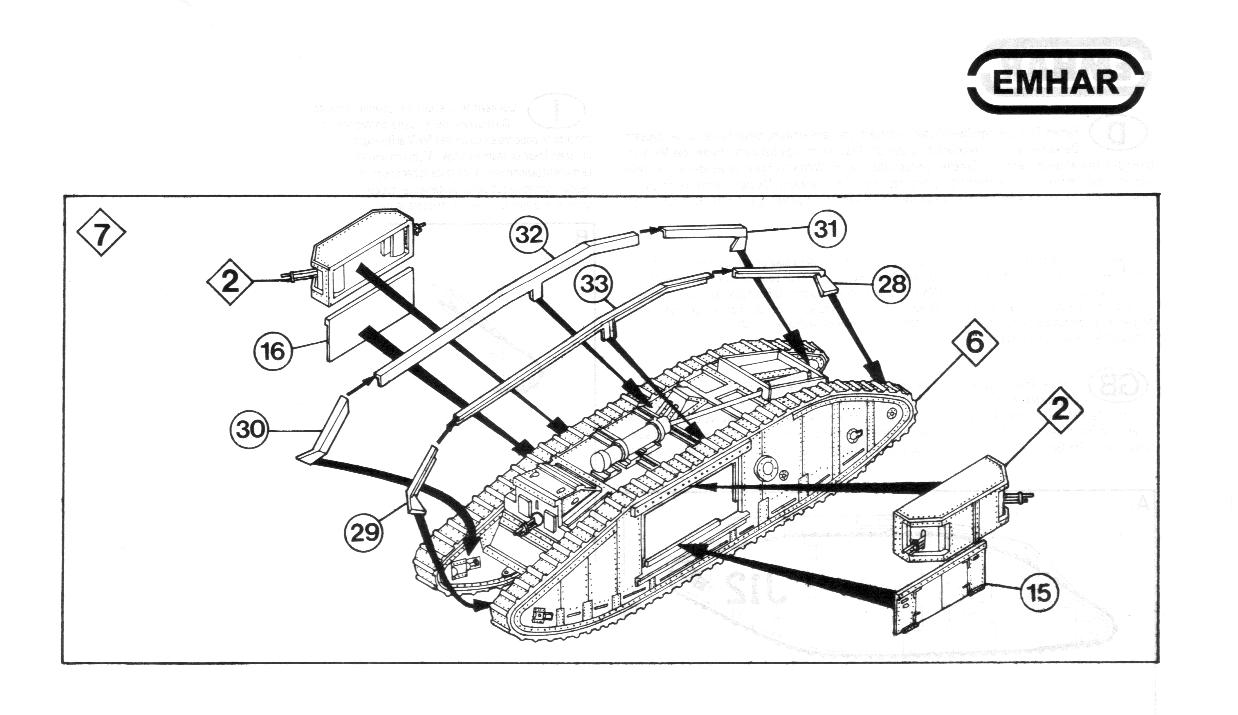
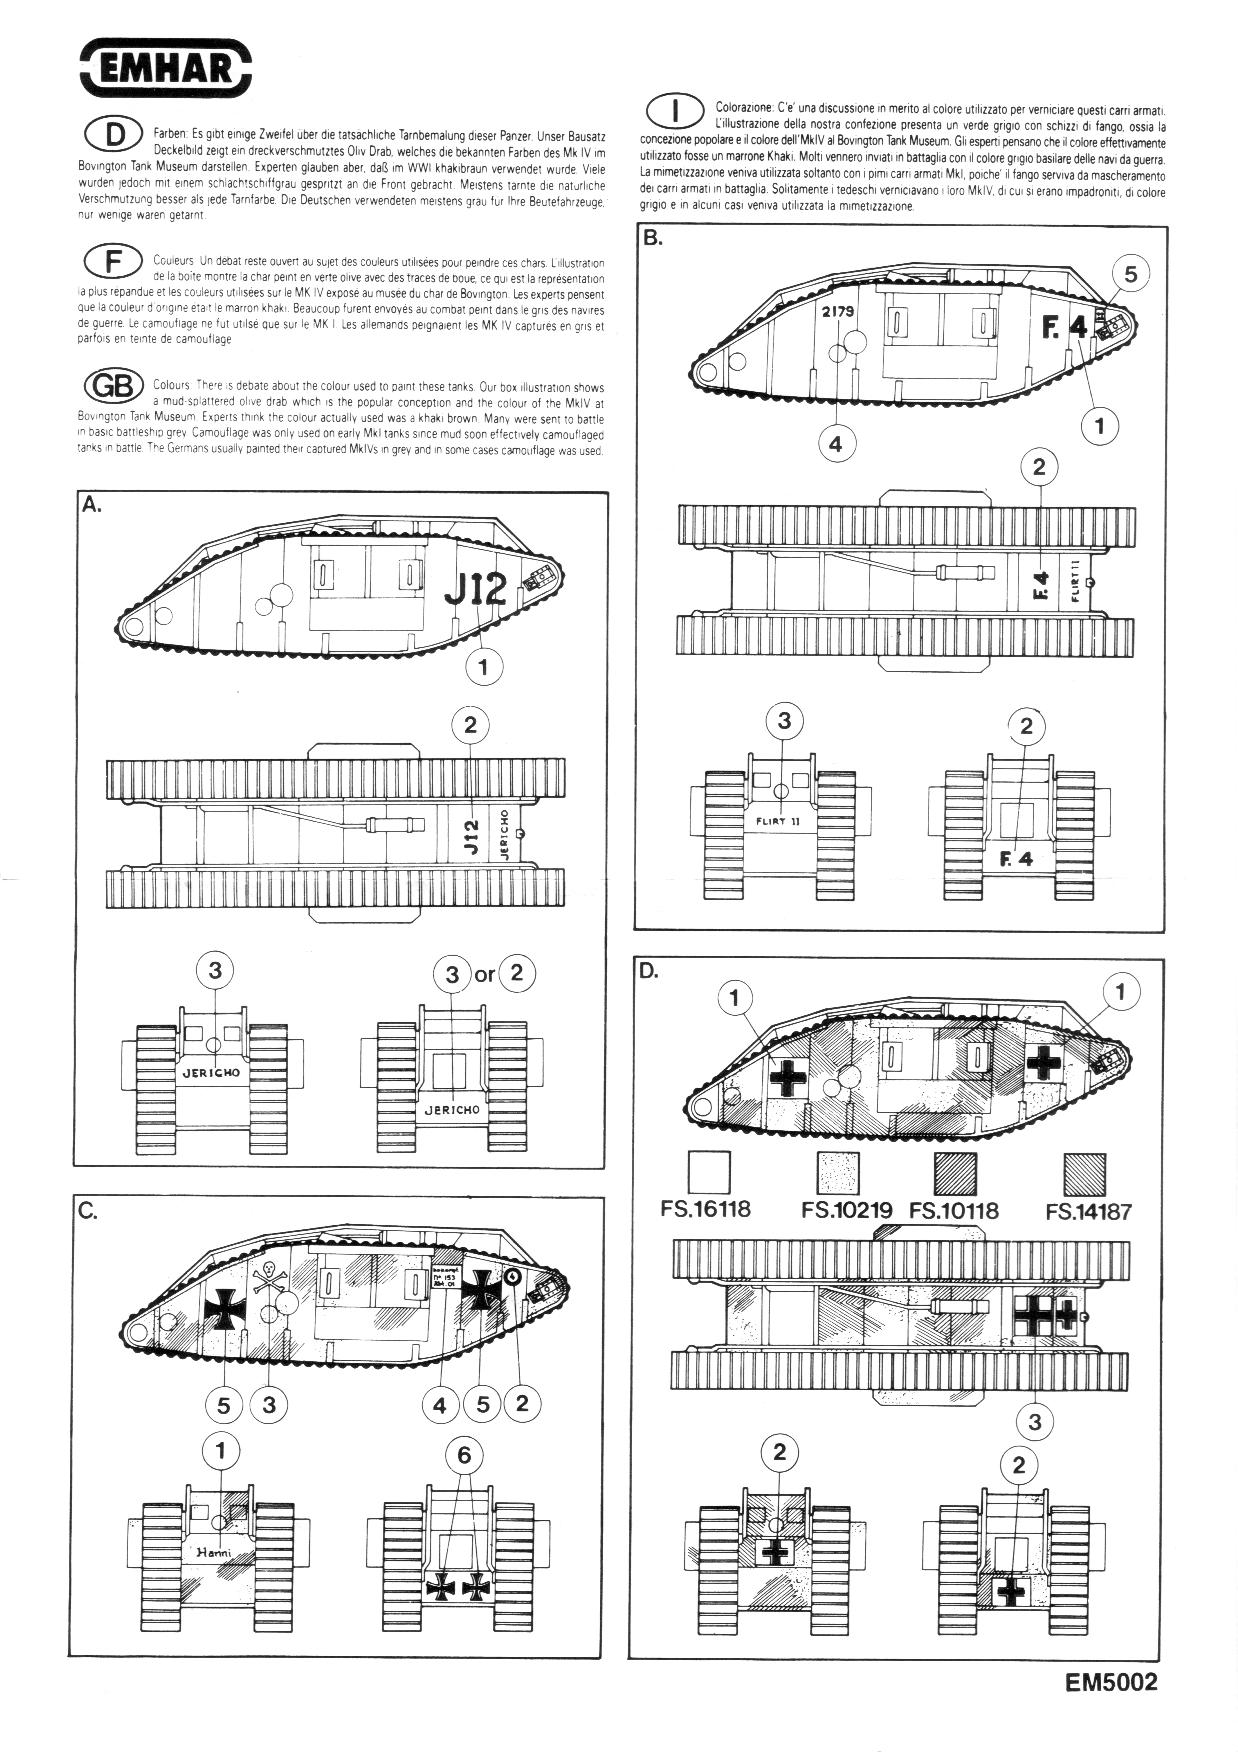
I build mainly wheeled AFVs and this was my second tracked vehicle. I decided on the Emhar Mk.IV female tank because I was impressed with their Whippet tank and figured that this subject would be a great way to attempt putting something together with “rubber band” tracks. The kit has 33 plastic parts with 2 flexible
plastic band tracks, an instruction sheet and a sheet of decals. Decal
options are for: I wanted to make a British version and chose the Flirt II markings. I performed some tests before commencing with the construction to see how well the tracks were going to work. First of all I was not sure how well paint would adhere to the tracks. Since I use enamels paints I tested their adhesion on a piece of the track sprue beforehand. The test was successful, allowing me to bend and twist the test strip without any paint peeling off. Based on this I decided that I could paint and weather the tracks at will. I also did a test to see how well the tracks would work with liquid glue. The instructions state that they can be glued with model cement. I cut a section of the track sprue and used some liquid glue to join it with another piece of sprue cut from the one of the plastic tress containing the body parts. The glue worked well enough in that it took quite a tug on the join to get it to separate, so it would seem that using liquid glue on the tracks will work. Construction was done in three sub-assemblies: body, left sponson and right sponson. Some corrective work was needed to make the kit a bit more accurate. The instructions would have you mount the rear gas tank (part 5) incorrectly. This was easily fixed by rotating it around so that the open end of the box shaped tank faced the underside of the vehicle and this was then filled with a strip of plastic. Watch out for part 13. The part number molded onto the back interferes with its fit to the other pieces comprising the front cabin. I thinned the box structure (part 4) surrounding the muffler portion of the exhaust. It would have been nice if there were some locating holes in the roof (part 7) for the three pipes molded to the bottom of the exhaust pipe (part 6). I shortened the end of the exhaust pipe. Most pictures I found of Mark IV tanks had a short pipe at the rear, possible so the fumes wouldn’t get inside as easily? The rails along the upper body (parts 28, 29, 30, 31, 32 & 33) are reversed and need to be switched around. This requires the replacement of the end supports on parts 28, 29, 30 & 31. The kit comes with Maxim machine guns. Apparently either Maxim or Lewis guns were used on the real tanks, but I had to discard the kit guns in favour of some Lewis guns because I found a photo on the web of Flirt II after her capture by the Germans. The replacement Lewis guns were fashioned from some plastic rod that was scraped and sanded to shape and the ends drilled out. I snipped off the Maxim gun barrels from parts 19, 20, 21 & 23 and glued the remainder into their respective mounts (parts 24, 25, 26 & 27). After painting was complete I super glued the new Lewis guns to the spots where the Maxim guns used to reside. Wanting a stronger base for the tracks and to give them more support to prevent any possible sagging over the years, I filled in the gap between the sides (parts 1 & 2, and 9 & 10) beneath the tracks with some plastic strips and square beams. When it came time to attach the tracks I used super glue. The extra plastic underneath the tracks allowed me to add glue along their centers as well as the edges. I also added some liquid glue along the join between the track edges and the body for an extra measure of strength. While stretching the tracks onto the body I had one of the tracks track partially split. The tracks are the one item that I’m not really impressed with. The tracks are a bit plain and there is no detail to the edges. Also it would have been nice if there was a bit more slack in them to replicate the gaps and the sloppy look of the real things. I also added an untrenching beam. It’s unfortunate that Emhar did not include this as it was pretty much standard equipment on the Mark IV tank. I cut one from basswood and added the metal bands on the ends from thin lead foil and the lengthwise pieces from thin plastic sheet. The chain was a section from a fine necklace purchased in a Walmart jewelry section. The kit was painted and weathered with Testors enamels. Kit decals went on nicely and snuggled down well after a few liberal applications of Microsol. After wards a coat of Aeromaster acrylic flat finished the build. All in another decent kit from Emhar and one I can recommend to build. Too bad Emhar didn’t continue with their success and add some of the French World War One tanks to their catalogue.
Review sample purchased by the author. |
| Back to Emhar Kit List Back to Kit Review List |
Back to Home Page |
Article Last Updated: 11 January 2009 |