|
Mk.A Whippet |
|||
Kit # 5004 |
Review by
- Al Magnus
|
|||
|
Mk.A Whippet |
|||
Kit # 5004 |
Review by
- Al Magnus
|
|||
 |
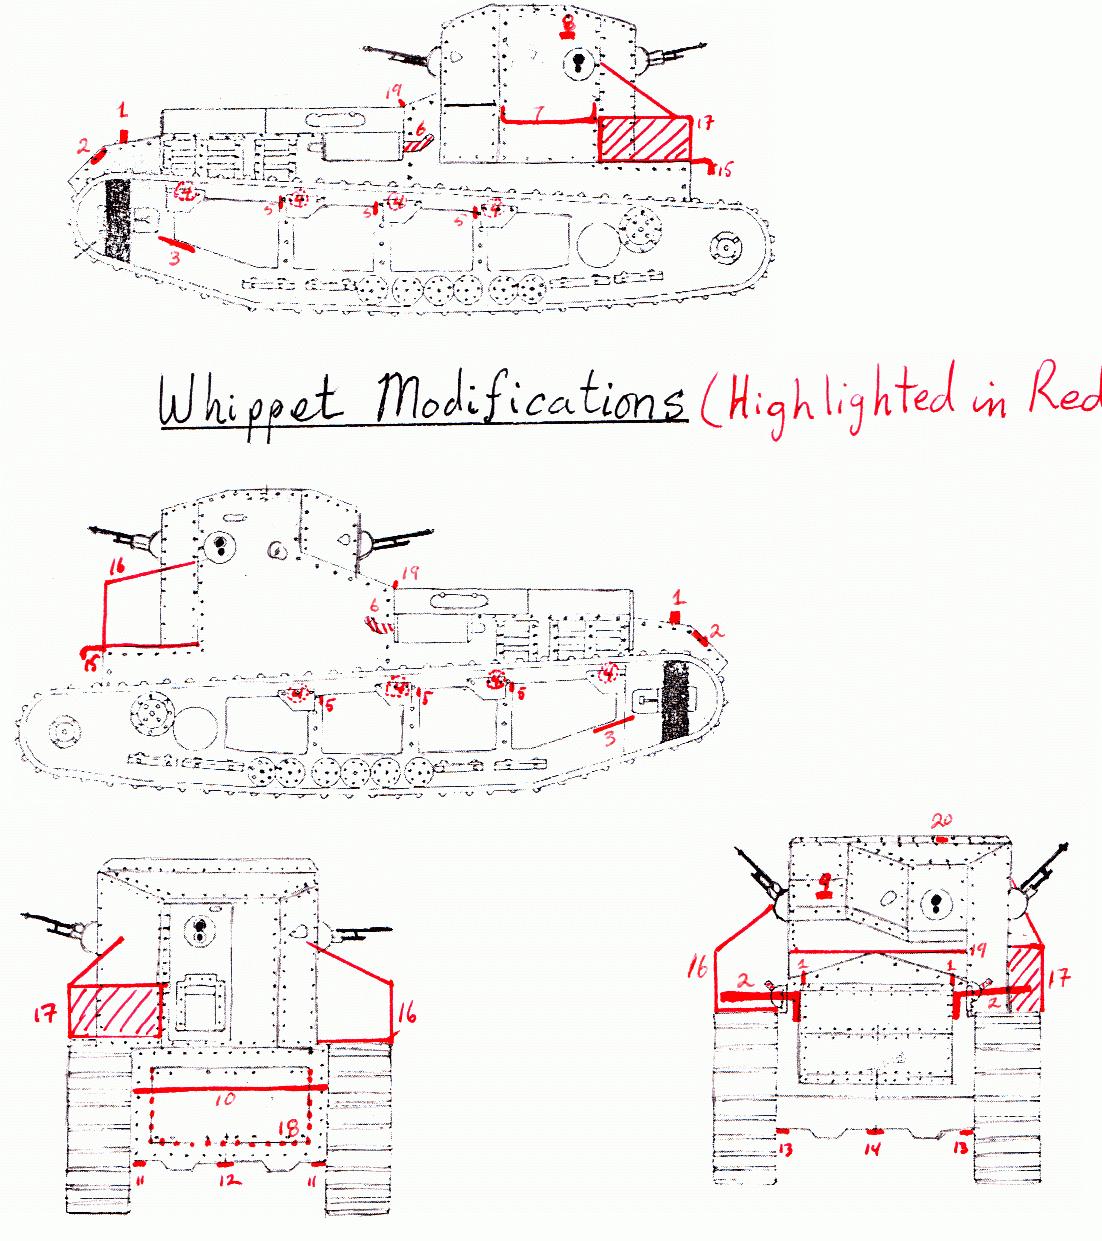
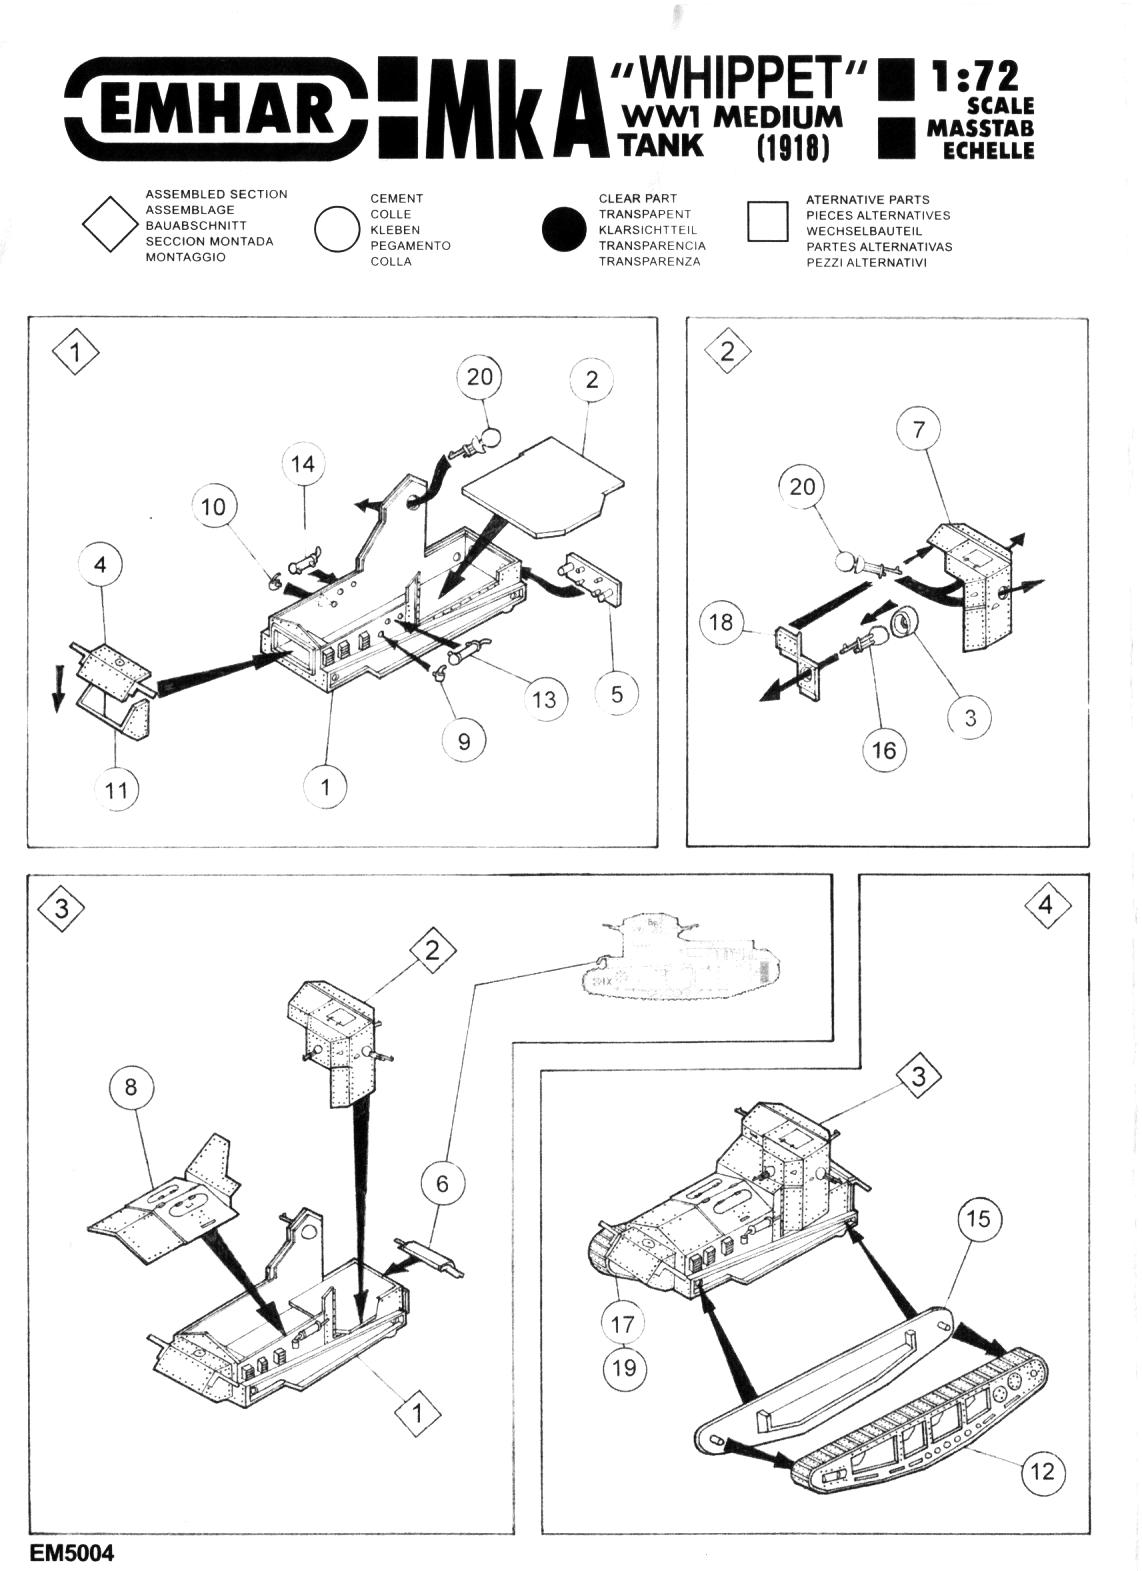
This is a simple kit from Emhar. It is consists of only 22 pieces but it is a nice kit nonetheless. The plastic is a bit on the soft side but working with it is fine and it does accept liquid glue very well. Instructions are straightforward and there are no major vices to this kit. Only sanding of the mating surfaces was needed to get parts to align correctly and minimize gaps. You could build this one straight from the box and have a nice representation of the Whippet, but with a little extra work to add some details, you can make this kit really stand out. I didn’t like how the machine guns (parts 16 & 20) mounted, so I backed the holes from the inside with some sheet plastic. Then the side and rear guns (part 20) were modified to remove the ball shaped protuberance and the front gun (part 16) had the rear half of the ball cut off. This allowed me to attach all of the guns after the painting was complete. I built the Whippet in three sub-assemblies: left track assembly, right track assembly and the body. To keep track of the improvements I wished to make I created a diagram of my desired changes to ensure that none were forgotten. Most of these details were easily fashioned from some plastic strip or rod, so I’ll not give details on the modifications unless they require a bit more explanation.
1. Added the missing vertical bracket
behind front fender hangers. The decal sheet contains markings for
no fewer than eight Whippets. All of the above are in overall green
camouflage except the captured version which has German The decal sheet is excellent. The images settled down beautifully after a good soaking in Microsol. The white decals are opaque enough that the underlying dark camouflage doesn’t show through and darken them. The white/red/white identification bands are supplied on the sheet but I chose to paint these instead. I chose the markings for Whippet number A259, which is the Whippet of Victoria Cross recipient Lt. Cecil Sewell. Below is the citation from Wikipedia on his actions with Whippet A259. “Cecil Harold Sewell VC (27 January 1895-29 August 1918) was an English recipient of the Victoria Cross, the highest and most prestigious award for gallantry in the face of the enemy that can be awarded to British and Commonwealth forces. He was educated at Dulwich College between 1907 and 1910. He was 23 years old, and a Lieutenant in the Queen's Own Royal West Kent Regiment, British Army, attached to 3rd (Light) Battalion, Tank Corps during the First World War when the following deed took place for which he was awarded the VC. On 29 August 1918 at Fremicourt, France, Lieutenant Sewell, who was in command of a section of Whippet light tanks, got out of his own tank and crossed open ground under heavy machine-gun fire to rescue the crew of another Whippet of his section which had side-slipped into a shell-hole, overturned and caught fire. The door of the tank had become jammed against the side of the shell-hole, but Lieutenant Sewell, unaided, dug away the entrance to the door and released the crew.” Not mentioned in the Wikipedia article is the fact that in his attempt to return to his own tank, Lt. Sewell was struck by enemy fire and later succumbed to his wounds. Once all the sub-assemblies were finished it was on to painting. In this regard I'm a dinosaur in these modern times - I still use enamels almost exclusively. Because of this I have to go slow during the painting and washing so that I don't damage the underlying layers too much. Painting was a multi-step process as follows: 1. After a coat of light grey Testors
enamel paint as a primer, I applied an overall coat of Testors #1787
Green Drab Following the painting all that was needed to finish the build was the gluing of the sub-assemblies together. So, if you want an easy and fun kit
to build, then locate one of these and have a go. Straight from the
box it makes into a nice little kit, but with a little extra effort
it can be made into a standout. 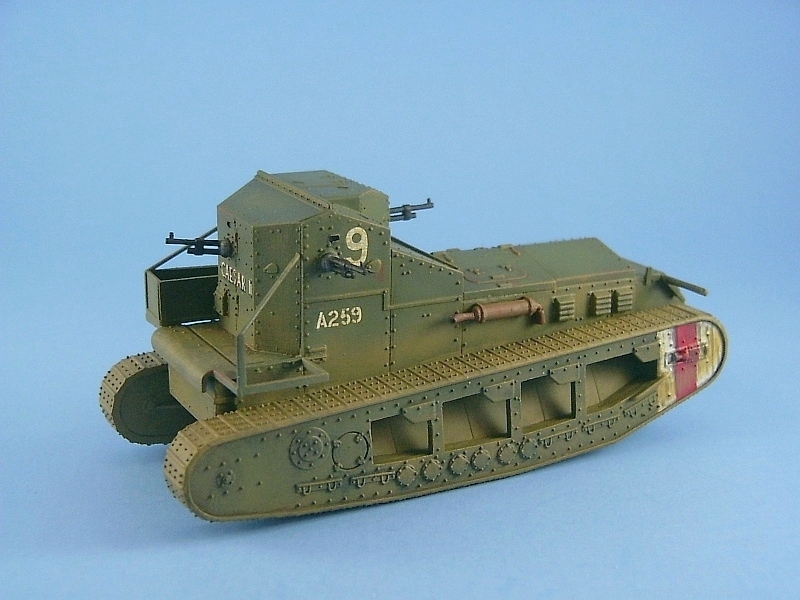 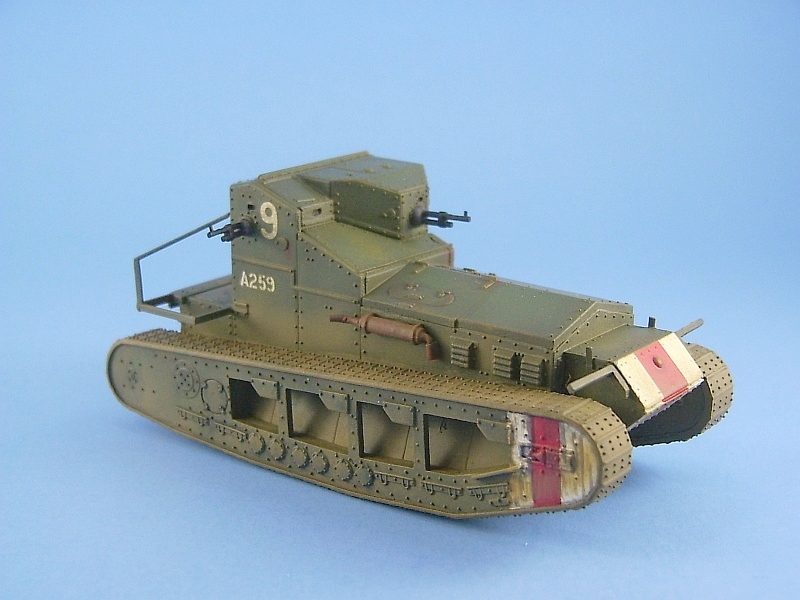 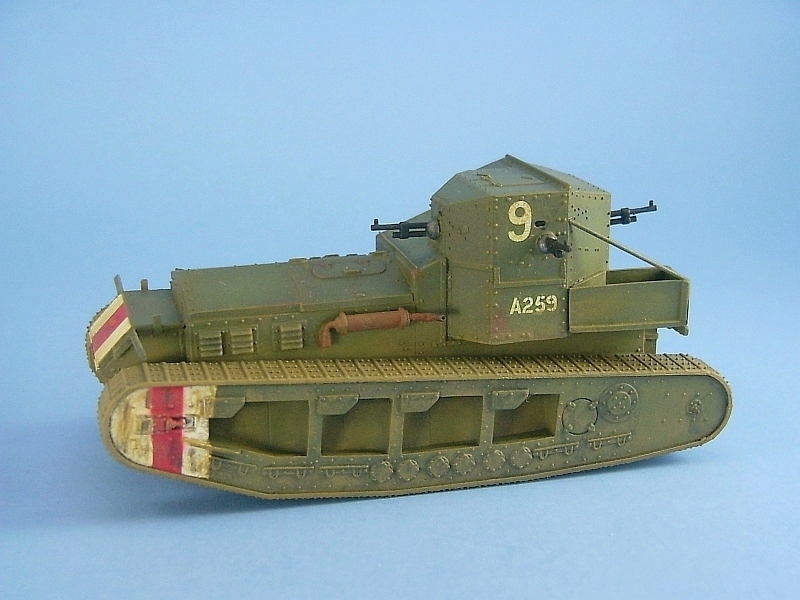 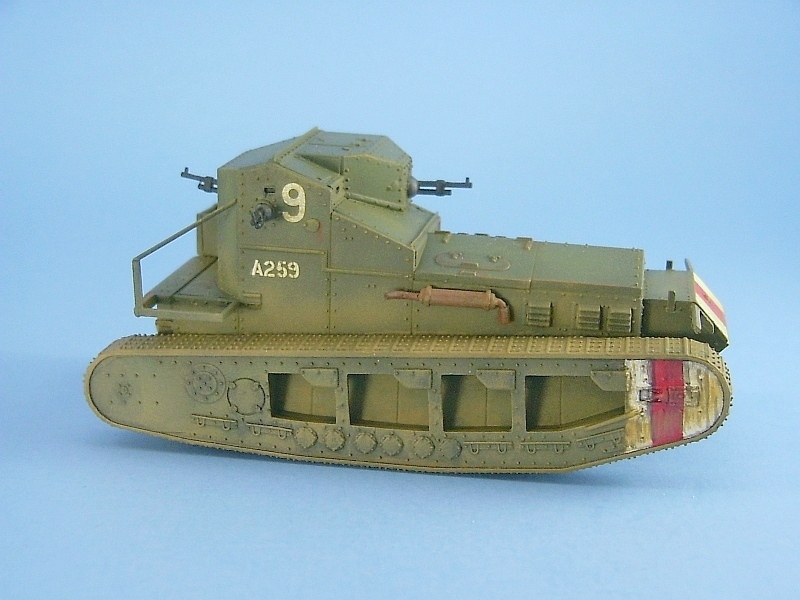
Review sample purchased by the author. |
| Back to Emhar Kit List Back to Kit Review List |
Back to Home Page |
Article Last Updated: 11 January 2009 |