|
Esci
|
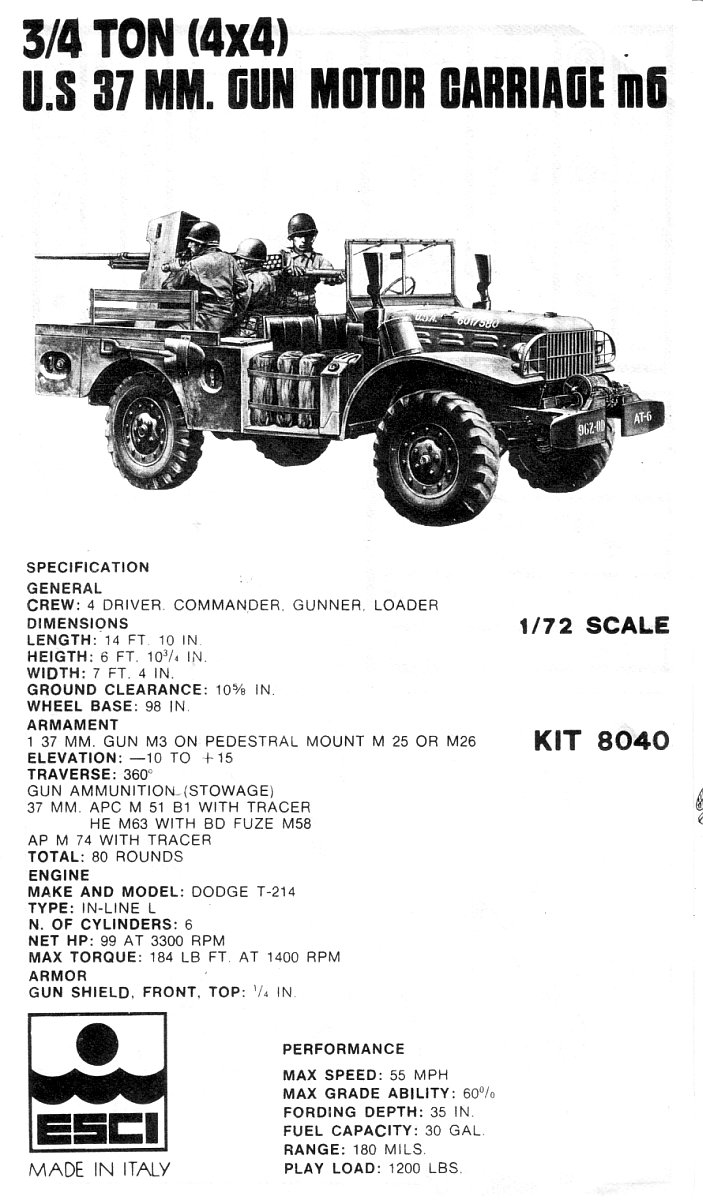
U.S. 37mm Gun Motor Carriage M6 |
|||
| Kit #: 8040 | Review by Al Magnus - one72guy(at)hotmail(dot)com | |||
|
Esci
|
U.S. 37mm Gun Motor Carriage M6 |
|||
| Kit #: 8040 | Review by Al Magnus - one72guy(at)hotmail(dot)com | |||
 |
|
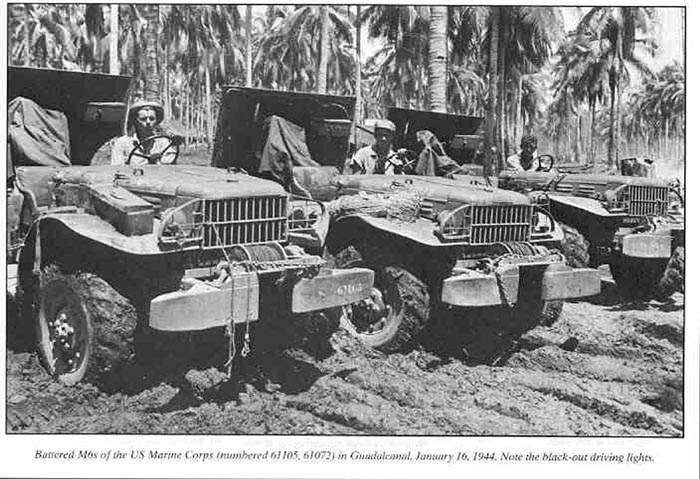
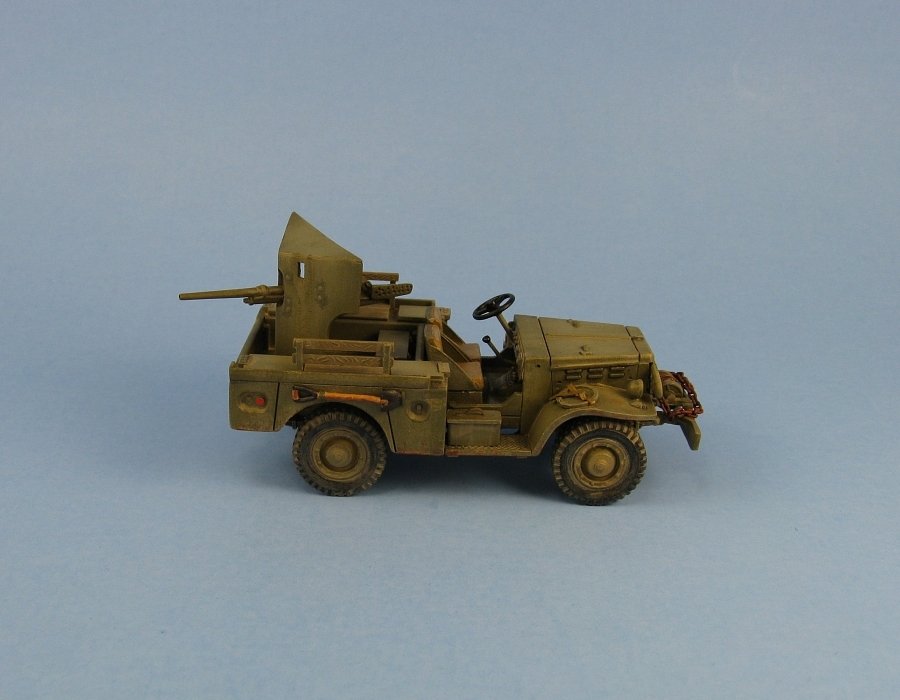
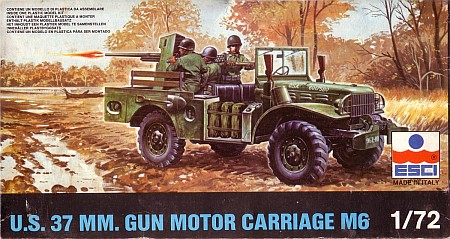
I have always liked gun trucks and the American 37mm GMC M6 is one that I particularly like. As far as I know Esci (and the recent Italeri re-release of the same Esci kit) are the only injected plastic offerings of this vehicle. My copy was one of the old Esci releases that I was a very inexpensive eBay purchase.
Watch for sink holes and ejector pin marks that will need filling:
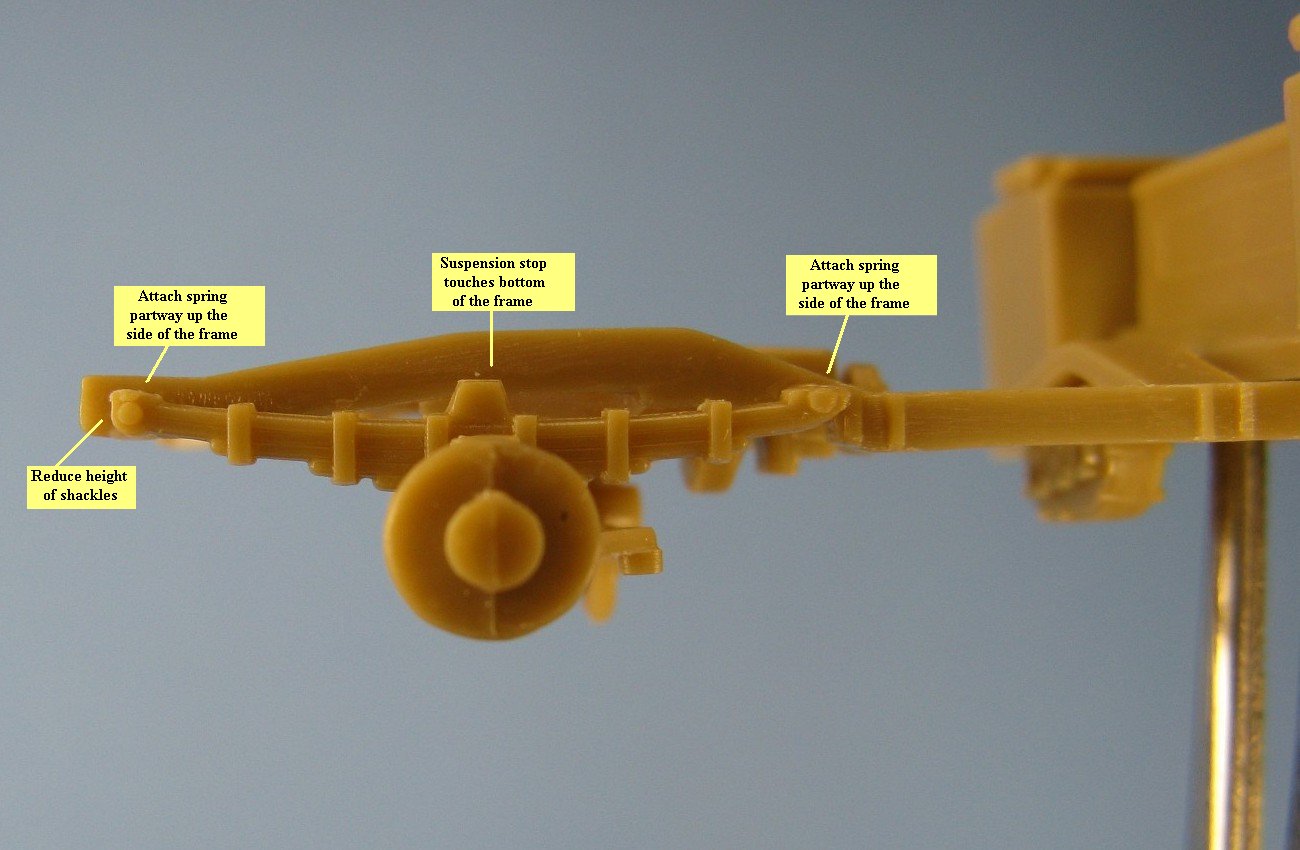
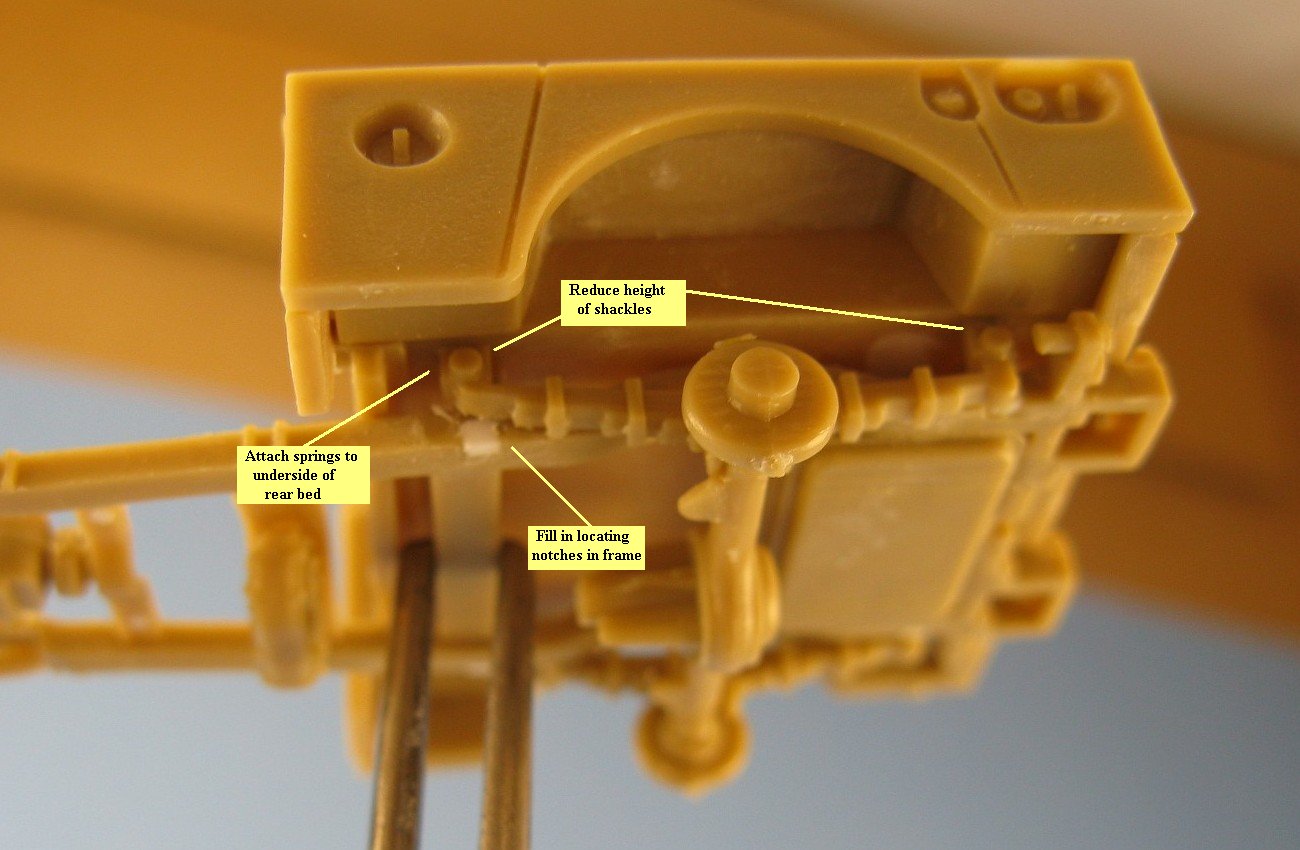
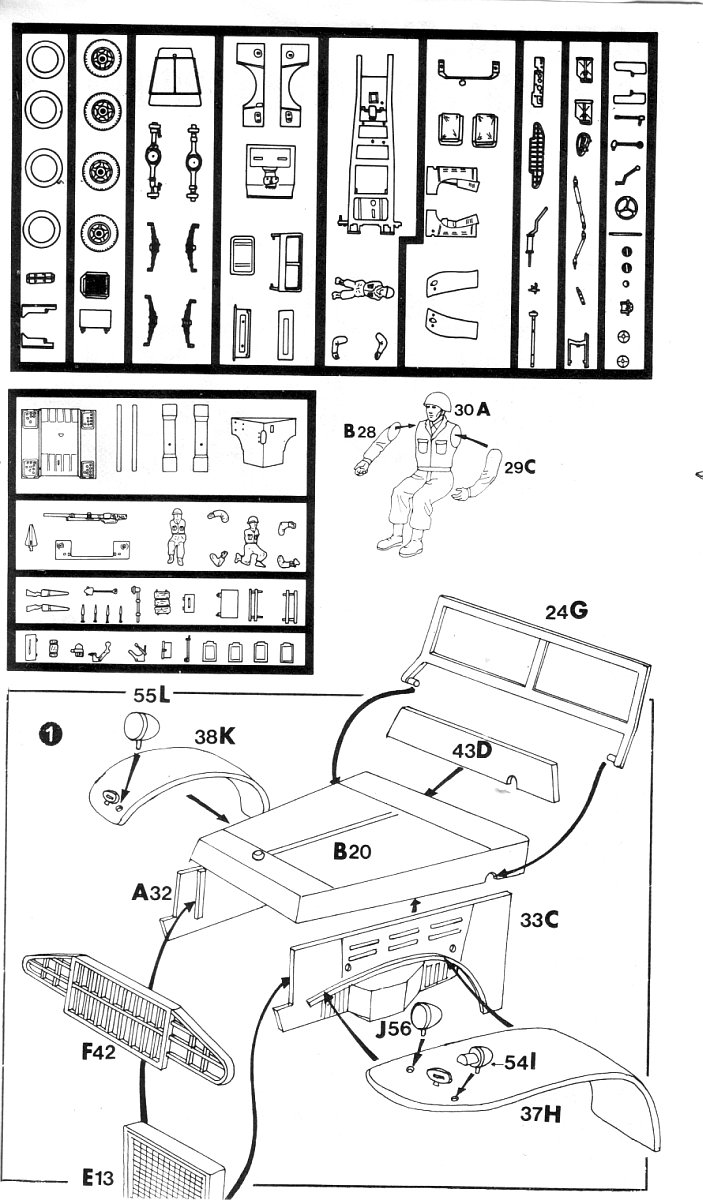
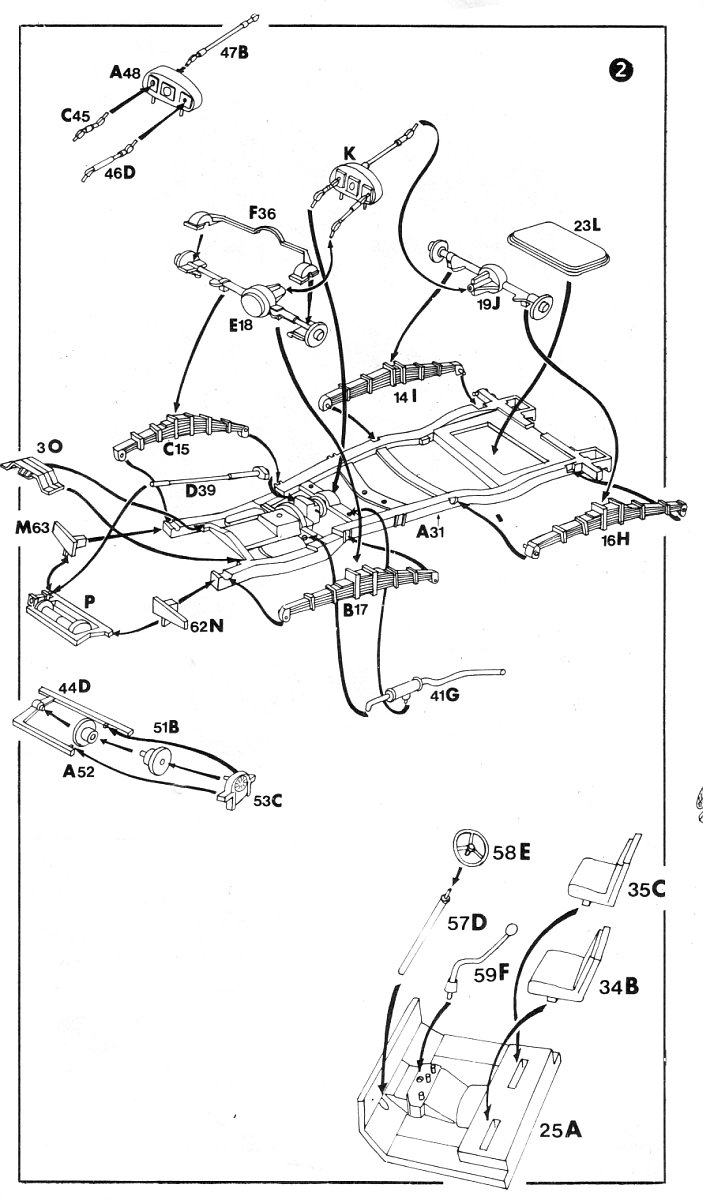
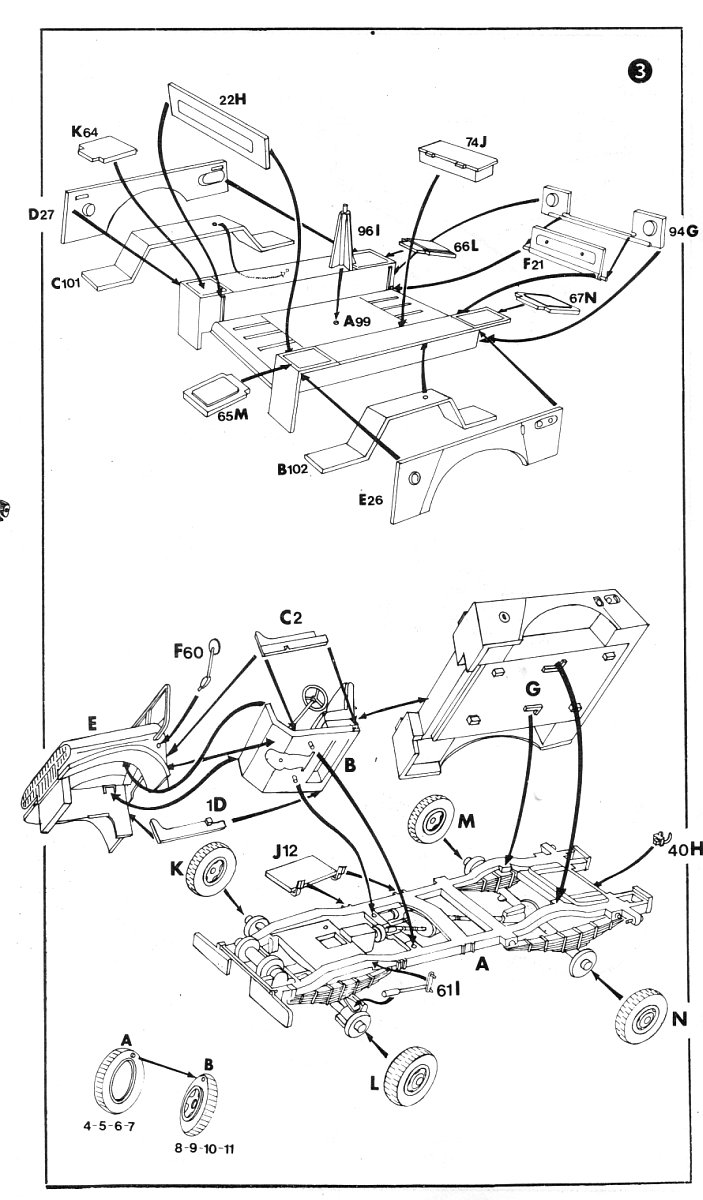
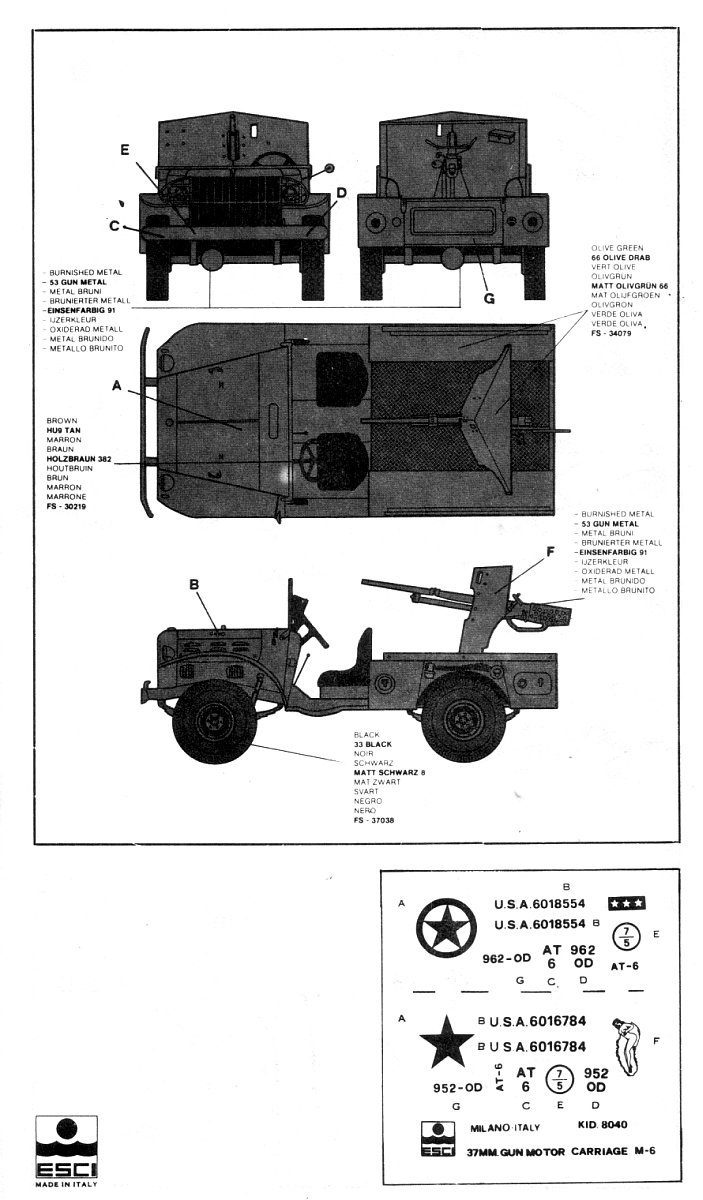
I generally followed the sequence as laid out by the instructions. Step 1 was followed pretty much as is but I did not add the fenders (parts 37 & 38) and brush guard/grille (part 42) until later in the build. The rear wheel well liners have holes where they attach to the fenders that need to be filled. The front fenders also have holes where the headlights attach that also must be filled after the lights are in place. Modifications to the kit were to address the items I considered major areas of concern with this kit. The first is the suspension, which is makes the vehicle sit too tall, the second is the gun shield, which is a bit undersized, and the general thickness of the parts, which is as expected considering this kit was first molded some 30 or so years ago.
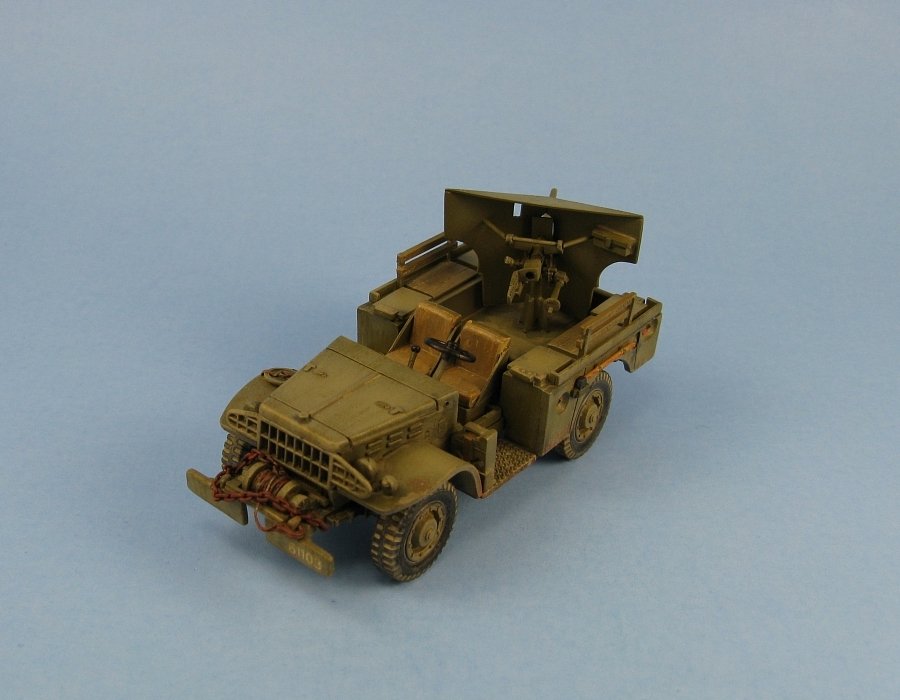
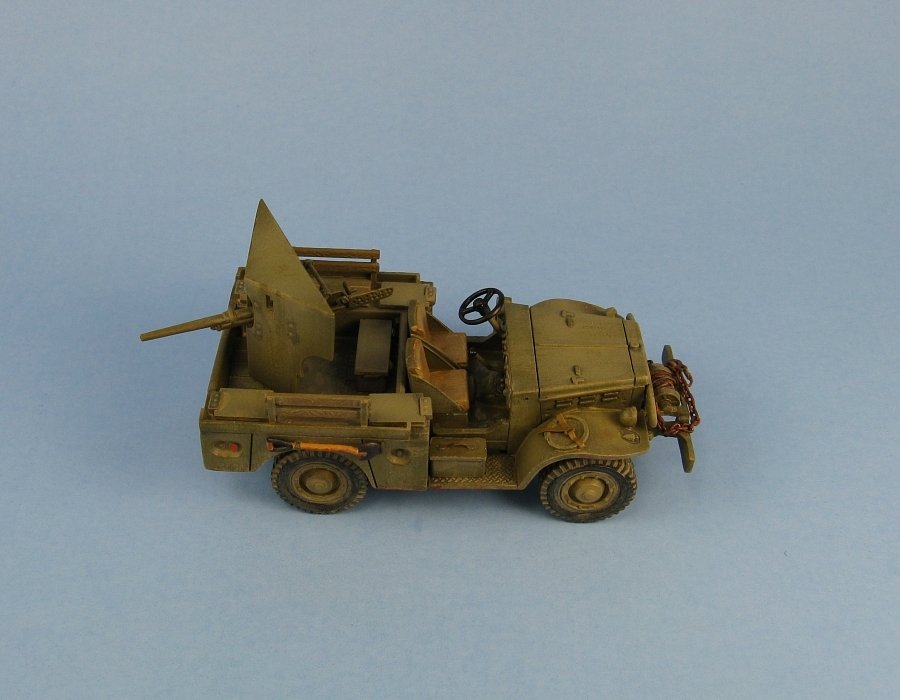
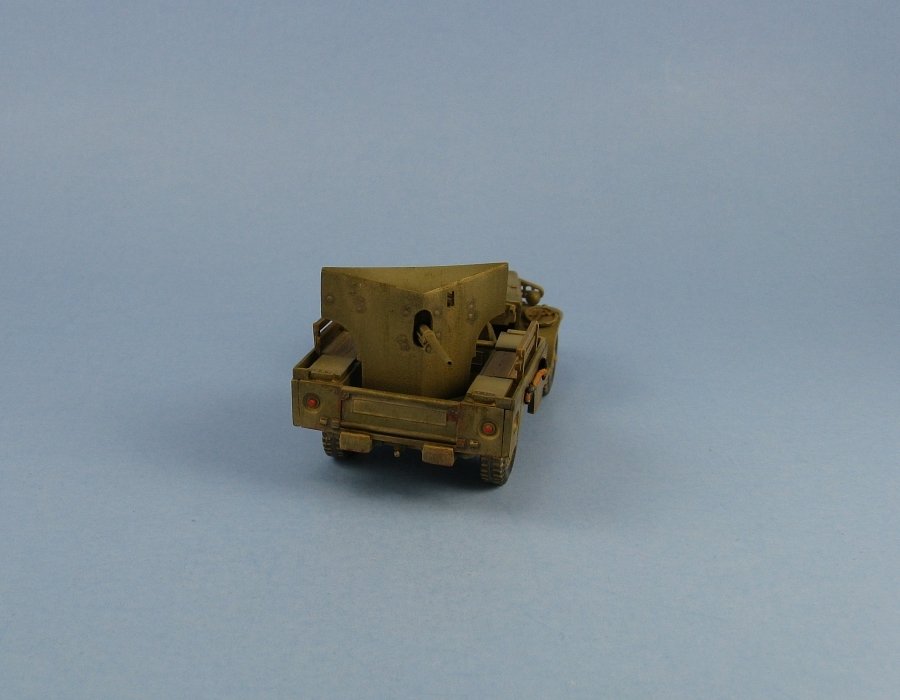
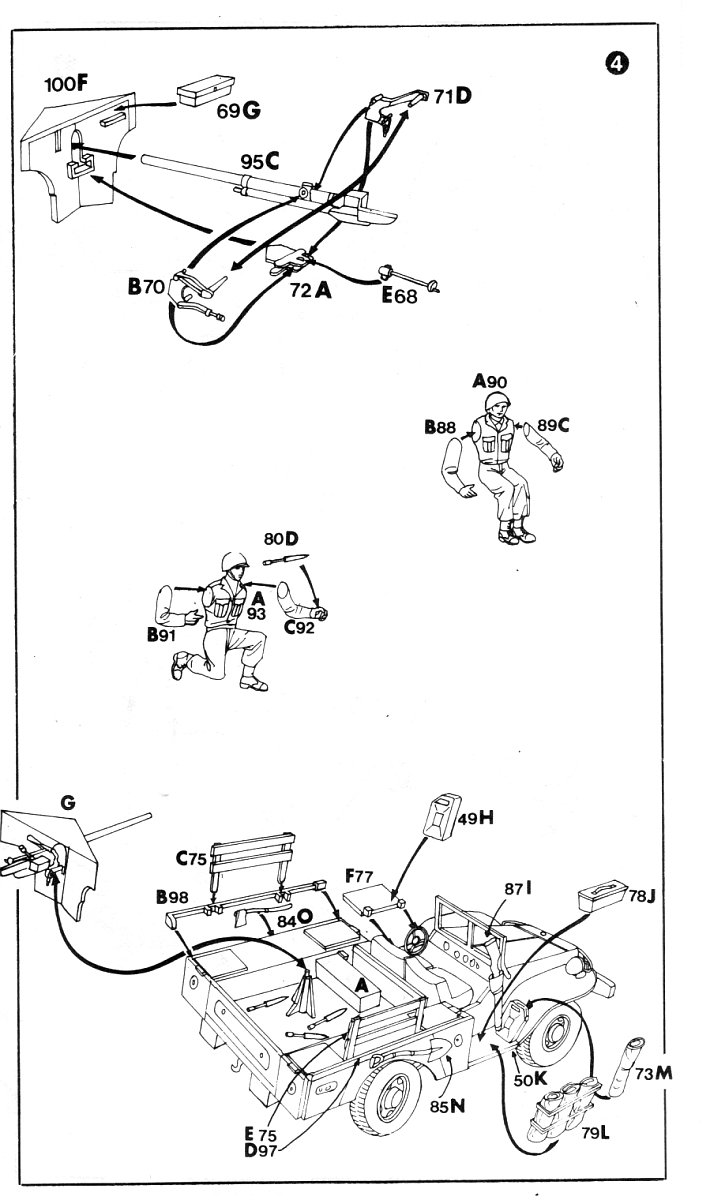
I started the shield replacement by cutting out new pieces using the kit's shield as a template. The outline of one side of the shield was traced onto plastic sheet with a mechanical pencil. This makes the replacement a bit larger than the kit part but that's not a problem because the kit's shield is a tad too small to begin with. The original shield's roof lacked the slope that was apparent in some web drawings I found so I extended the vertical line of the shield about 1 mm to give it more slope. I then scored along the traced lines with a steel ruler and snapped the shield piece from the plastic. Then the replacement piece was reversed and traced onto the plastic again. It was a bit larger than the other piece due to the tracing but some trimming and sanding got it to match the other piece. Both pieces were put back to back and the cutout for the gun was made with a hobby knife and rounded out with a round file. The two pieces were glued together with some methylene chloride and then put over the old shield to get it to the correct angle and left to dry. Once set a rectangular piece of plastic was cut and glued to the top of the shield. When that was dry the piece was trimmed flush to the shield and sanded. Bolts were marked and added with superglue. Next the barrel mount from the old shield was cut out and sanded down. It was then glued to the back of the new shield to hold the gun. A drill bit was used to add a shallow hole to the gun's breech. Afterwards braces from the gun to the back of the shield were fashioned from some plastic rod and the small box (part 69) was added to the rear of the shield. Sounds like a lot of work but in reality it wasn't that difficult. Next I partly built the front passenger compartment by adding the side panels (parts 1 & 2) to the tub (part 25). I had to trim the ends of the compartment sides (parts 1 & 2) slightly as they are a bit too long and will not allow the front compartment to attach to the rear bed without some interference. As for the kit's front seats I removed the molded on frame and added sides to the seats to make them more like the bucket style as found on the real vehicle. I then tackled the rear bed. There are supposed to be some bench seats on top of the fenders. These were added with some plastic sheet that was scribed to represent individual boards and then some wood grain texture was applied by scraping the edge of my hobby saw along the top of the plastic. I also replaced the overly thick railing (parts 97 & 98) with new pieces from plastic strip. I moved the gun pedestal about 1mm to the rear to place the gun further aft as per my drawings and trimmed the braces to more closely match my references. A cable was added to the winch drum. For this I stripped out the inside wires from a set of ear buds. This provided a nice thin piece of copper wire nicely wound around a threadlike interior core. A chain was draped over the front bumpers. For this I used a fine silver necklace obtained from a Walmart jewelry section. The molded on strap on the top of the storage box (part 78) was replaced with a piece cut from lead foil. On many of my reference photos, as well as the box top painting, there appears to be some kind of a bracket for what looks like a pail on the right front fender. I scratch built a bracket, minus the pail, and added some straps cut from lead foil. The kit's tarps (parts 73 & 79) are rather featureless and flat looking as are the two rifles and their sheaths (part 87). These were left off the kit plus one of the two supplied jerry cans. The two figures were assigned to the spare parts box. I had originally wanted to display the windshield (part 24) in the folded forward position but it would not sit fully down onto the hood so in the end I also left it off since the picture that inspired this build showed vehicles with them removed. Thus the windshield was discarded and the holes in the hood were filled and sanded and new smaller holes were drilled to represent the attachment points. The grille and the light guards are a bit on the clunky side but unless you're willing to scratch build them (and I wasn't) the only effective option is to do as I did and thin them with some scraping with a hobby knife. The kit was painted with olive drab enamels. Markings, which consisted of just a single vehicle number on the left front bumper, were made from a set of rub on transfers (a model railroader set by Woodland Scenics if I remember correctly) applied to some Superscale clear decal paper. The kit was weathered and sprayed a flat coat to finish it up. Well, it was a lot of work but the changes make it look much better than what comes out of the box. This is an old kit and it shows it's age with the poor fit and thickly molded parts, and as far as I know it is the only game in town if you want to have an M6 in your collection.
Review sample purchased by the author. |
| Back to Esci Kit List | Back to Construction Reviews |
Article Last Updated: 27 November 2009 |
Back to Home Page |