| Introduction
This article covers the assembly of the injection-molded styrene
plastic Dragon Models Limited (Dragon or DML) 1/72-scale M4A2(75)
model kit #7305. For an in-the-box review and view of the parts
please go to Modeling
the Sherman Tank in 1/72nd Scale.
This 1/72 scale kit represents a mid-WW2 diesel engined Sherman.
Based on the square, welded driver’s hoods protruding from
the 57 degree angled glacis plate this is a Sherman produced by
Fisher Company. Fisher was the only Sherman manufacturer to produce
and use this type of hood and it is commonly referred to as the
“fabricated” hood. Other producers used cast-steel driver’s
hoods until introduction of the 47-degree glacis. I have never seen
applique armor plates fitted to the fabricated hoods as was common
to the cast hoods.
This
M4A2 variant (i.e. the one with the square hoods) was used by US
Marines on Tarawa Island, by the Poles in Italy, by UK forces, and
by the Soviets.
Many
of the assessments of this particular plastic model kit should also
reflect other 1/72-scale Sherman kits offered by Dragon; many of
Dragon’s
M4 kits share common parts.
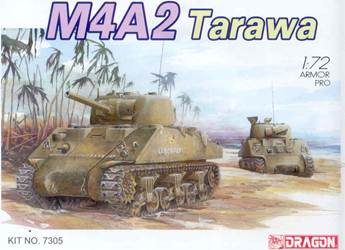
I like to start off with describing the box art so we can later
compare if what is advertised is within the box. Here above we have
the Company C tank M4A2 tank named COLORADO of the 1st Marine Amphibious
Corps Tank Battalion, followed by a second Sherman coming up from
the beach on a pleasant day in the South Pacific, though the palm
trees appear well abused.
For
features: the M4A2 has the wide M34A1 gun mantlet, the fabricated
(welded) driver’s hoods on a 57 degree glacis. We can see
a tow cable attached to a front shackle and running back toward
the engine deck. The vehicle horn is mounted down by the port (left)
side fender rather than higher on the glacis with a brush guard.
The differential cover is the one-piece rounded intermediate style.
The tracks appear to be the all-steel T-54E1 type. There is no gun
travel lock on the upper glacis plate.
Notice
that there are no sand skirts which were favored by the British.
Though it looks like the tank could be painted in a two tone soft-edge
camouflage pattern, this appears to me to be dust and shading, it
should be all olive drab color. On the side we see the vehicle name
Colorado in white and a two-color charging elephant drawing common
to this tank unit. What we don’t see are big white stars typical
of US Army AFVs of the European Theatre.
The
kit
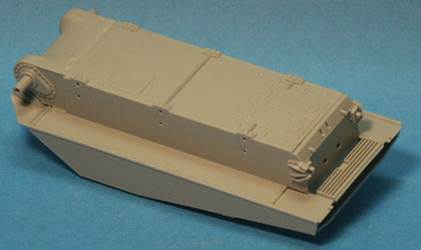
The
underside of the DML M4A2 hull appears accurate. Here we see the
starboard side floor escape hatch, the air ventilation grill under
the stern overhanging cowl, and the well-done idler wheel mount.
The rear transition piece between the rear plate and the floor is
flat plate rather than the curved plate also used by Sherman manufacturers.
Dragon’s way of attaching the Sherman sprocket wheel is superior
to all other methods used by other kit makers, they have a long
rod on the sprocket that slides into the tube protruding from the
hull side so the attachment is strong and straight.
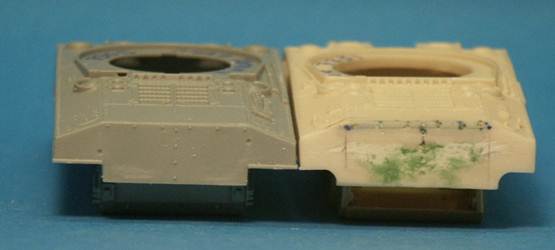
Comparing the gray plastic DML hull rear to the MR
kit we see that the DML sponson side is a tad lower than that
on the MR
hull; I believe that DML is correct. On the rear plate are mounting
holes for separately molded tools.
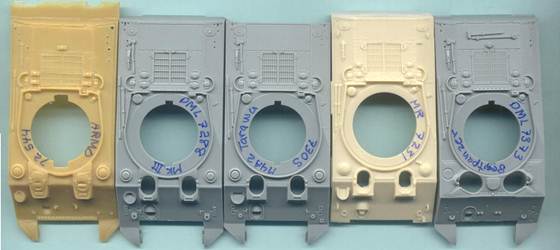
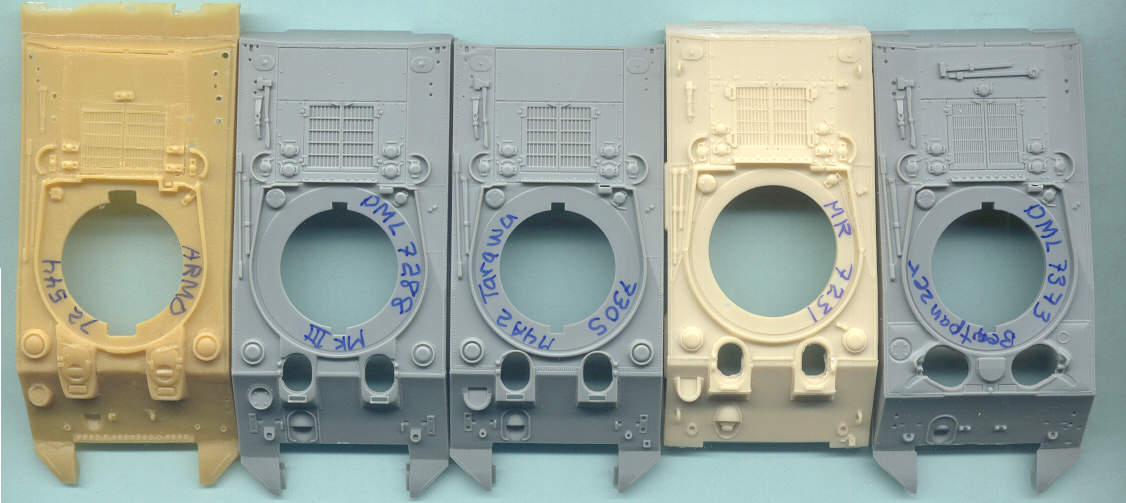
Here is a comparison photo of five upper hulls of 1/72 scale M4A2
kits: one from ARMO, three from
DML and one from MR Models.
The Dragon Models subject of this kit (#7205) review is in the center,
the angular welded “fabricated” driver’s hoods
are evident compared to the rounded cast hoods of the two kits to
its left.
In
addition to different driver’s hoods there are slight variations
in the engine deck grill and other features that reflect different
manufacturers, early and late production changes and interpretation
by the model companies of what their M4A2 model should look like.
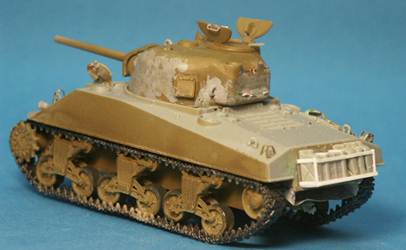
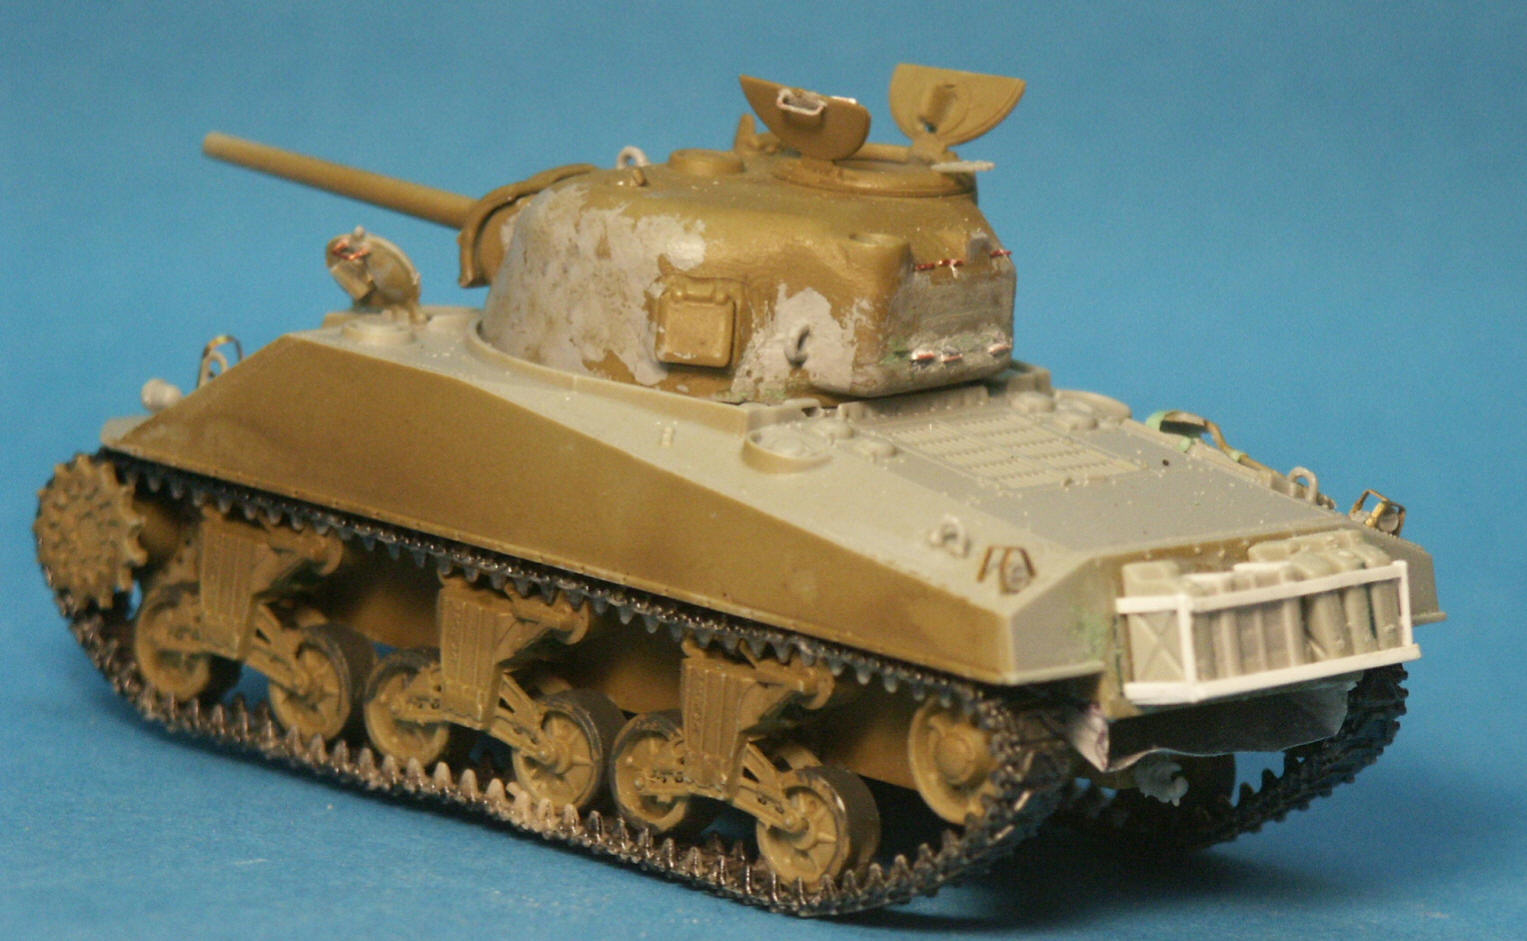
At this point we’ve jumped ahead in assembly and are ready
for painting. This left rear view shows the welded-on rear fuel
can rack seen on Marine Shermans on Tarawa Island filled with American
fuel cans taken from an Academy model kit.
Copper-wire
grab handles have been attached to the three open hatches. Etched
brass brush guards are installed over head and tail lights.
Fit
of the Dragon DS band tracks around the wheels was perfect; not
too short or too long.
DML Sherman kits are about the only kit I have where the kit’s
plastic lifting ring parts are done as well or better than I could
reproduce from copper wire.

At this stage several small braces missing from the front fenders
have been added. I found it odd that the two towing attachments
were not included on the DML kit’s differential housing, the
nose. So I had to replicate them in white styrene.
The
DML band tracks went on well, not too tight or too loose. The tracks
do not sit flat to give the impression of rolling over uneven ground
when I mount the model on a base. I painted the lower suspension
and roadwheels prior to affixing the tracks.
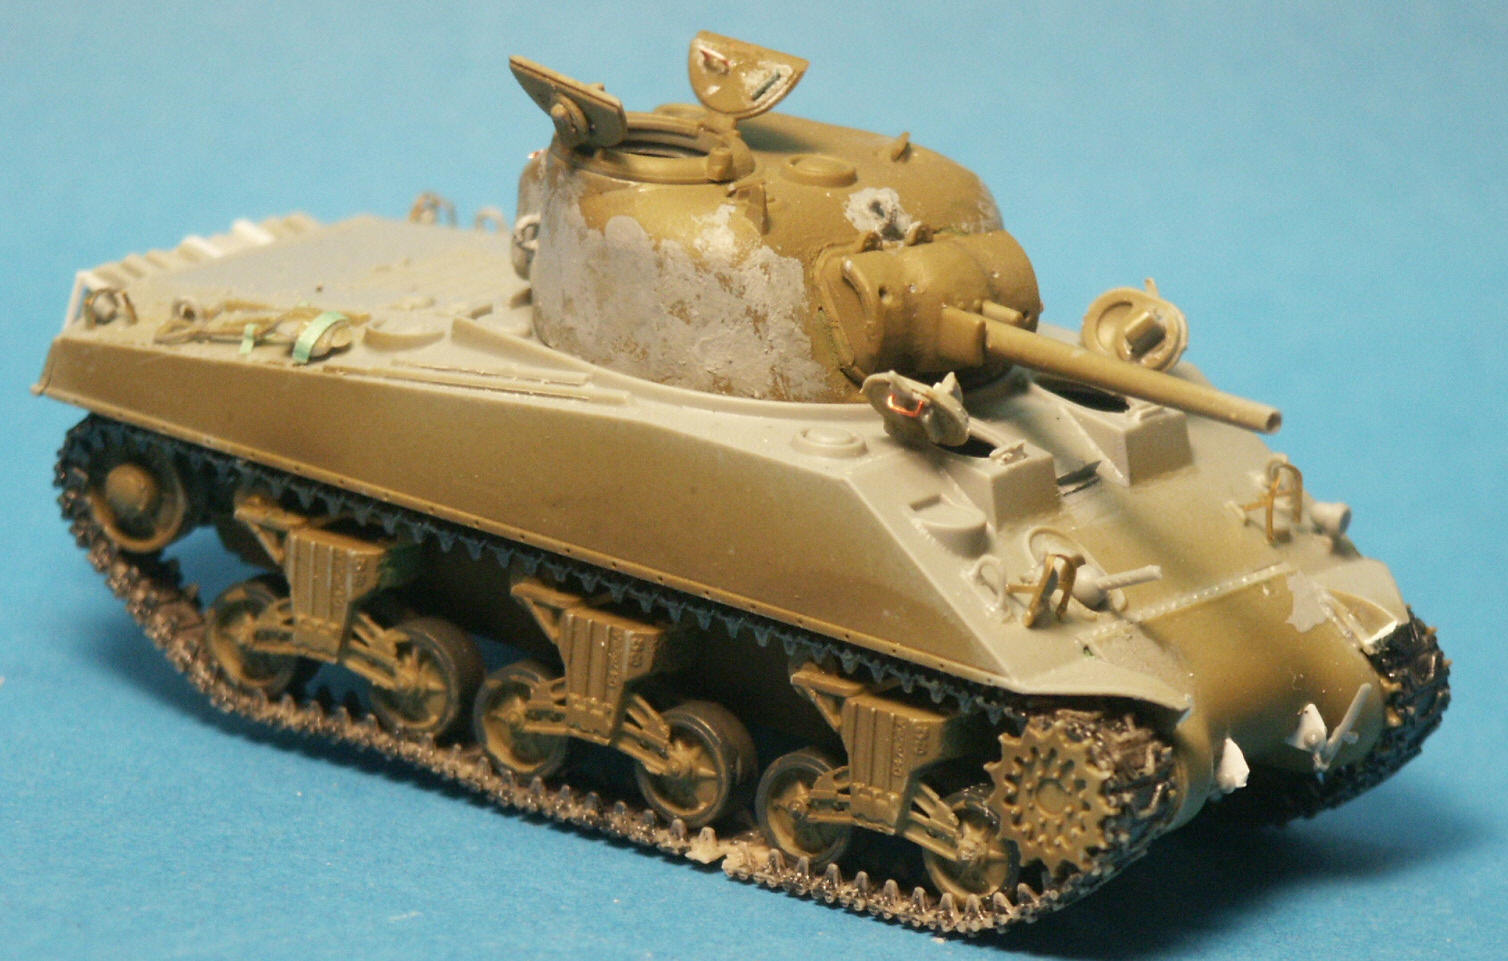
The
etched brass headlight guards from the brass fret included with
the model are attached but I left off the headlights, sometimes
done in combat. Based on my reference photos and common to early
M4 variants I did not add the brass periscope guards.
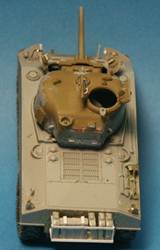
Overhead view of the DML M4A2 for comparison. The track-tensioning
wrench and hammer have been deleted from the rear plate for the
fuel can rack but I do not know where the Marine crews moved them
to.
No
50-calibre AA machine gun is mounted on the cupola ring as seen
in my reference photos.
The fuel can’s handles are not accurately detailed so I plan
to cover the cans with a wrinkled tarp.

After the initial base coat of acrylic olive drab paint a point
wash was applied in crevasses and around high spots on the model.
The wash I prefer is made from black or brown artist oil paint diluted
in turpentine. This oil-based wash would only be applied over a
water based acrylic paint; it will dissolve and lift an oil-based
paint. Many modelers prefer a cleaner solvent but I personally like
the smell of turpentine.
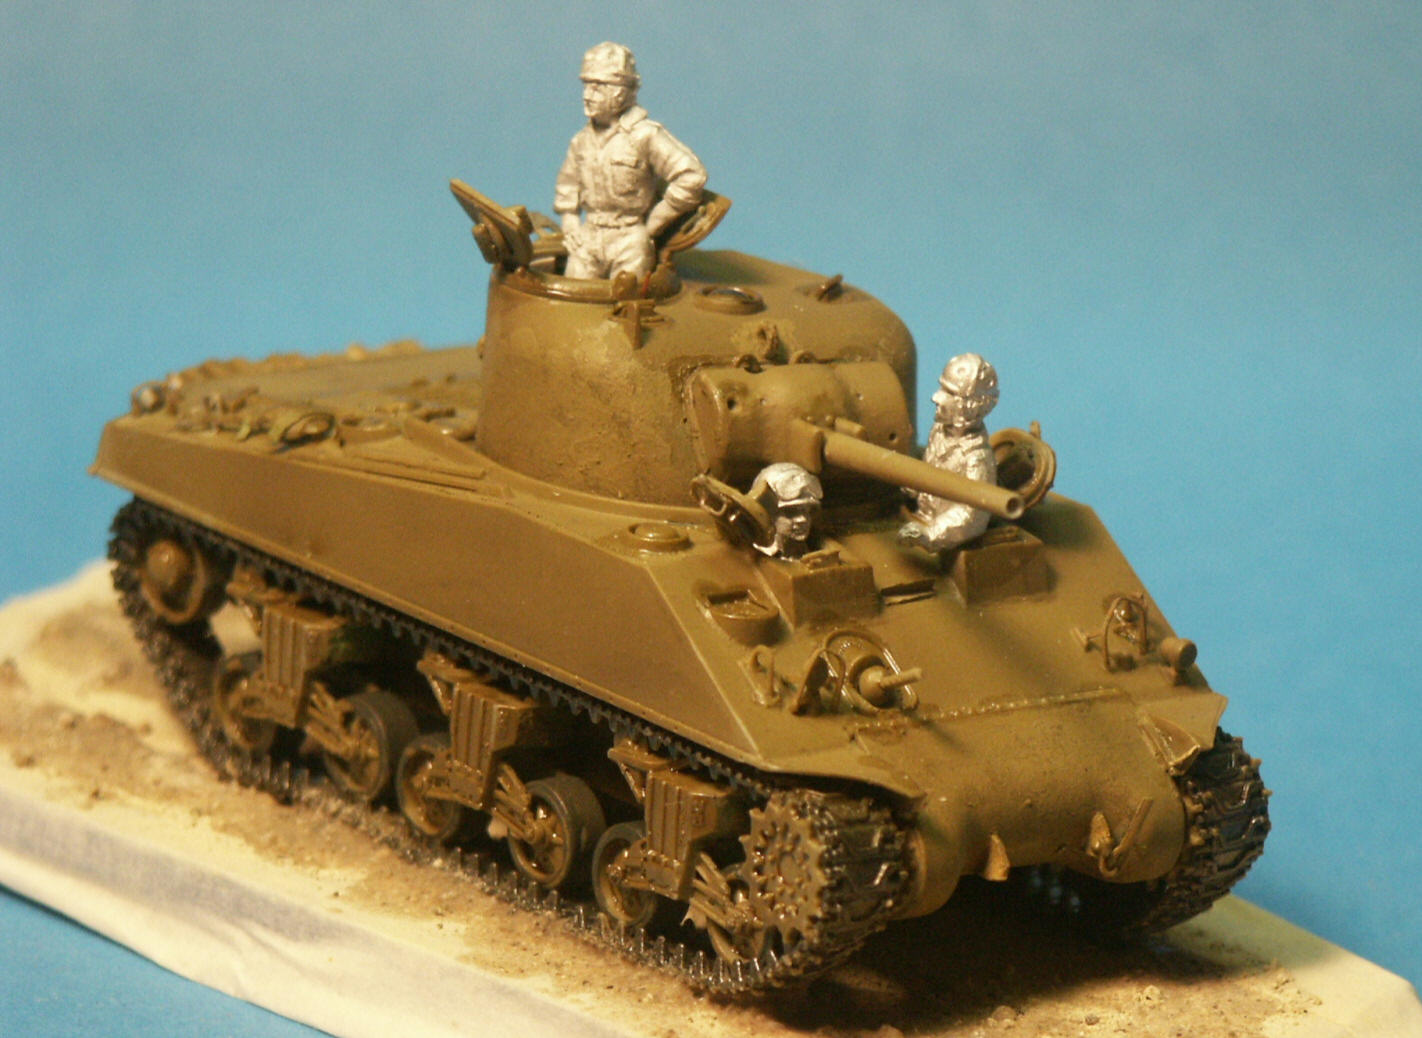
White
metal US Army WW2 tanker figures, produced by AB Figures, are test
fitted in the open hatches. These figures tend to be squat with
short dwarf-like legs but they are fine for mounting in AFV hatches.
The
base is a piece of Plexiglas sign material broken into an irregular
shape and covered with fine sand and painted with Model Master Randone
Tan color acrylic paint to represent sandy soil on Tarawa Island.
The final coat of olive drab has been applied blending in the oil
wash, then a water based point wash applied. The undersides of the
hatches have been painted OD as well, which is typical for AFVs.
Though hard to see, a clear acrylic gloss coat has been applied
over the flat paint in preparation for the US Marine markings from
the Dragon kit decal sheet.

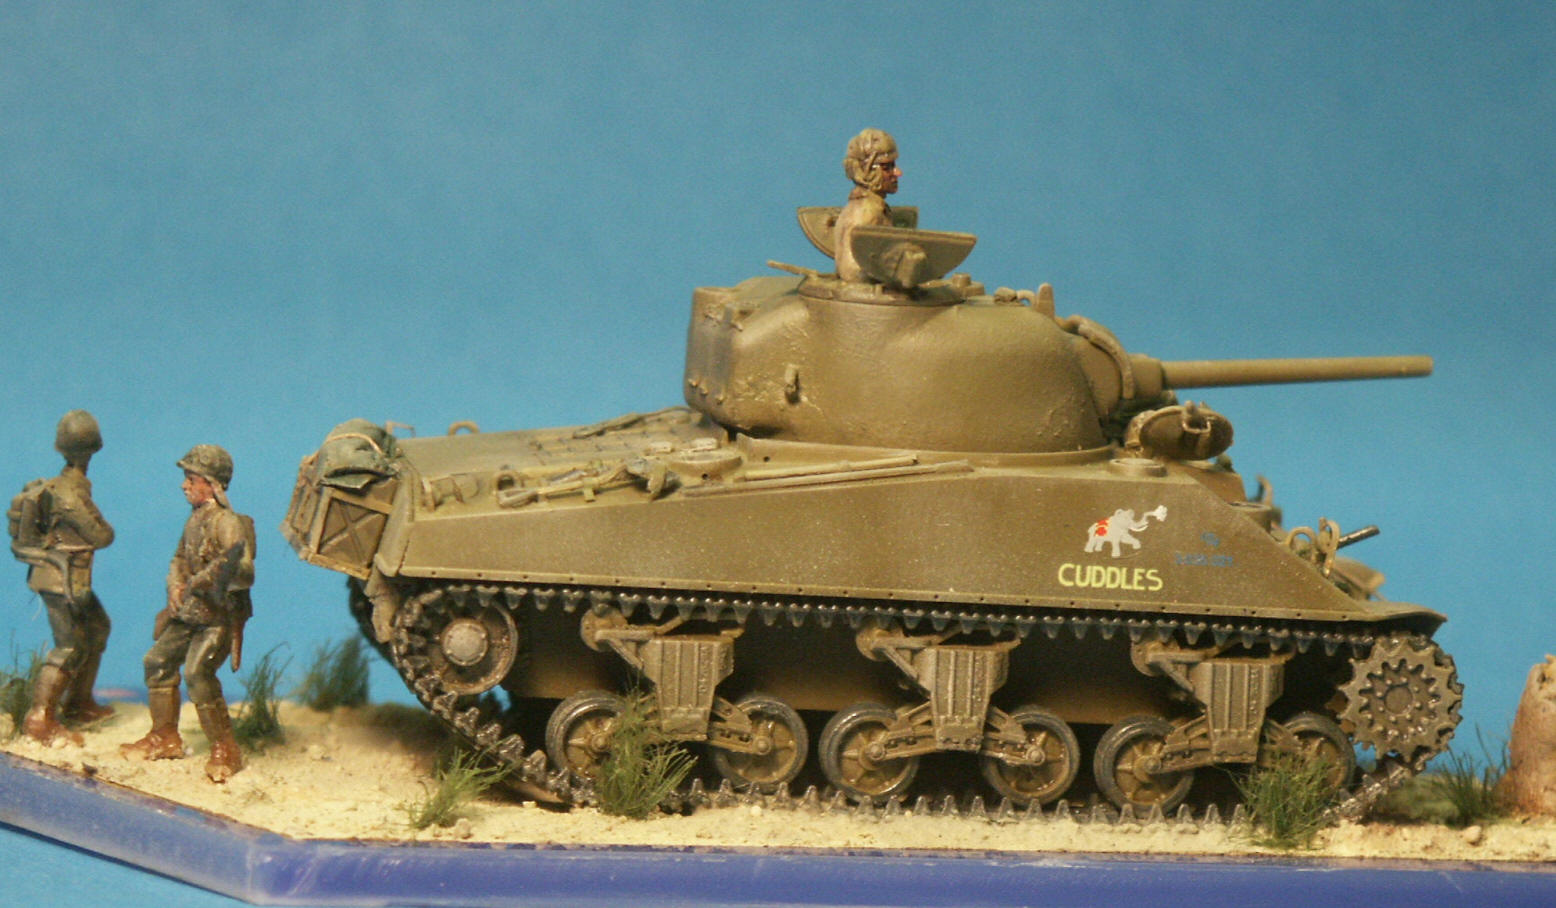
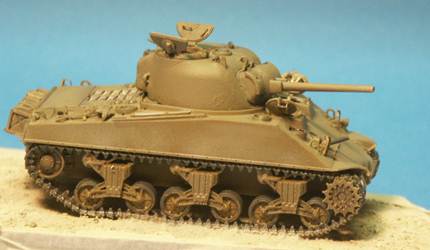
This Marine M4A2 vignette represents Company C, 1st Marine Amphibious
Corps Tank Battalion serving in the Battle for Tarawa Island, November,
1943. Tarawa is a small island in the central Pacific and a former
British colony in the Gilbert Island chain. Being a coral island
it has light sands, as opposed to black volcanic sand like Iwo Jima.
The model is finished and mounted on some groundwork on the broken
sheet of blue Plexiglas and a couple of Marine infantry figures.
The rear fuel can rack is visible.
The DML water slide decal markings applied well and the clear decal film disappeared
under a spray of clear flatcoat.
I very
much like the detail that DML put into their 1/72 Sherman kits,
such as the strip along the bottom of the hull to mount side skirts.
The Dragon band tracks I feel look very good; certainly better than
the MR resin Sherman tracks I used recently.
The
vehicle has been highlighted using Tamiya Weathering Master which
looks just like woman’s cake makeup and is applied with a
foam brush.

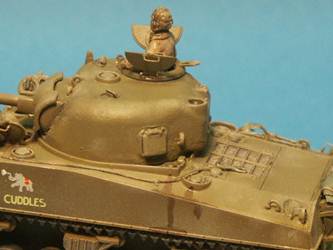
This photo shows off the well-done fabricated hoods and open driver
hatches, the M34A1 gun mantlet (rotor shield), as well as the nice
detail of the figures.
The
tow cable is replicated by a teabag string which has been soaked
in white glue and attached to plastic cable loops included in the
Dragon Sherman kits.
I like
pieces of darkened camera film cut into small pieces to represent
the periscope lenses.
Conclusions
Overall I found this a great small scale model and pleasure to build.
Dragon’s M4 Sherman series of small scale models is one of
their finest in detail. Dragon’s
range of Shermans is near complete; I hope they would release
an M4 composite (hybrid) hull version and early direct-vision hull
versions as well.
Some
modelers prefer link & length tracks, though I am pleased with
the Dragon band tracks. For me it’s not as much what the tracks
are made of but how well they are rendered.
References
-
Tank Battles of the Pacific War, by Steven Zaloga, Concord Publications
Co., (1995). ISBN 962-361-607-4. This softcover book covers combat
and vehicles used by US and Japanese forces.
- M4A2
Sherman, Part 1, by Wojciech J. Gawrych, Armor Photogallery #11.
An excellent soft cover reference book.
- Comrade
Emcha, Red Army Shermans of WW2, by Claude Gillono with Leife
Hulbert, The Oliver Publishing Group (2011). ISBN 978-0-9806593-7-5
- Modeling
the Sherman Tank in 1/72 Scale website. Doug Chaltry’s
excellent website on the Sherman tank.
- Sherman
Minutia website. This is the best on-line reference for the
details of the Sherman tank variants; not as much of vehicle history
though.
- Modeling
the US Army M4(75mm) Sherman Medium Tank, by Steven J Zaloga,
Osprey Publishing Ltd. (2006). A great softcover on 1/35-scale
Shermans from a master modeler and author, helpful for small scale
Shermans even if it does cover the less challenging 1/35 modeling
scale.
|