T-34/85
Primary Manufacturers: ESCI and Al.By, plus others
By Dave Showell
Arguably the best all-round tank of the Second World War, the Soviet T-34 is a real icon of the 20th century. If you want to have a truly representative collection of WW2 armour, you have to have at least one (if not more) in your collection. Small scale builders have been relatively well served in this area, with several kits in 1/76 (Airfix, Fujimi, Matchbox) and 1/72nd (ESCI, AER, Eastern Express).
I particularly like the old ESCI kit. While the Eastern Express offering may match (or even beat) the hard-to-find ESCI one in detail and quality, I have built enough (at least 10) of the earlier ESCI kit to know all of its tricks and foibles. Also the Eastern Express kits are fiendishly expensive up here in Canada. Last year, while ordering some kits from Philip at Tracks & Troops, I added the Al-by T-34/85 turrets essentially to "round out" the order. The following kit bash was the result. At the time I was not yet aware that Revell was about to announce the coming release of a T-34/85 - it figures!
The Al-by Turret
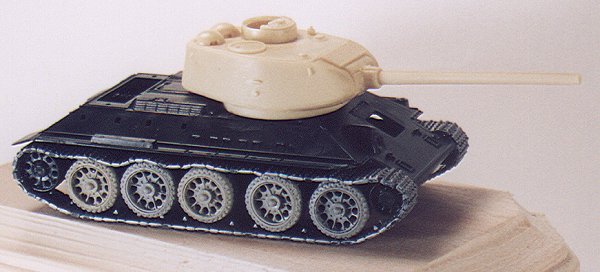
Al-by's replacement turret, moulded in yellow resin, is one of his earlier offerings I think. It's a simple little kit which includes a hollow, one piece turret, a gun barrel (business end hollowed out), and the half hatch. The moulding is of high quality, although maybe not as stellar as some of Al-by's more recent kits. As far as I can tell, the turret represents a mid-production version, with a casting line stretching from below the mantlet to the rear. There were some air bubbles in the rear of the turret, but these were easily filled. Interestingly, there were positioning holes for grab handles on the sides and the rear of the turret.
The ESCI T-34 kit
Although it suffers from a couple of small faults, the ESCI T-34 is a really nice kit - especially given its age. ESCI produced two versions, a 1942 and a 1943 - later releases had hard tracks in place of the soft plastic ones. PART's recent release of etched brass T-34 tracks make the hard tracks less valuable, but at the time I began this project they were not yet available, so I used the ESCI link and length ones.
Straight off the bat, there are a number of things that have to be fixed on the ESCI kit. Going from back to front, the first thing that has to be done is fill the slots in the rear fenders where the box gas canisters fit in. This can be done with putty, although you might notice I just put a couple of thin pieces of stock plastic strip over the holes. Next, on the ESCI kit, where the lower hull joins with the upper, there are three "hinges" (they aren't hinges as far as I can tell but that's what they look like). There should be only two, the left one and the right one - no middle. I have yet to see a photo of a T-34 of any year or mark that had the middle hinge. Once that is sliced off, you will have to put in its place a bolt in line with the other bolts (I used a piece of stretched sprue, cutting a tiny pepperoni-like slice cut off it to make the bolt). Next, using a pin vice, hollow out the exhaust pipes.
The next step is tricky. The ESCI kit comes with the engine grill as a separate piece, but the mesh is moulded solid. To me, the look of the moulded mesh isn't acceptable. My answer (I've done this at least five times) is to carve the "mesh" areas out from between the supports using a very sharp exacto knife. This leaves five rectangular holes in the engine grill. I then thin out the supporting arms and the edges of the rectangles as much as I can without snapping the grill piece. Finally, I cut a piece of fine brass mesh (from model railroad supplies) and press it into place from the inside of the grill frame. The brass mesh conforms around the supports - where necessary I use a dull pencil to press it into the corners. Then I super glue it into place. BEFORE you glue that grill into place, keep in mind that you cannot look down through the mesh into the engine compartment. There is a set of what look like louvers just below the mesh of the grill. I originally though that perhaps the crew could open and close these slats depending on the weather but after examining the T-34/85 at the Canadian War Museum I have come to the conclusion that they are fixed in place. I painted the louvers a rusty, dirty grey.
Next come the spare fuel drums strapped to the flanks of later T-34s. Think about whether you want to put these on or not. Photo evidence, from what I've seen, seems to indicate that when T-34s (as well as JSs and KVs) were going into action, they topped off their internal fuel tanks and removed these tanks. If you think about going into a shooting war with three big cans of diesel fuel an your rear deck, this makes some sense. If you don't put the tanks on, you have to scratch the retaining mountings. Very late (post war) T-34/85s seem to have had a remote release for at least some of their external fuel tanks. Looking at the Canadian War Museum example (which is pristine and in running condition) I actually wonder if the remote release is based on some sort of explosive bolt - there seems to be wires running to it. There is no connection between the internal fuel tanks and the external ones. The ESCI external fuel tanks are not the ones seen in most photos. They have the filler cap at one end, whereas it is normally found in the middle. Also, they do not have recessed ends with handles and they generally seem a bit small to me. To replace them, I borrowed three fuels cylinders from the PST KV-1 kit. These are bigger, have recessed ends and handles. The moulding of the retaining straps is bad however, so I filed them off and replaced them with thin plastic strip. After filling the mounting holes provided on the kit - they didn't match the KV-1 retaining straps - I mounted the new fuel cylinders.
The next modification I made was to remove what I think are mounting points for grab handles moulded into the side of the ESCI hull. Since I was using thin wire to make the handles, I cut these off and drilled small holes to receive the ends of the wire. I then super glued these handles into place.
Moving to the front of the hull, it is also necessary to carve off the mounting points for grab handles that appear at the top left and right of the glacis. Handles on the glacis seem to have been rare. The ESCI drivers hatch causes me a certain amount of trouble. The hatch itself is nicely moulded but, to me, the hinge apparatus is way out of scale and, as a result, the two view ports are fore-shortened. I cut the hinge portion off the drivers hatch and added a piece to extend the view ports back a bit. I then carved the separation between the two ports on the extension. Next, I cut the giant hinges off the glacis and sanded down the attachment point. I wanted to have the hatch open, so I didn't bother replicating the hinge (I didn't think it would show). If I was closing the hatch, I would have built up a smaller hinge mechanism out of spare parts. It is also necessary to add a thin horizontal bar just below the bottom of the hatch. I think this is a "splash guard" to keep bullets or fragments from deflecting up under the hatch cover (but I could be wrong).
Since I was building a T-34/85, I had to consider whether I needed to replace the rounded front fenders with squared off ones. I have seen the /85 with both types, so I assume that it depended on which factory was the producer and what they had in stock. In the end I decided to avoid the problem by removing the front fenders altogether. This makes the tank look quite different.
The last point to address, in terms of modifying the ESCI hull, is to remove those two funny little prongs that are moulded onto the front of the upper hull - I can find no evidence for these at all. Oh, and also carve off the little shelf on the port side for mounting the antenna - this is wrong in any case (the Soviets had a sort of "pot' for mountings antennas) but the /85 had the antenna on the turret roof.
Moving to the running gear, if you have a copy of the ESCI T-34/76 1943 the bogey wheels are almost unusable. They have tried to portray the rubber-less steel wheels but have missed the look badly. I think it might be possible to carve them up to make them look closer to the real thing, but it will be a struggle. These wheels were an interim response to a rubber shortage anyway, and they are not common on /85s. The wheels of the T-34/76 1942 (solid with rubber rims) are better, but they lack bolt detail around the hubs. I decided to use, instead, the Resin Master "pierced" style wheels which were seen on later T-34s. I think these are the ESCI wheels with the inner hub carved out and replaced with the pierced style wheels from the 1/76 Fujimi T-34/85. They look pretty good for a late war vehicle. One final issue for the running gear, the front return roller on the ESCI has a mould dimple where the hub should be - this should be filled. BE CAREFUL when positioning the return and drive wheels - if you have them out of line with the bogeys it will throw off the look of your tank from the front and rear and could cause problems fitting the upper hull onto the lower (been there, done that).
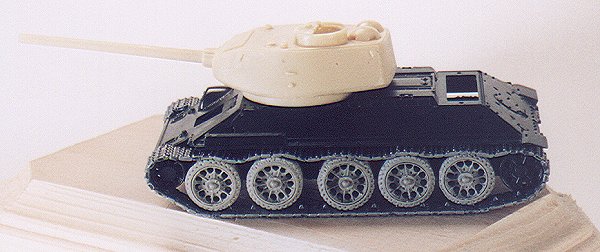
I put the tracks together, as per the ESCI instructions, and the Al-by turret went together without a hitch. I painted the running gear and tracks (medium grey) before attaching the top hull to the bottom. Before gluing the two halves together, I painted up the tanker figure which comes with the ESCI kit and stuck him in the drivers position. If you look in the hatch, you see him sitting there.
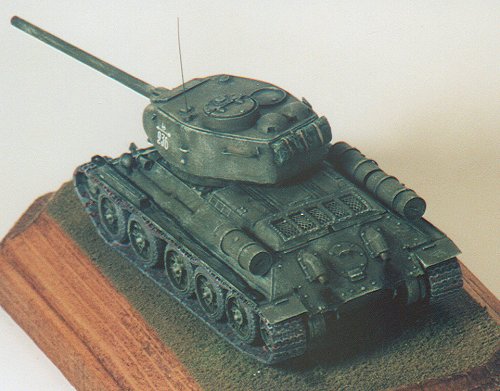
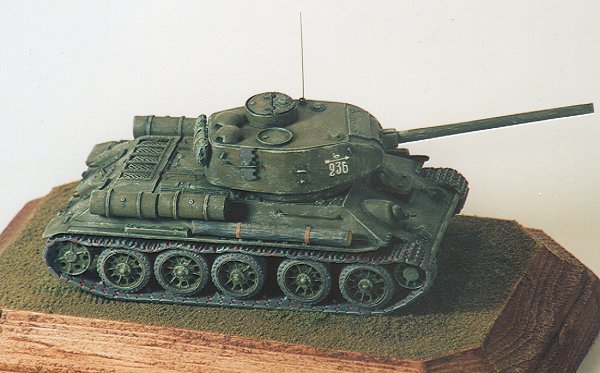
With the kit assembled, I painted it over all in Modelmaster Olive Drab. I then went back and used a dark green around any protruding items that I wanted to highlight - this helps to give depth to the model, particularly when doing a dry brush of highlights. Before dry brushing, though, I added the markings. These are Archer dry transfers and they are fantastic. There is no silvering and they go on completely matt. The sheet has markings for several T-34/85s so I'm going to have to build more...
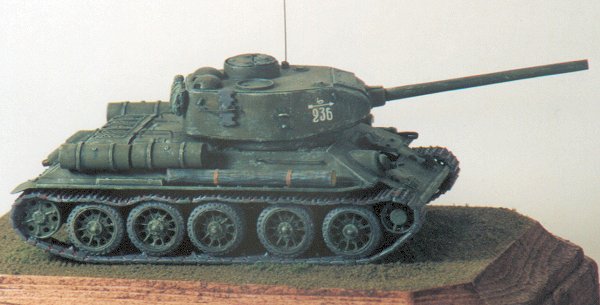
With the decals in place, I added a few bits and bobs - the headlight (hollowed out and filled with white glue), a canvas roll on the back of the turret (resin accessory by Leva), an unditching beam and antenna for example. I then dry brushed the whole using Humbrol Buff or Canvass, painted the exhaust pipes rusty brown and added oil/exhaust stains to the ends of the pipes and the area below. Using a soft pencil, I highlighted the tracks a grey-silver colour and then went over them with some water-based red paint (from my kids' war hammer paints).
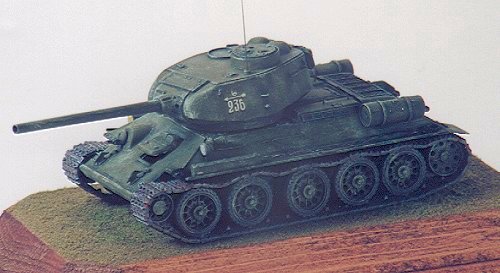
The final step was to mount the completed tank on a flocked wooden base, purchased at a local craft store. I kind of like the way it turned out - particularly those Archer transfers!
| Back to Kit Reviews | Back to Home Page |
| Back to Al.By Kit List | Back to Resin Master Kit List |