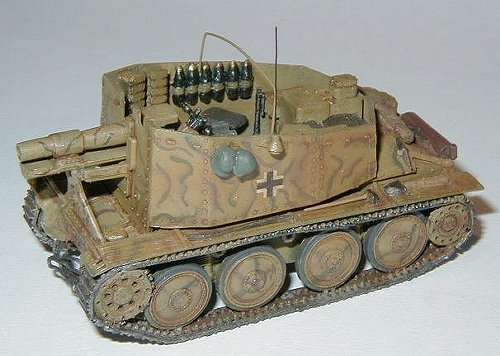
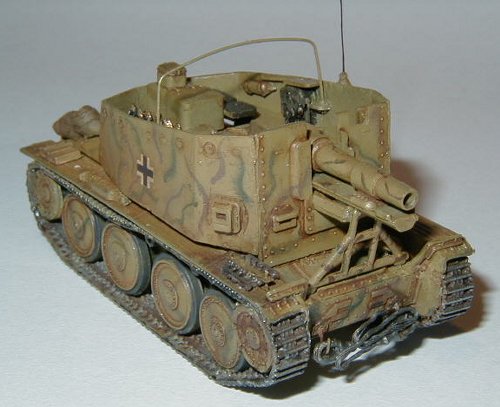
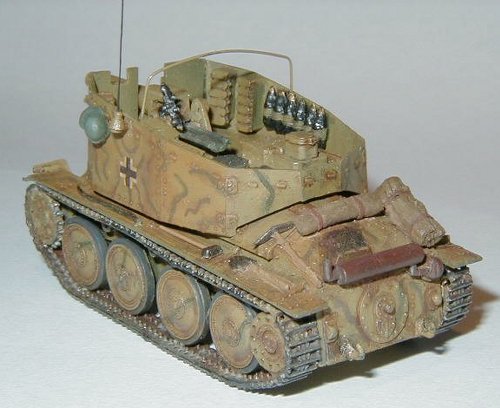
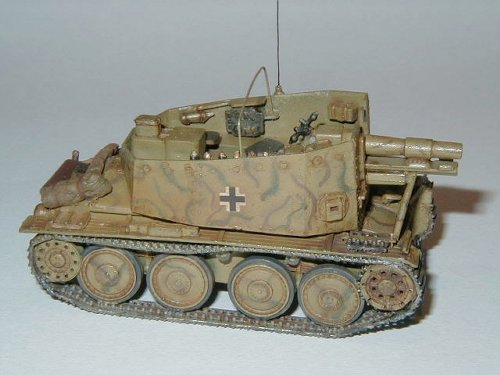
Grille Ausf. H
Manufacturer: Attack Models (# 72801)
By Augusto Versiani.
After I did the Pzkw 38(t) from the same source, I was anxious to do the Grille, a rare example of open top armor in this scale. I had some problems with the 38(t) (which you can see in the Gallery) but in the end it was worth the effort, as the kit went together well. But with the Grille, it was different; to the same problems, more are added and the final result was poor. Maybe this is a job suited to a more talented modeler, than an average modeler like me.
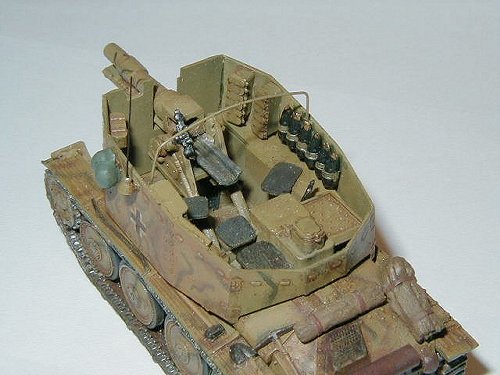
Lets start with the bright side. The tracks are nice, the plastic is soft enough to allow them to be bent to shape over the sprockets. The external details on the outside of the wall plates are ok, but I thinned the walls to be more in scale. No internal detail unfortunately. The radio is nice, as are the internal bin drawers and the road wheels. End of the bright side.
The problems start even on the sprues. The tracks had a lot of attachment points and it makes the job to cut and clean them tedious. The gun is simply unusable; as I had no plastic rod available I made a new one combining a piece of the sprue for the barrel with the load breach of the original piece. The tubular structure that support the gun on the transmission cover plate is far too thick, but I confess that I had no patience to do a new one. The sprockets and idler wheels must have the holes reopened due to the flash in them, and the return rollers are again unusable so I made new ones. The gun ammunition is a poor representation and I now think that the better thing to do is to cut off the shells keeping only the empty supports.

Construction
The first problem is that, as in the 38(t), the joining of rear side walls and the engine cover left an ugly wide space between the upper rivets and the vertical walls, so as with the 38(t), I put some tools and rolled canvas to cover it. But the main problem is that there is no space between the upper tracks and the fenders. I thinned the fenders as much as I could and sanded the tracks too, but even with all this effort I ended with a large gap between the vertical part in front of the fenders and the transmission cover. I filled it with putty and sanded it smooth. But the problem was not solved as the tracks on top of the sprockets are almost touching the fenders. I had the same problem with the 38(t), but this time the vertical walls of the upper hull made the job much more difficult by interfering with the fenders' position.
I thinned the walls of the upper hull and they fit ok. The rest of the assembly went with minor problems; I hollowed the exhaust pipe and use a wash/drybrush on the rear air-intake grill and added other minor details.
I painted the kit with acrylics and washed with oils. A final touch was made with pastel chalks.
Conclusion
It was a hard task to put this baby together, and I must say that I am not pleased with the final result. But I like this vehicle, and as Attack is the only game in town, maybe I will give it another try. But next time, although I am not a fan of photoetched sets, I will use the PART set and some resin gun replacement to try and reach a better final result.
Recommended only for those who are seeking trouble.
| Back to Attack Kit List | Back to Home Page |
| Back to Kit Reviews |