|
|
Schwimmwagen |
|||
Kit # |
Construction review by Rob Haelterman | |||
|
|
Schwimmwagen |
|||
Kit # |
Construction review by Rob Haelterman | |||
 |
| Preliminary
note: History
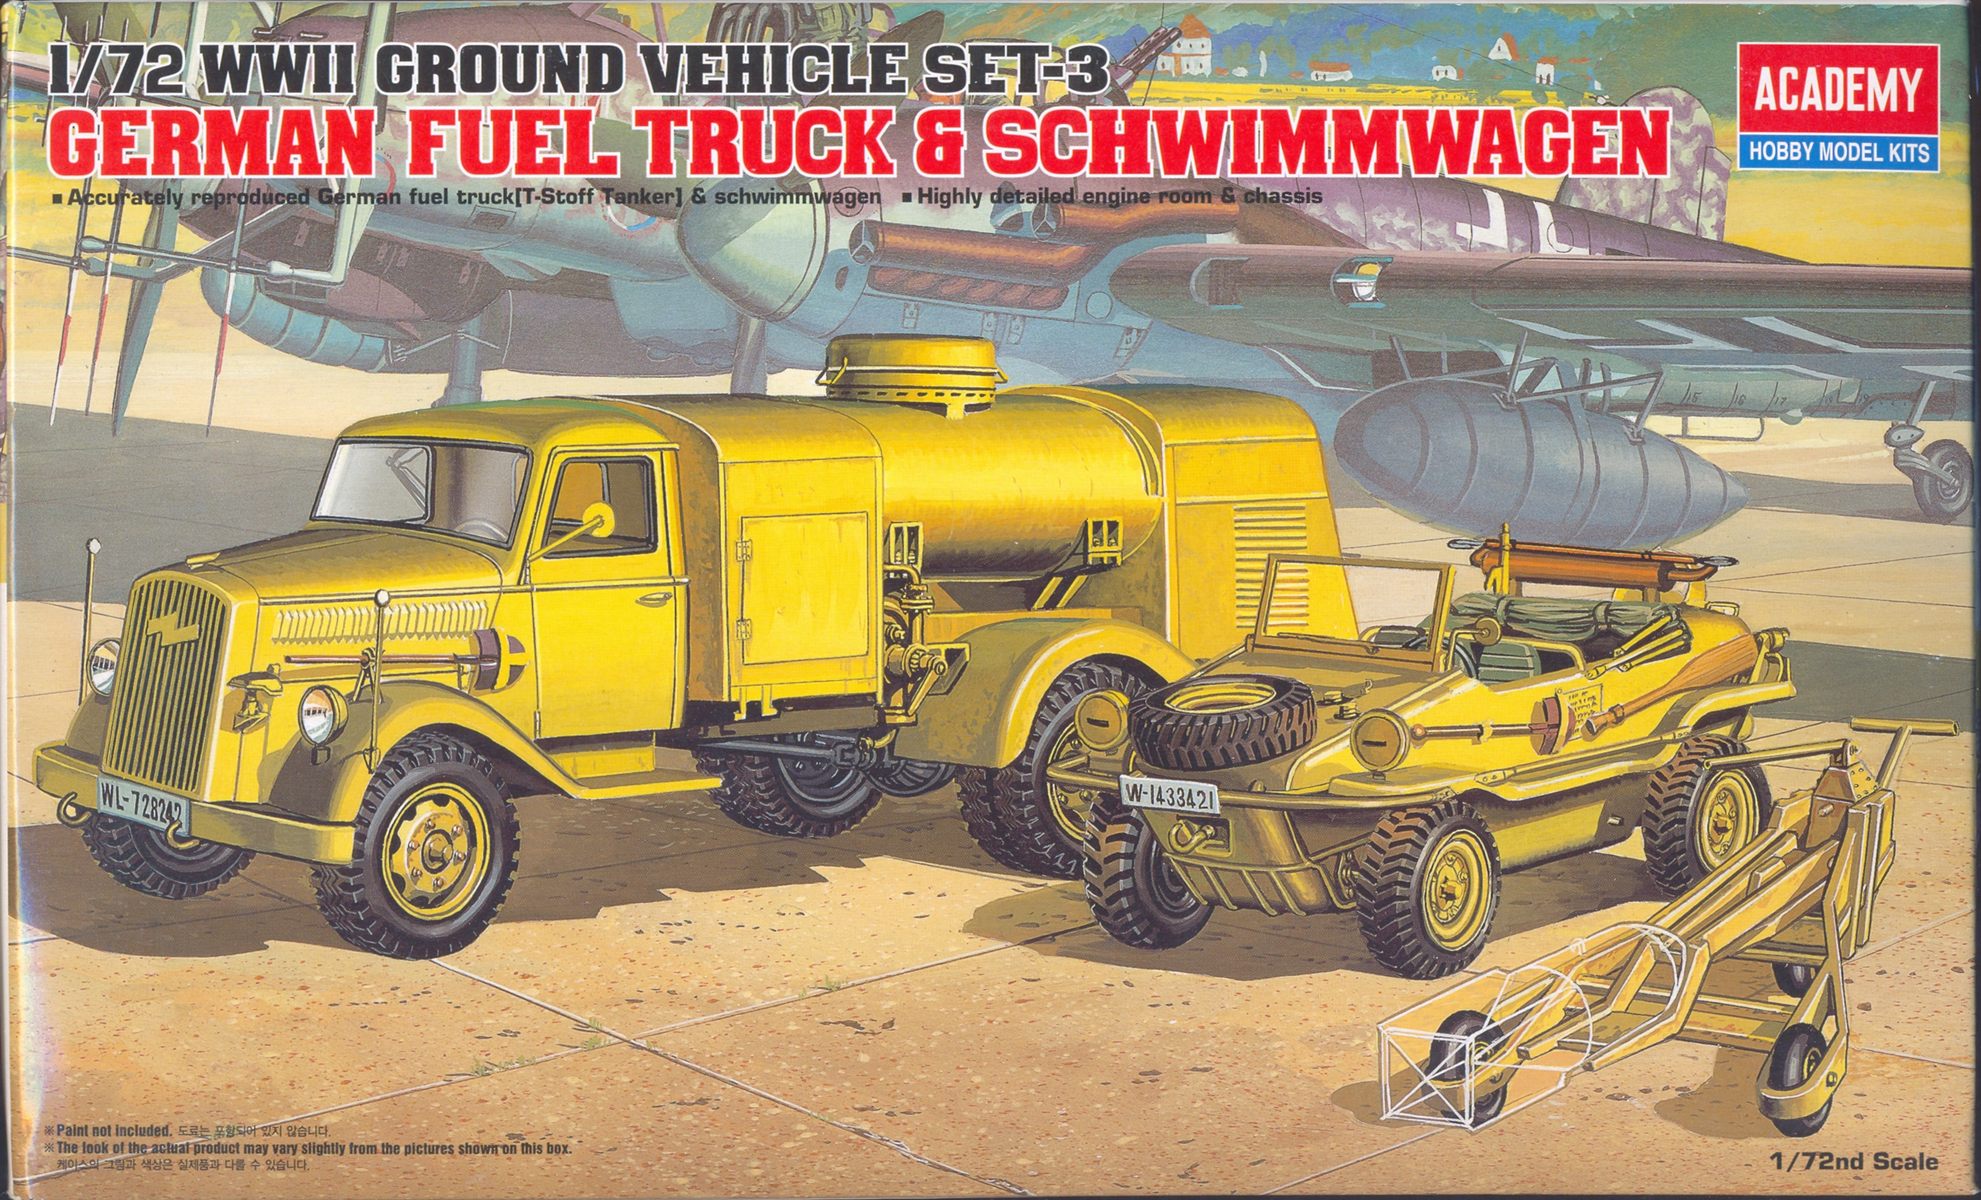
While the Academy kit isn't perfect, it is a far cry from the Hasegawa kit in every respect and actually captures the looks of the vehicle quite well. The Eduard set is a masterpiece of PE-engineering but is not for the faint of heart, and I plead guilty to loosing the odd bit or shying away from using the sundry part. The MK72 wheels were necessary, not only because the Academy wheels are rather poor, but also because the particular vehicle I wanted to replicate had the cross-country tyres.
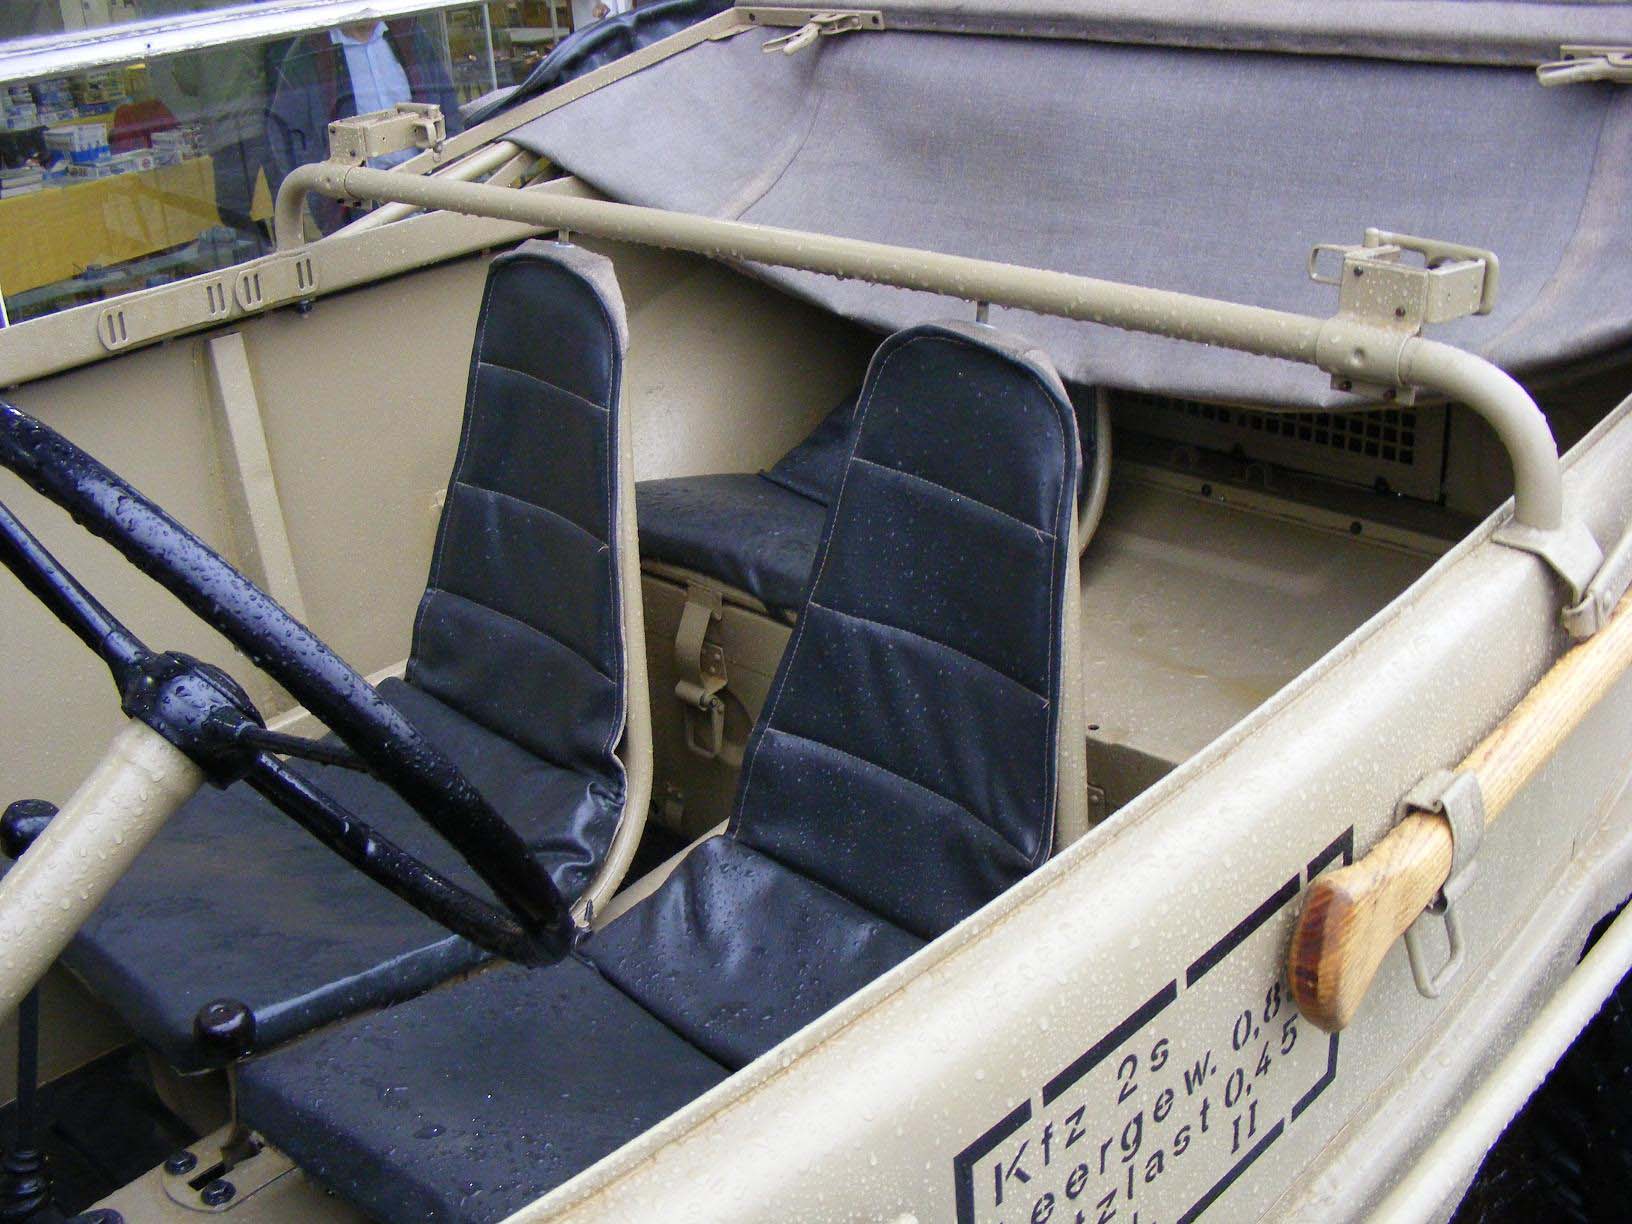
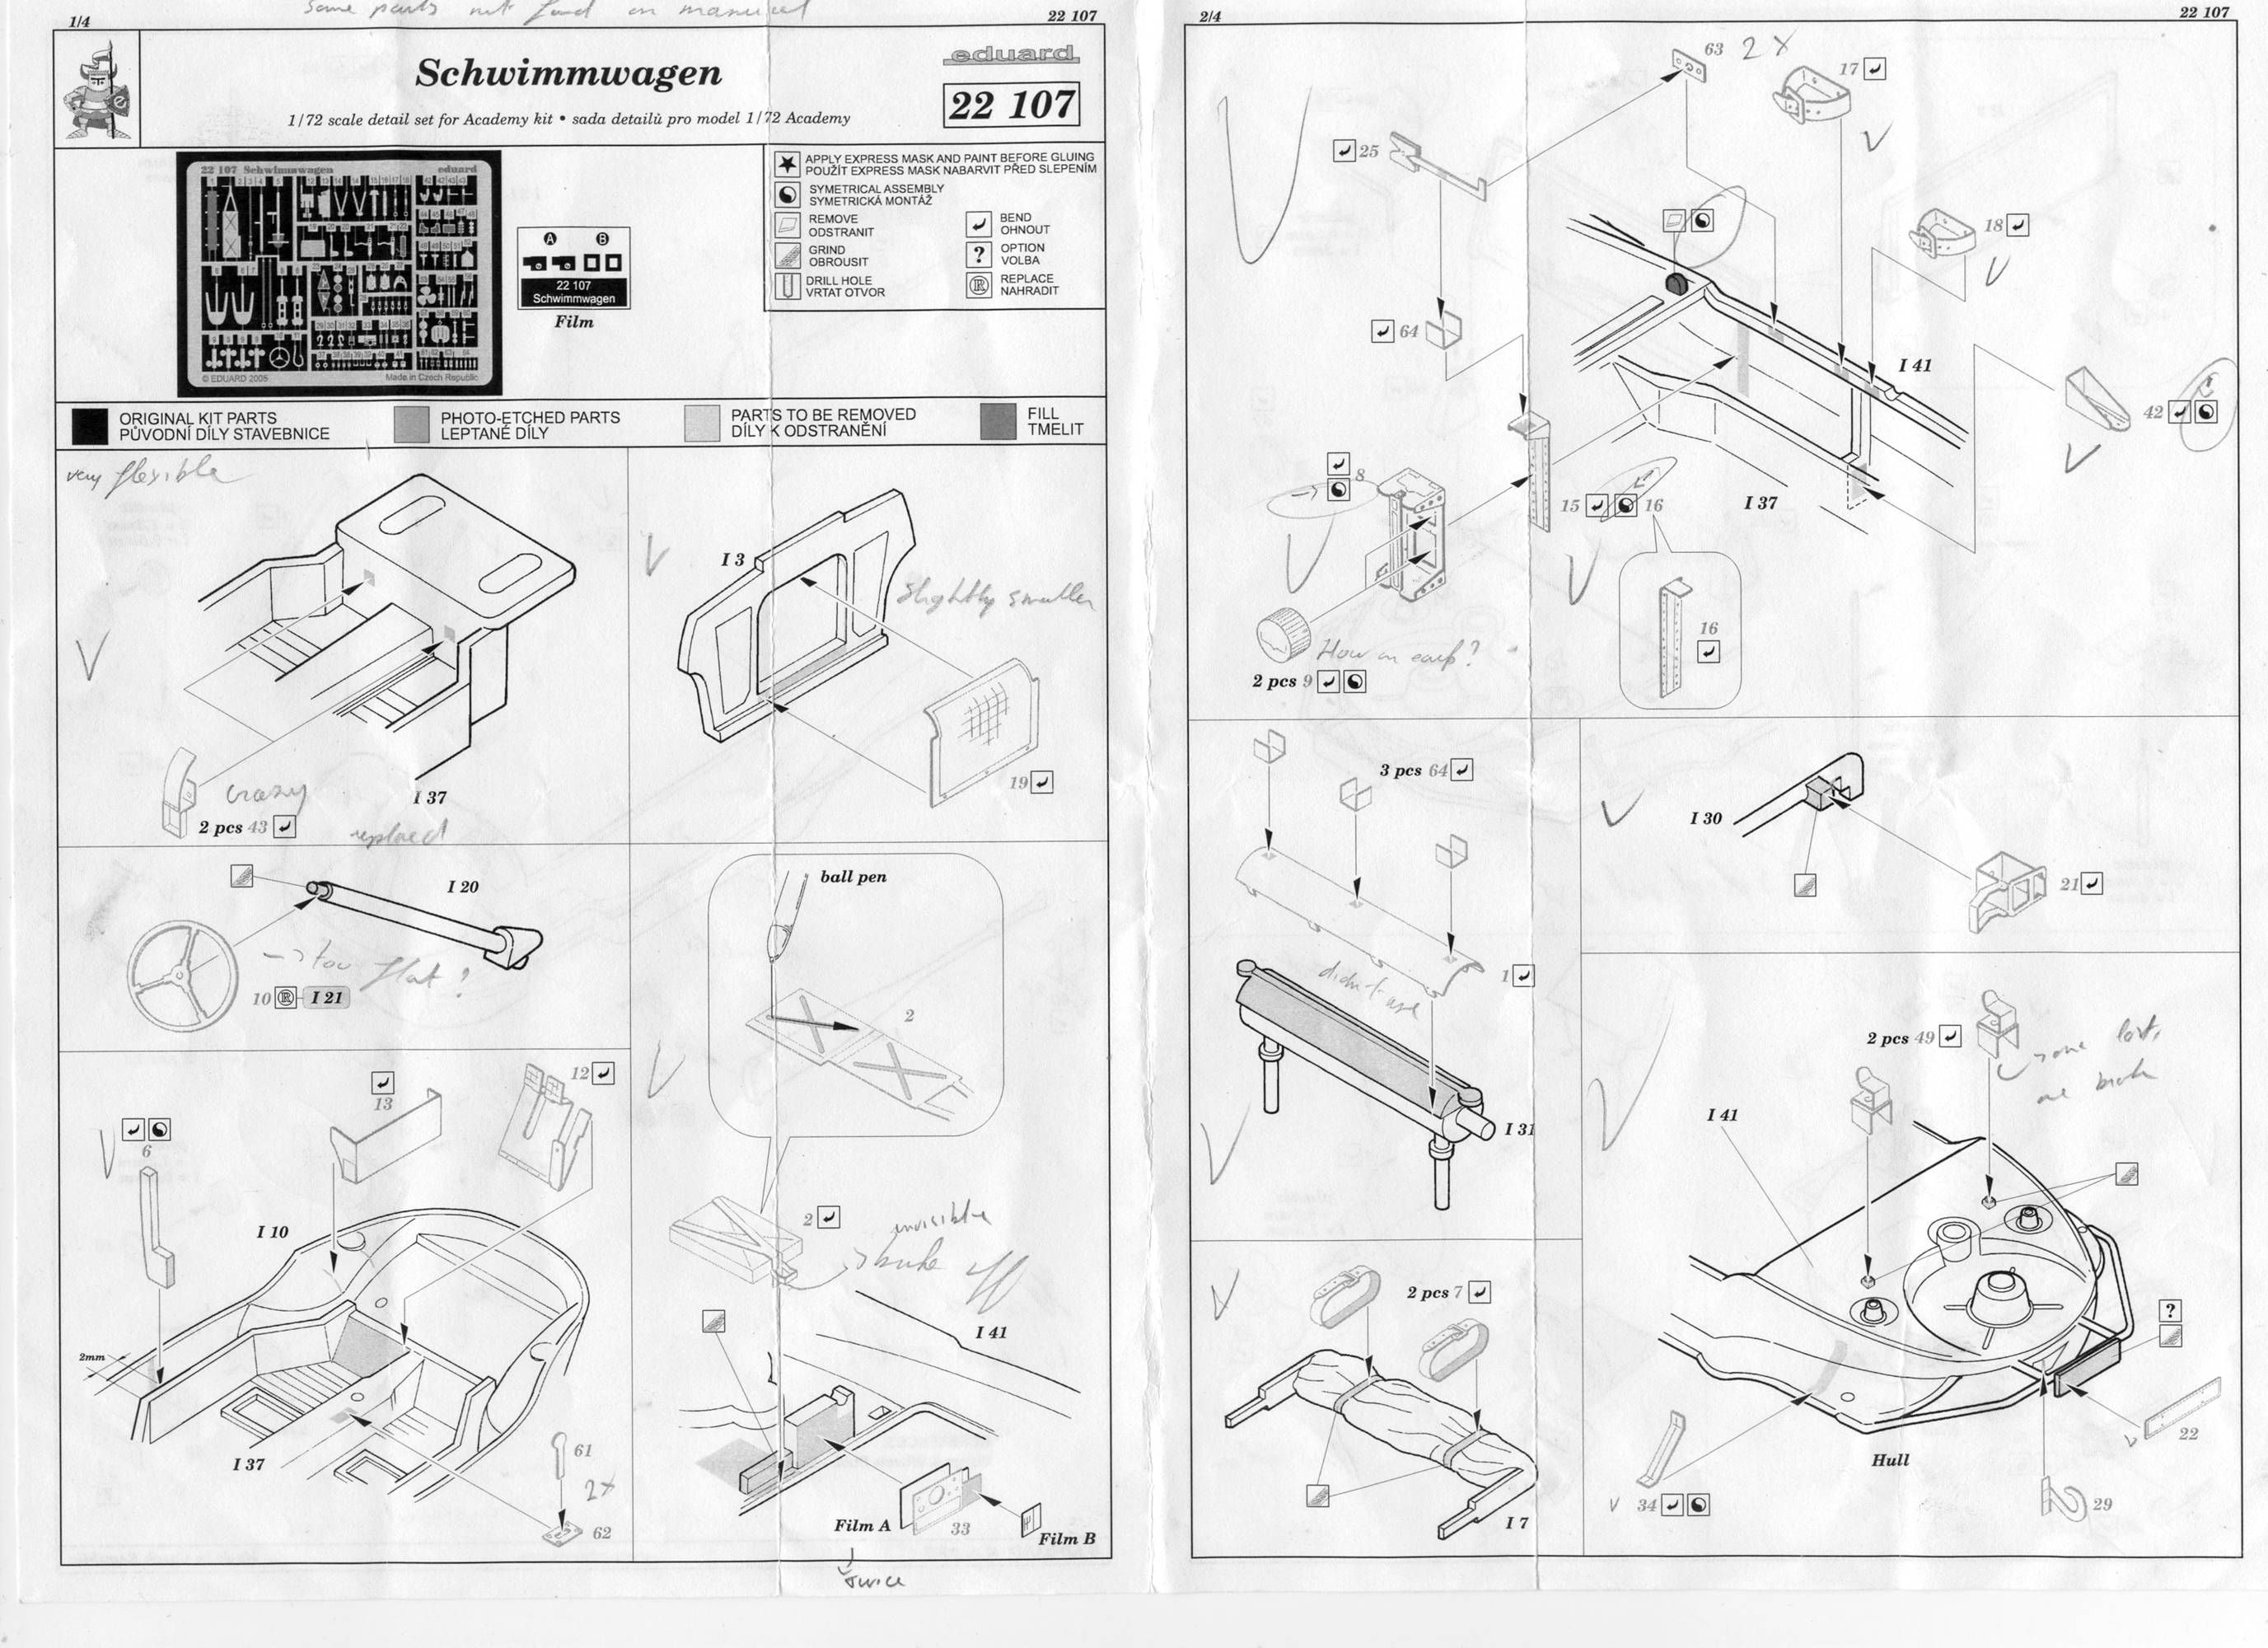
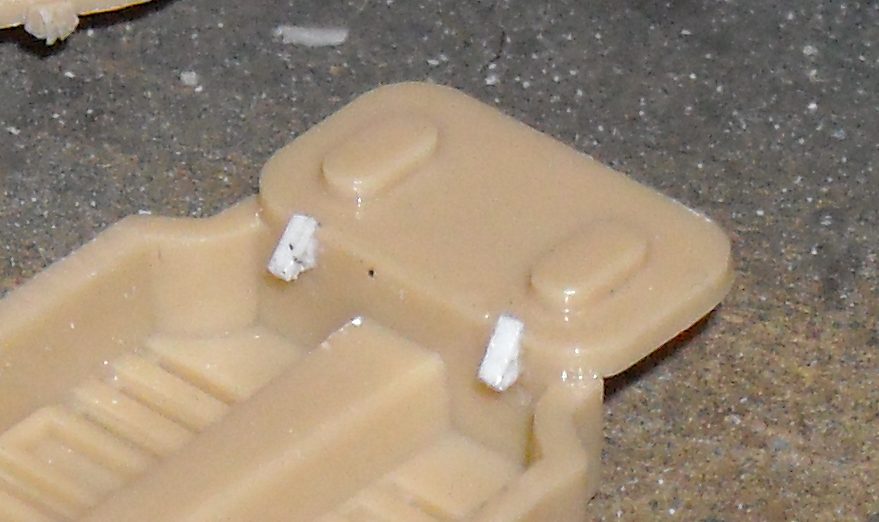
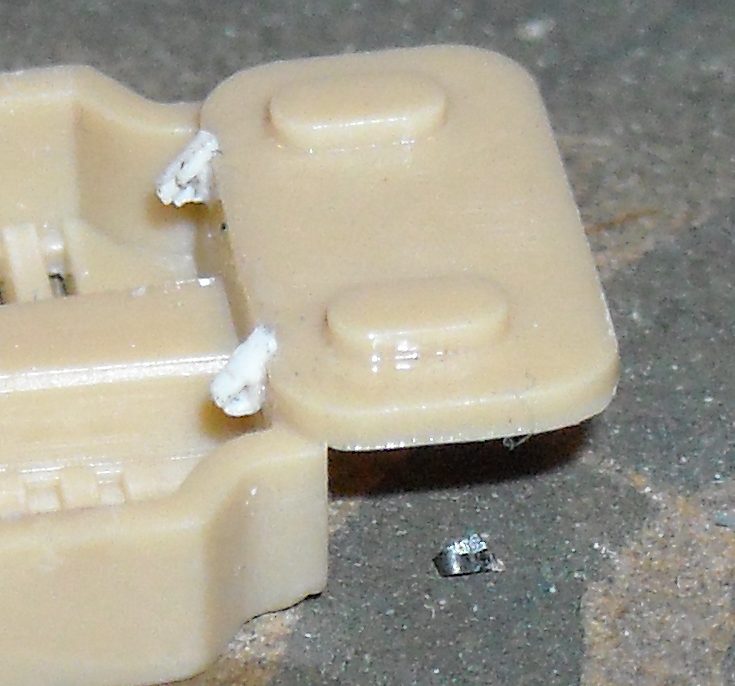
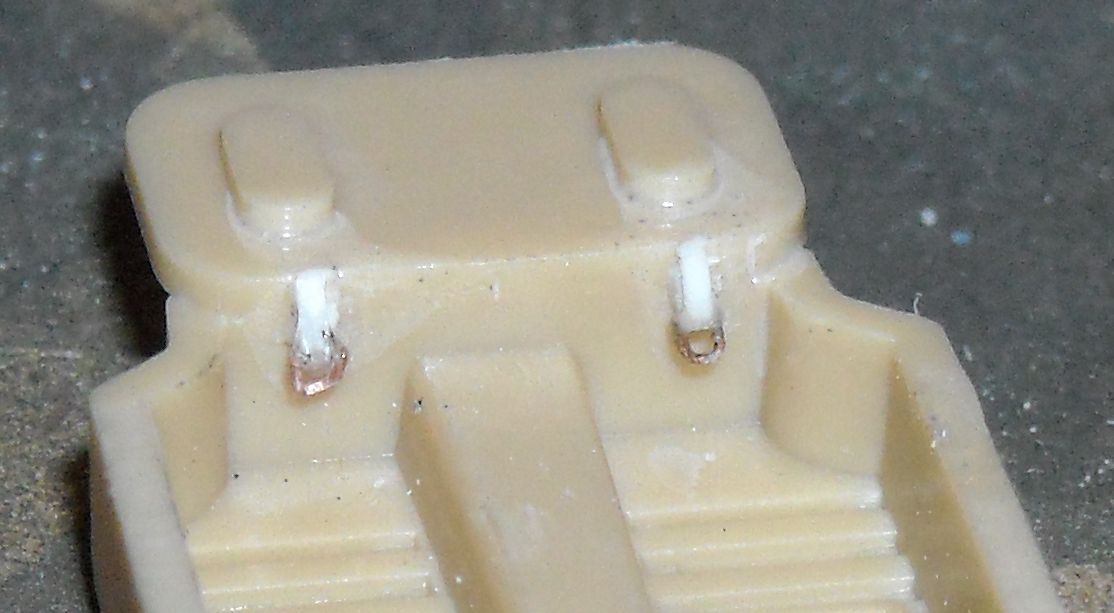
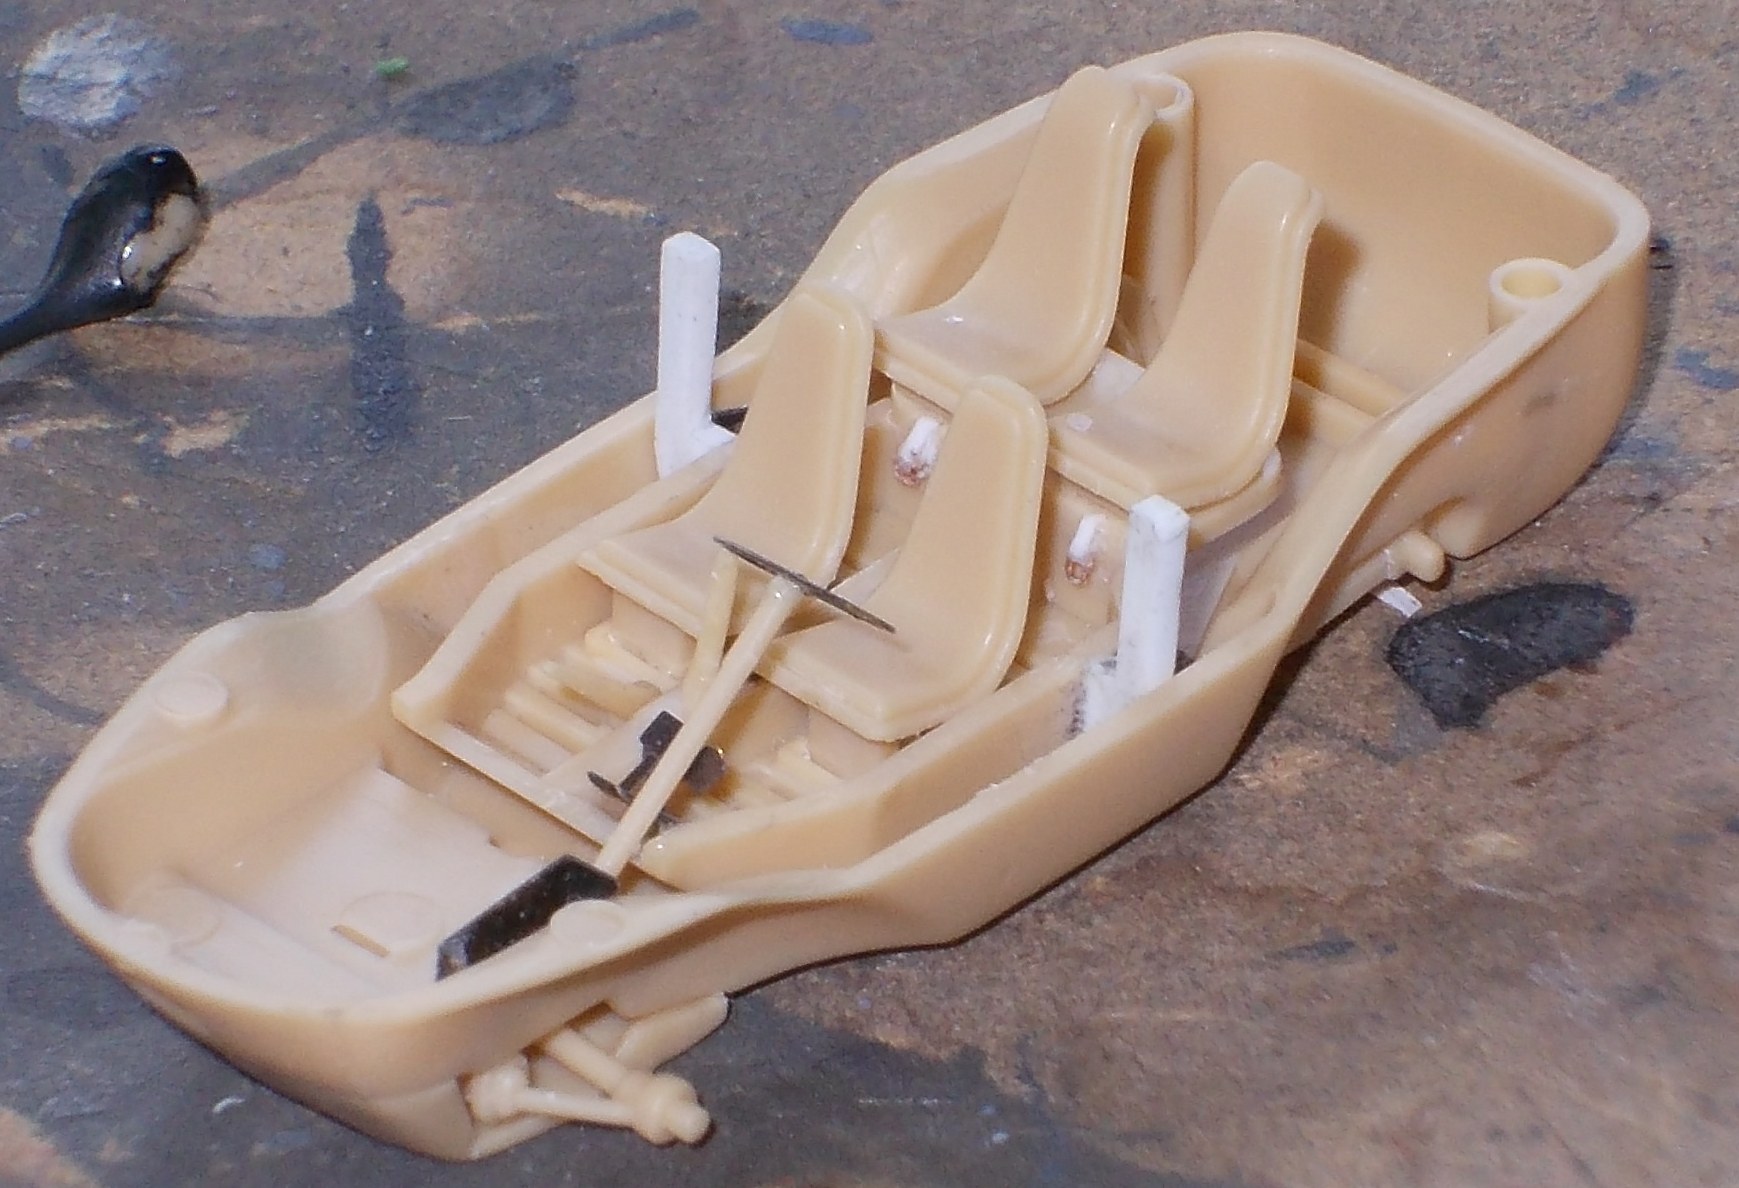
Construction Construction of the Academy kit starts with the lower hull. I only followed the instructions to a limited extent. For instance, I left off the wheels until the very end. Afterwards the instructions of the Academy kit turn to the "tub" which is provided for the interior. While rather good in itself, this was the first step in which I used the Eduard parts. My first attempt was rather inauspicious, as I broke one of the interior fittings that go to the rear of the tub and lost the other. Breaking the PE parts is rather a common occurrence due to the fineness of the parts and the multiple fold lines (6 for this part that is barely 1mm across). Fortunately these two parts will be mostly hidden underneath the rear seats, so I trusted my limited scratchbuilding skills to come up with something similar. While on the subject of these rear seats: you might want to cut them down by a couple of milimeters, or sand down their base, as they will interfere with the (folded) hood. Either Academy messed up the fit of these parts, or I did, but you might want to play safe. Modifying the parts at the very end of the construction phase is evidently a lot harder then before gluing them to the interior.
After finishing the tub you can add
it to the lower hull and start adding more PE parts. I left out the
engine block as it will be completely invisible without cutting out
the engine hatch, which I did not plan to do. The bulkhead received
a PE mesh, which is slightly too small, but this won't be seen after
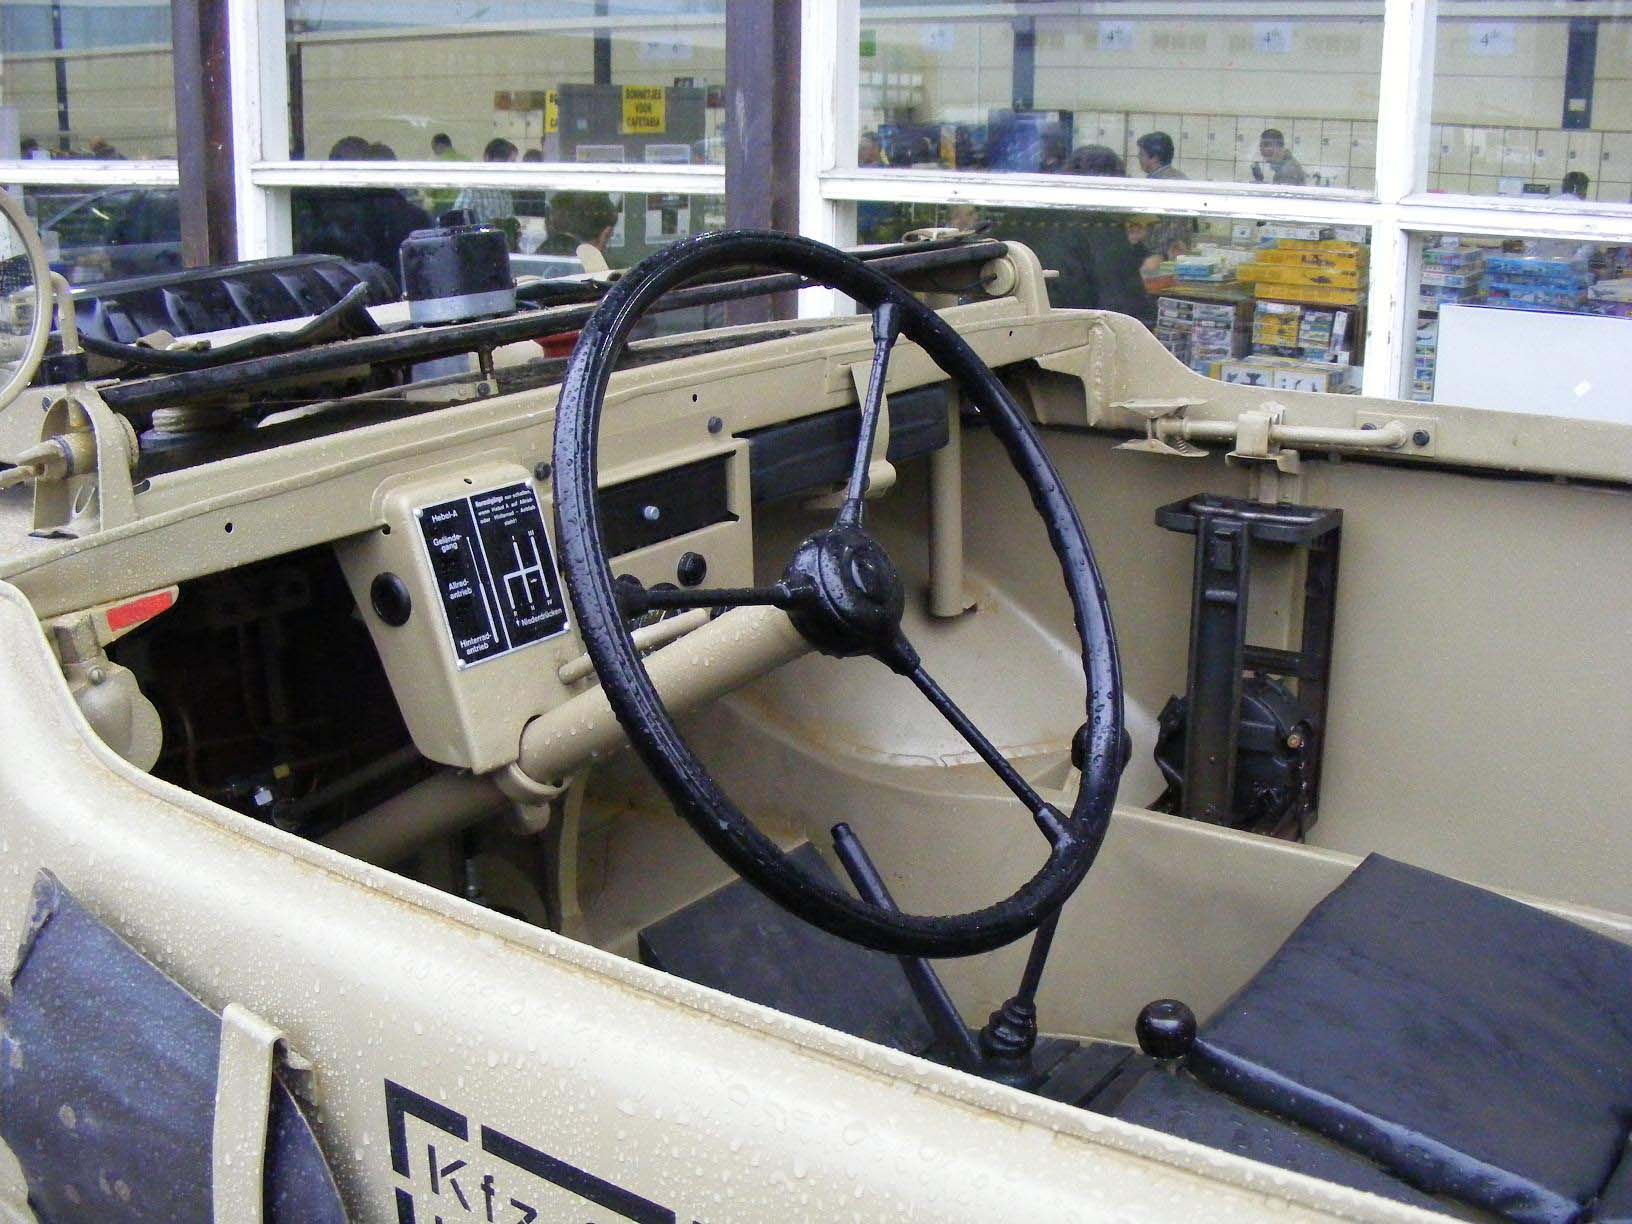
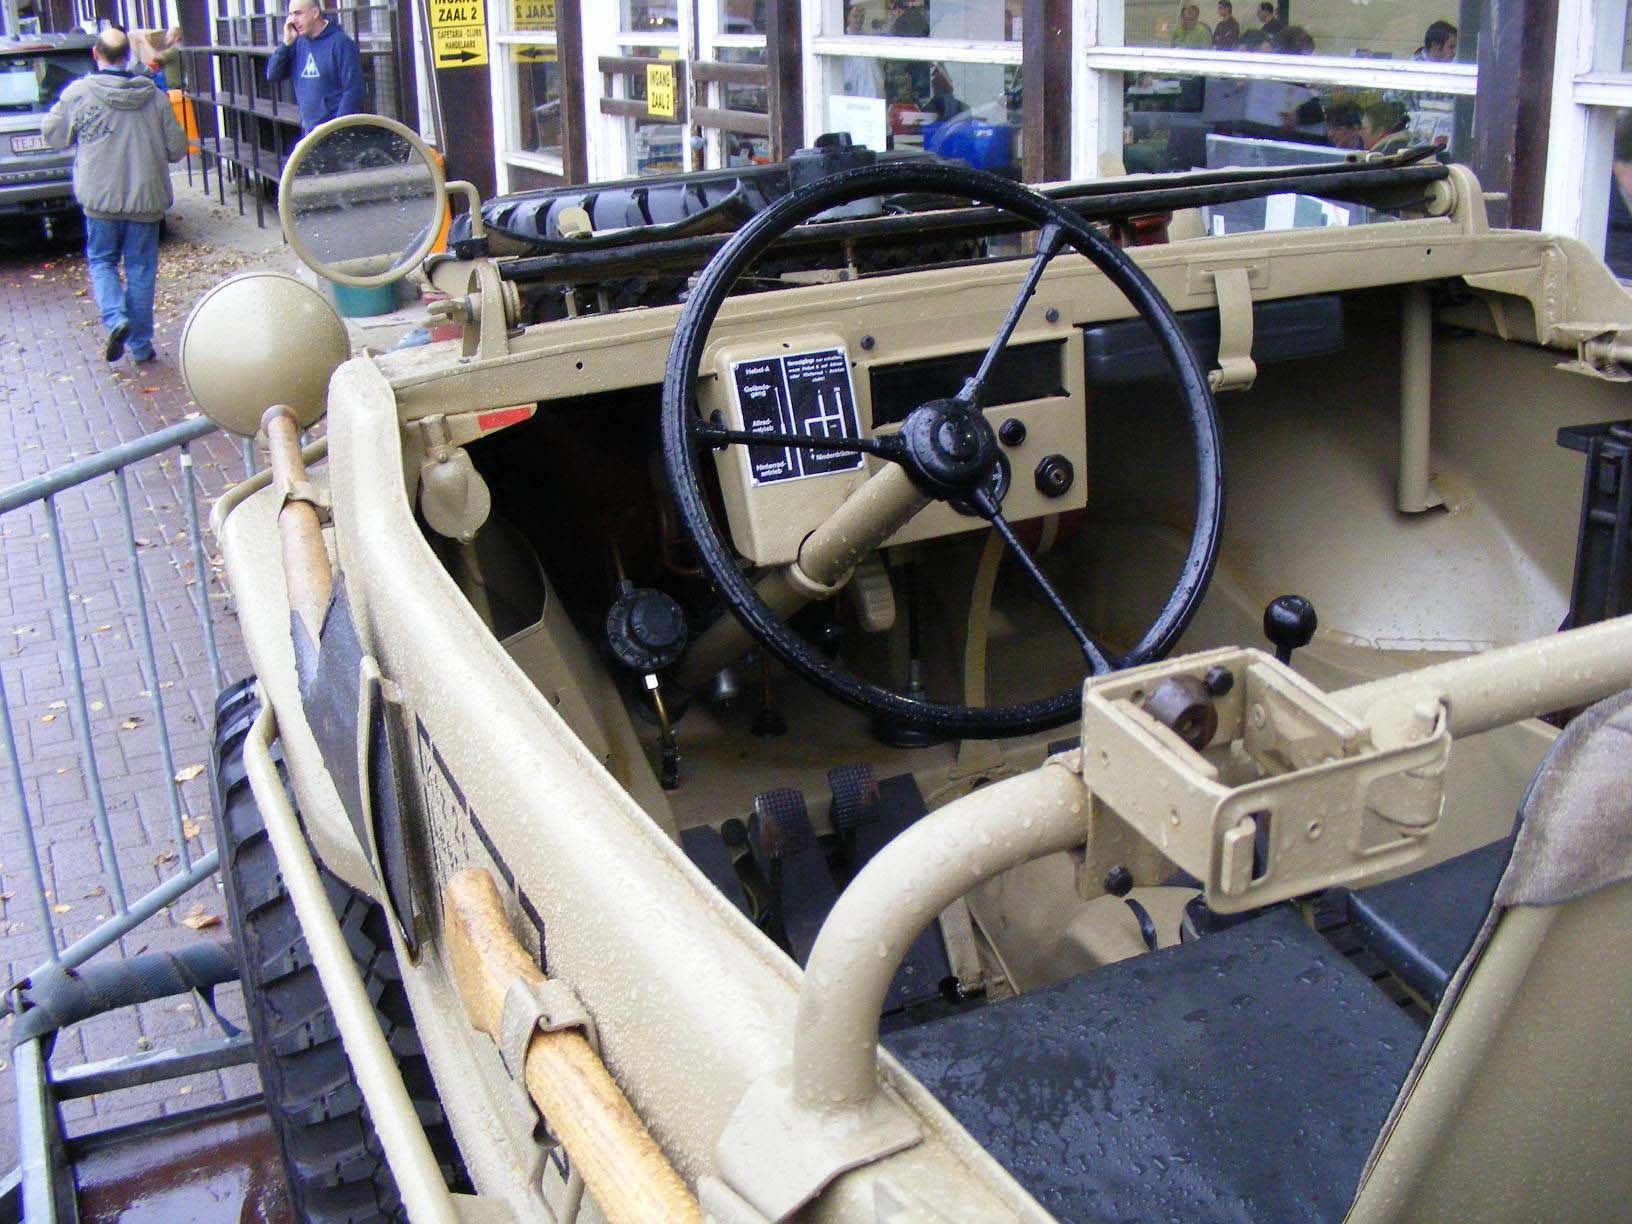
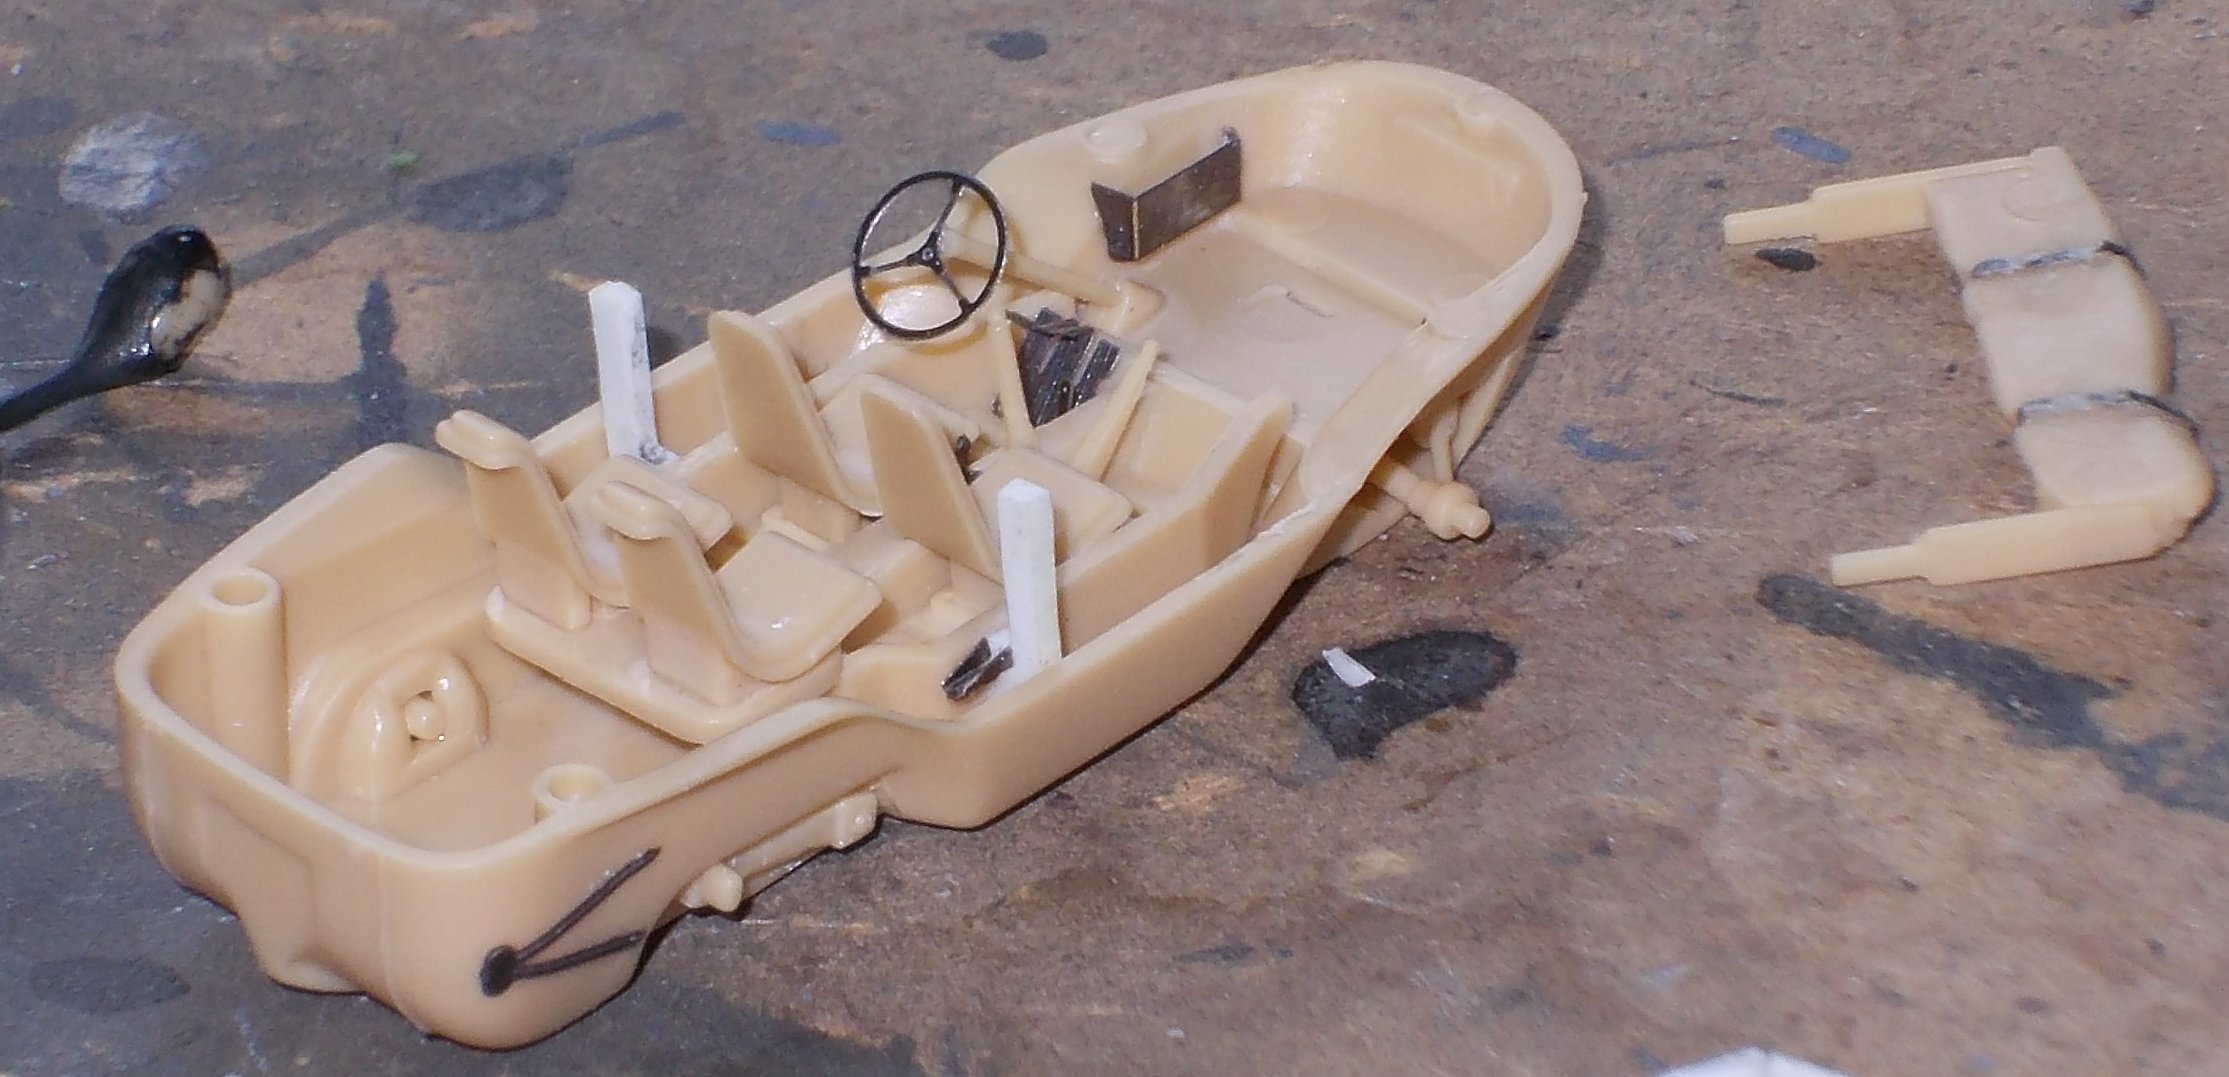
the hull is closed. The PE part for the steering wheel was added at
first, but it was replaced afterwards with the plastic kit part, as
I felt that the PE part was too flat and underscale. (That said, the
kit part is too rounded and overscale, but that's a matter of personal
taste.)
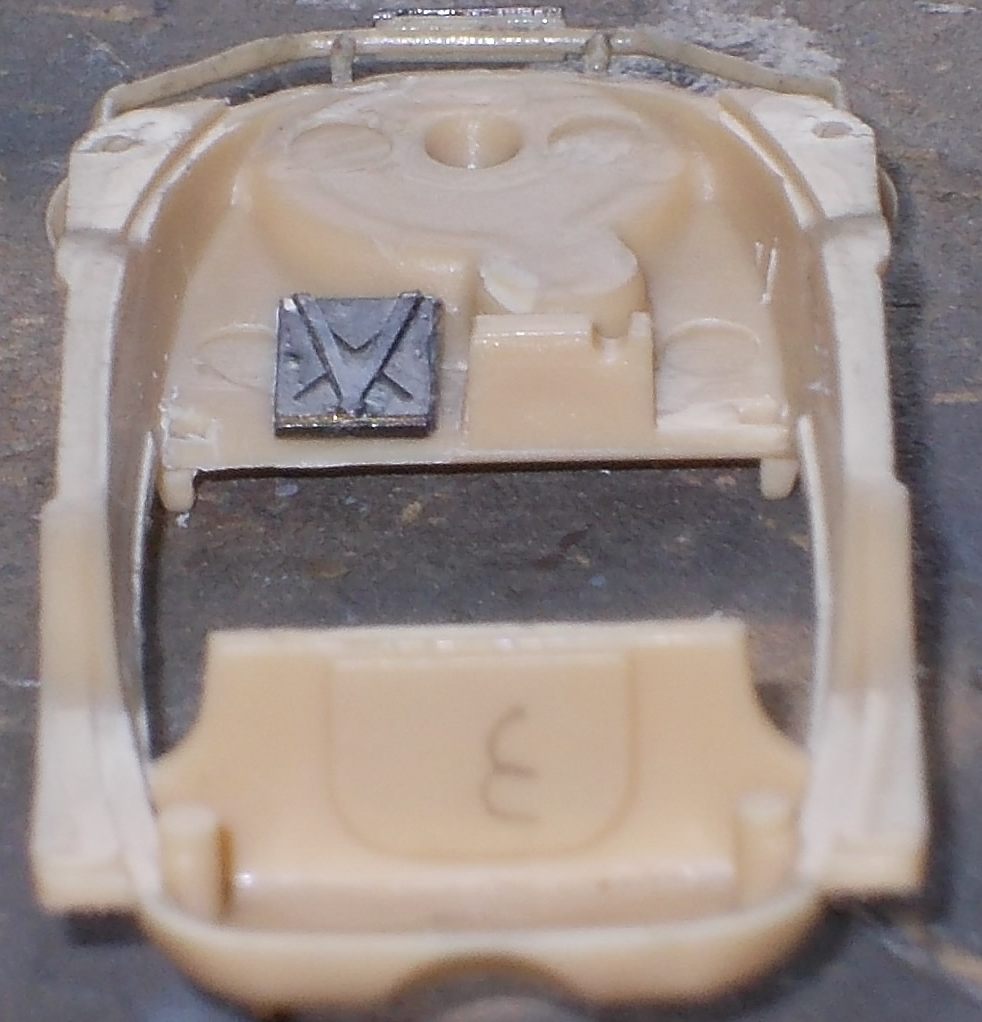
Eduard provides two bulkheads for the
sides of the hull, but folding them was again too much for me, so
I replaced them with styrene bits, cut to shape.
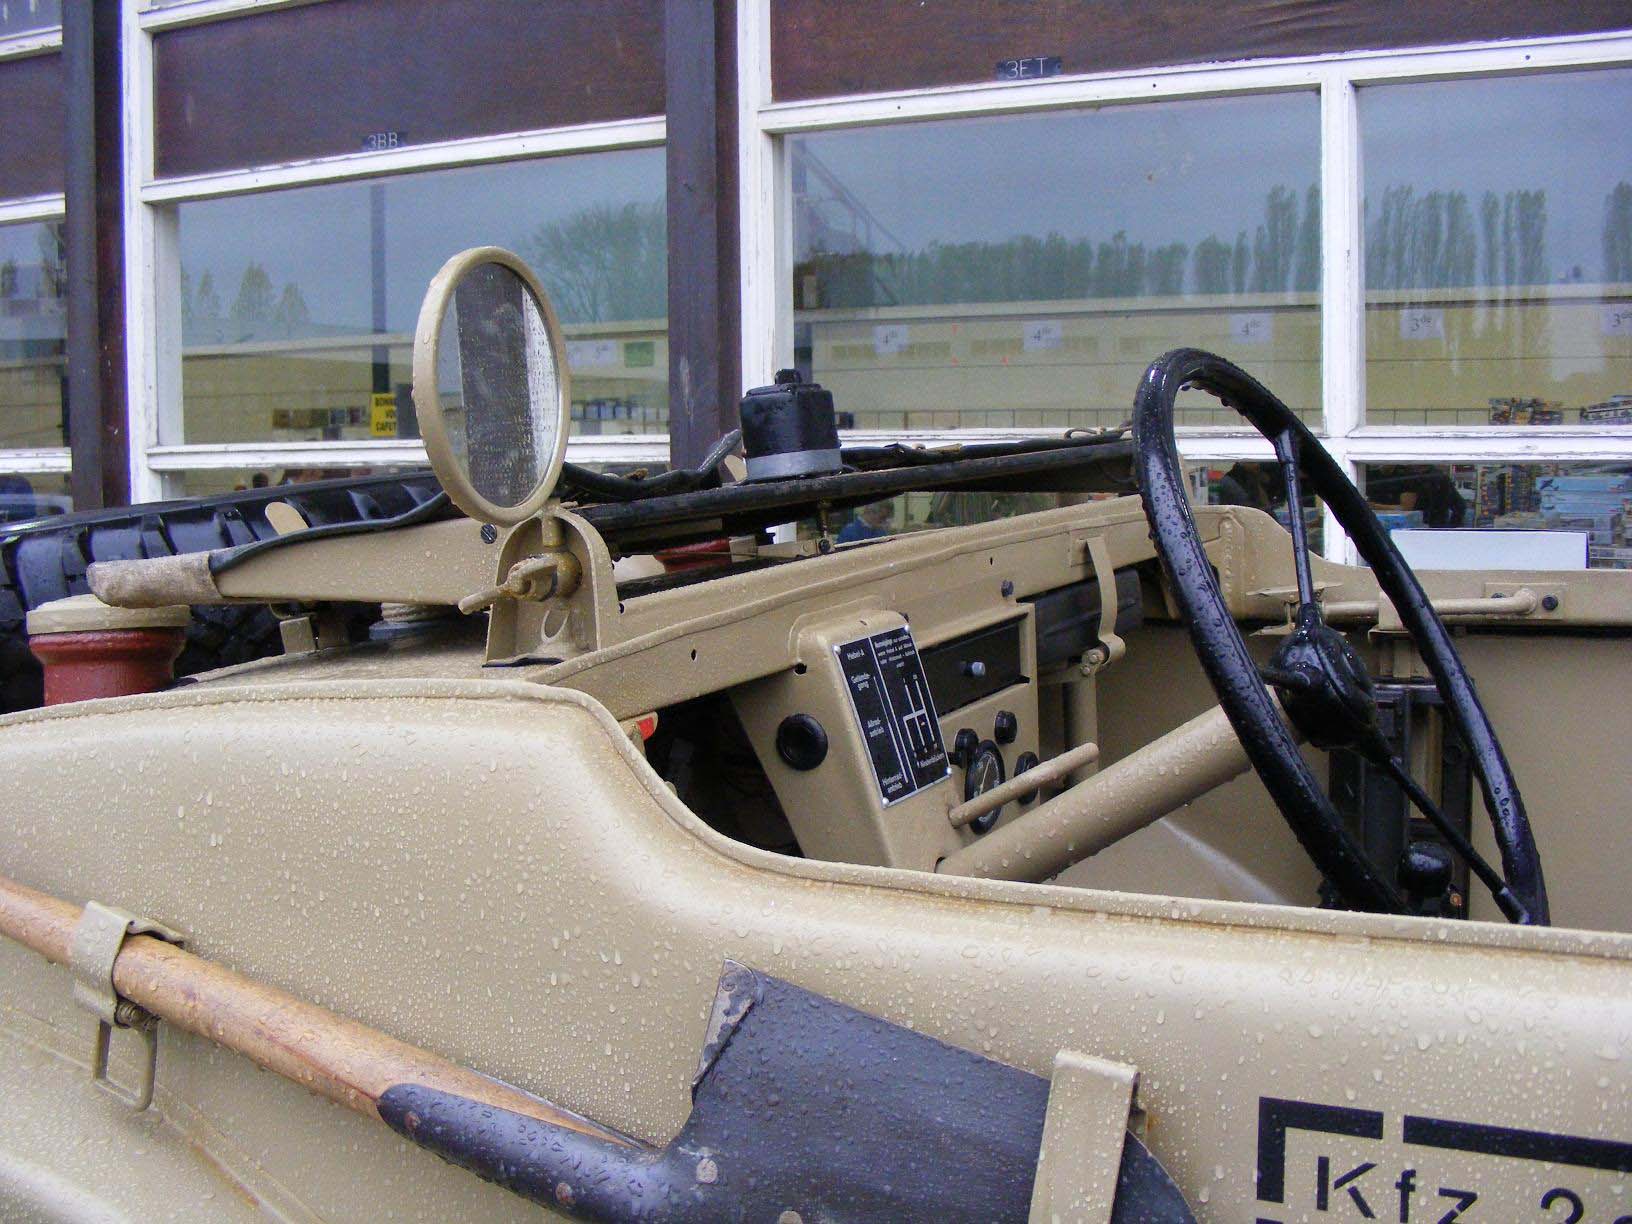
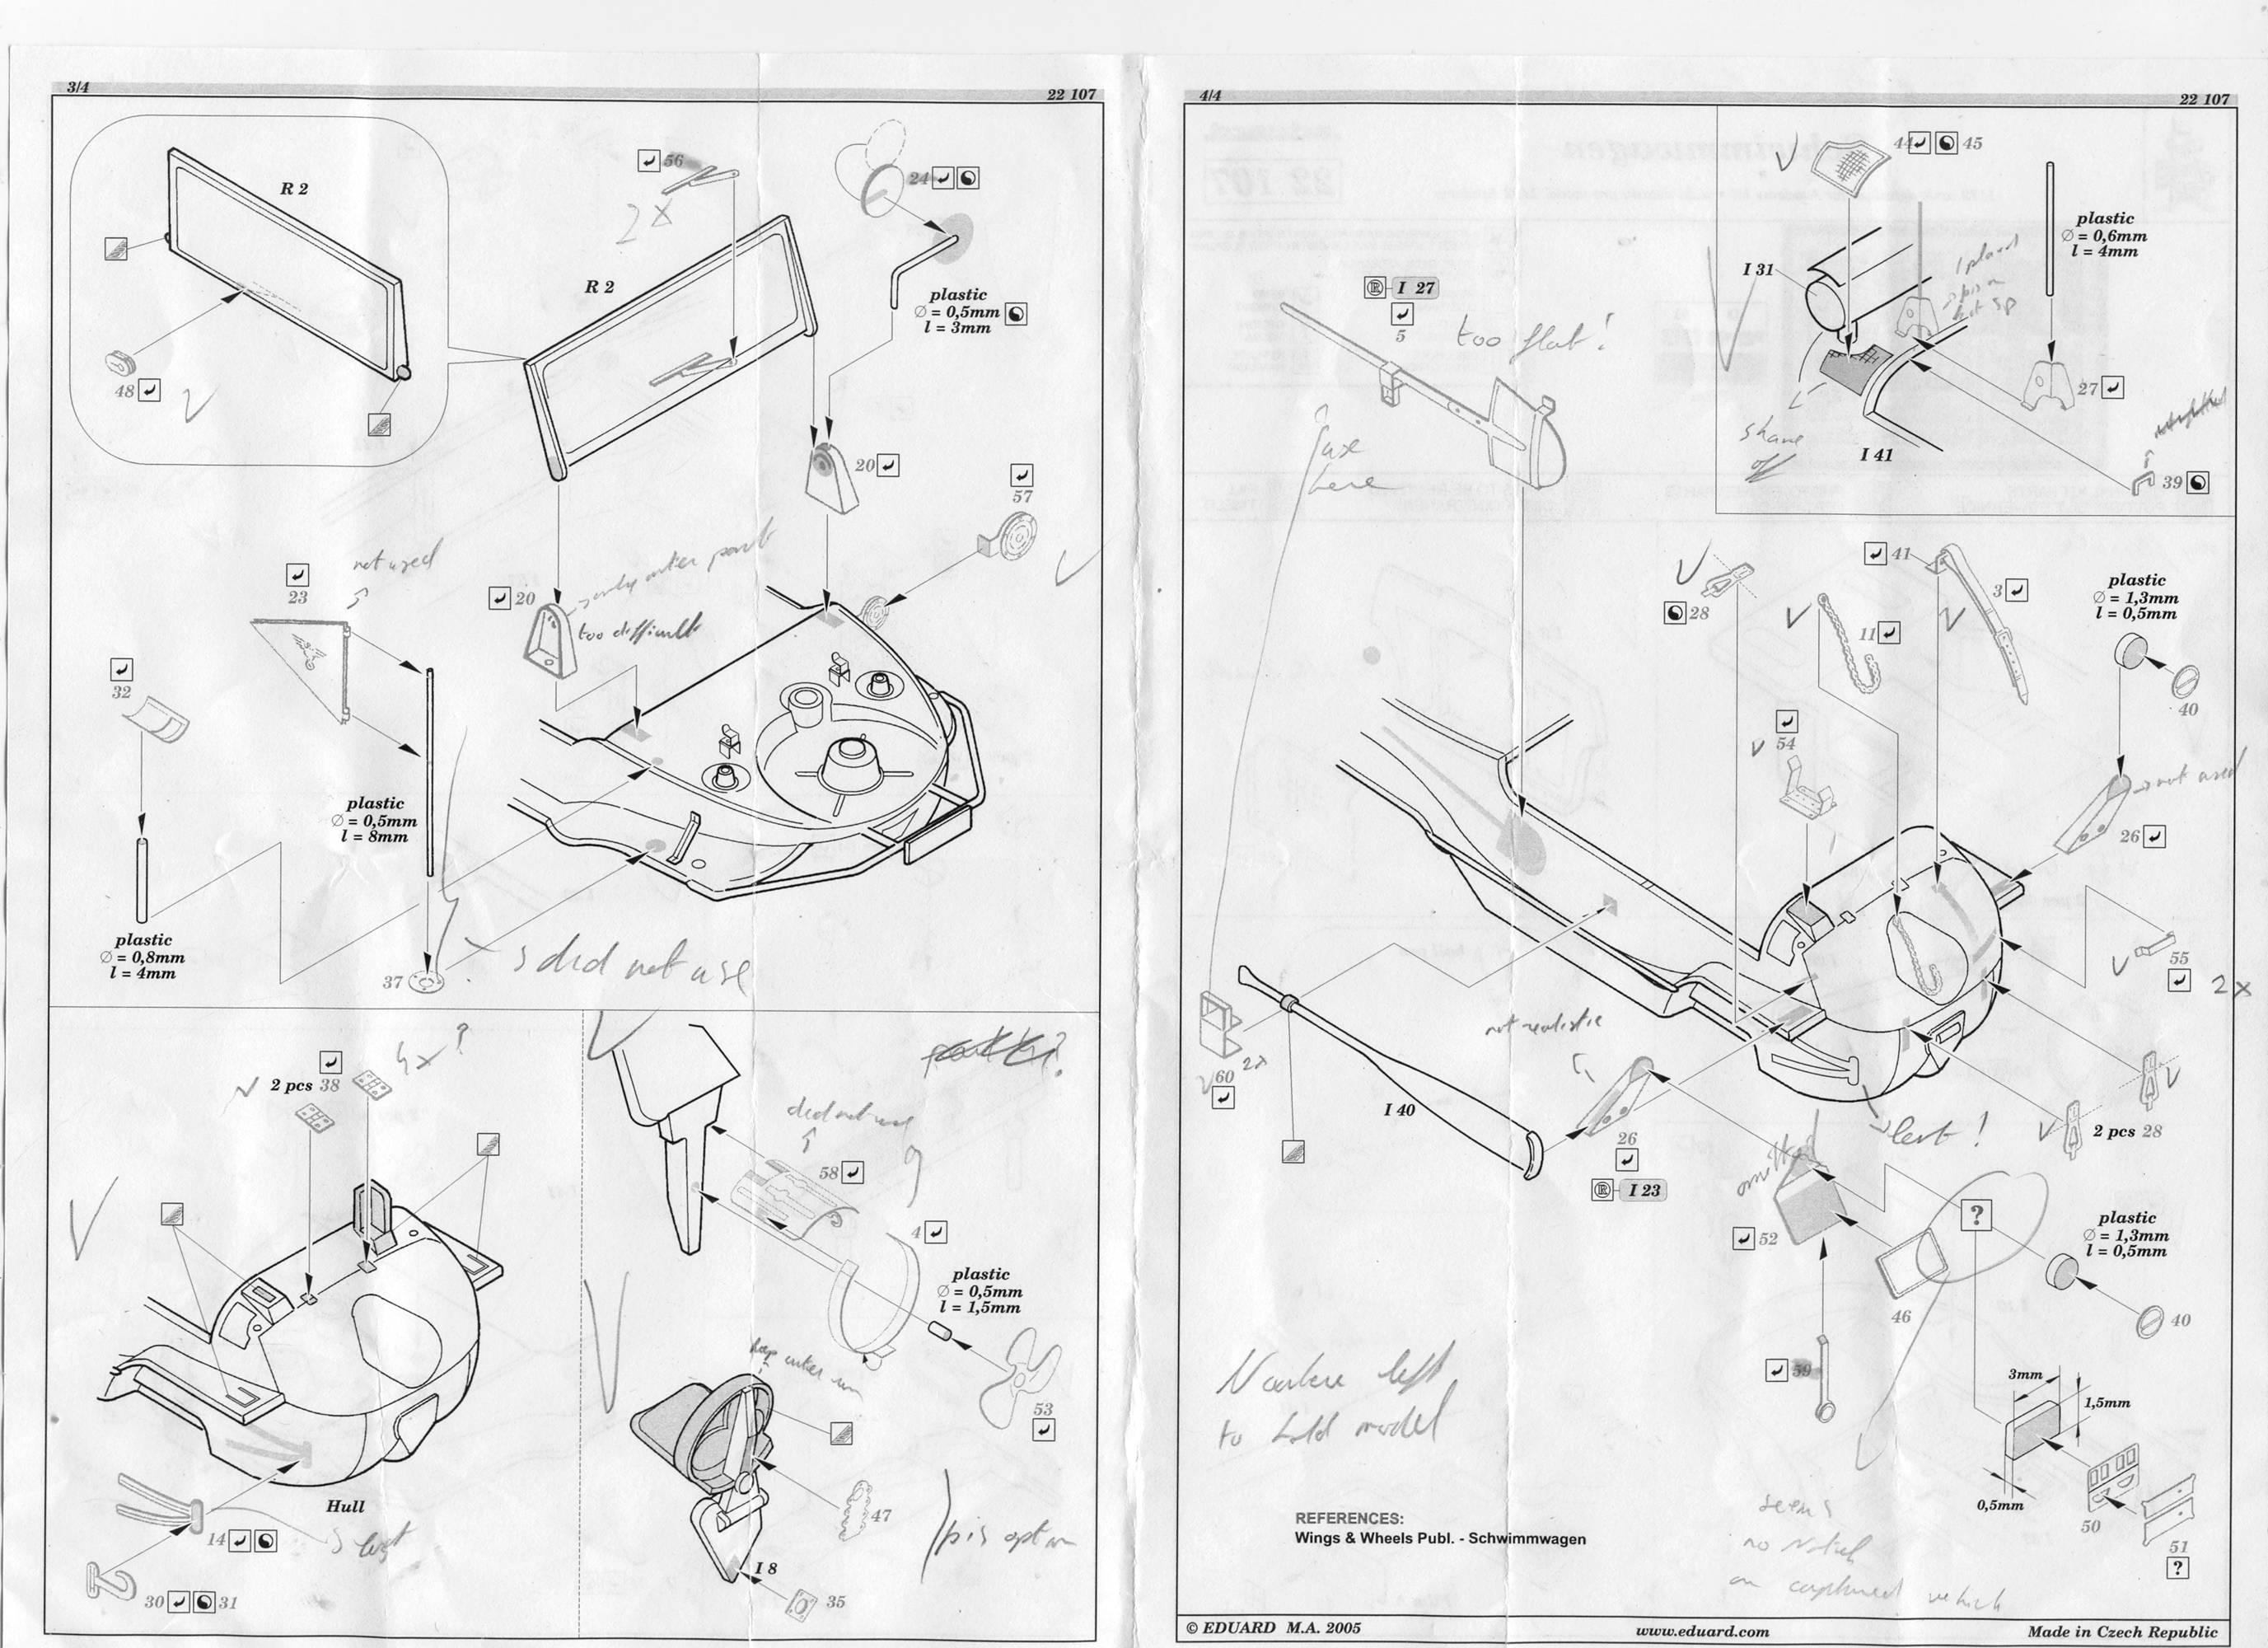
As an interlude I added the straps to the folded hood and carved some detail into the sides to represent the folded frame. I prepared the exhaust by adding the small U-shaped fittings, but not the metal shield, as I wasn't able to fold it to a shape conforming to the kit part. Next step is the nosejob, where some fittings need to be added to the area in front of the windshield. Again parts were lost (49) and thus replaced with bits of styrene. I left off the tow hooks (front and rear) until the very end by fear of loosing them as well. Note that on the rear of the vehicle the nose hook can be folded back. Choosing when to actually join the
lower and upper hull is difficult, as it will make adding some PE
parts harder and some easier. Moreover, some PE parts might interfere
with the fit of the hull. The next step in the Academy manual
would have you add the windscreen. I think that's one part better
left off until the end. Academy actually offers you two windscreens:
one where the frame and glass is in clear plastic, and one in which
the frame is plastic and the glass is a separate part. I chose the
latter as it eases the paintwork, but which will take some very careful
gluing not to ruin the transparency. Eduard provides a new windscreen
wiper (even twice, but why ?) and new hinges for the windscreen. The
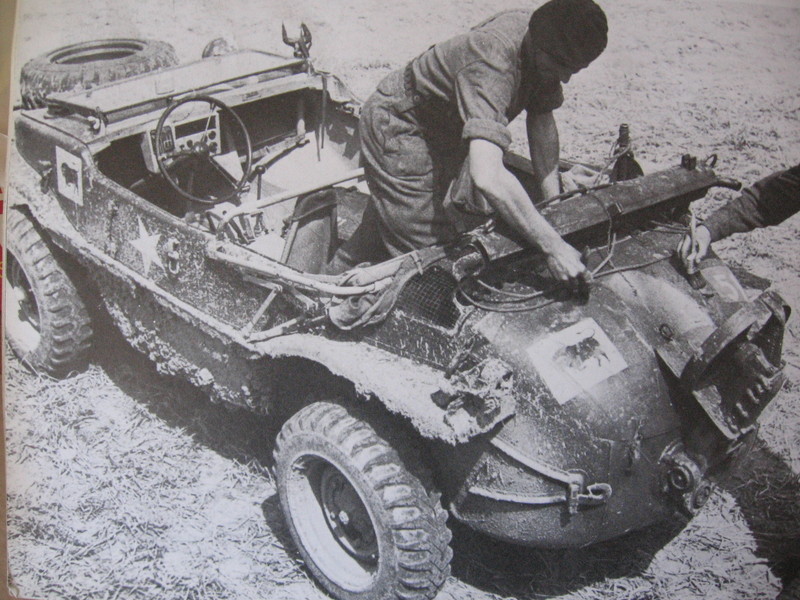
latter were beyond the reach of my modeling skills. It's a pity that Academy only provides a stowed hood, and, to boot, one that doesn't even fit nor exactly look like a real folded cover would. The oar that is fitted just below it also gets in the way, so this really is an area where Academy messed up quite badly. I needed to shorten the oar by a couple of milimeters to make it fit. As I was trying to build the exact same vehicle as in the picture below, I didn't fit a Notek (neither front or rear), but I did fit the shovel. The picture doesn't show it, but it might have been fitted. I cut off the attachments of the Eduard shovel (which is too flat) and added it to the Academy plastic part. The MK72 wheels are a drop fit as they replicate the fittings of the Academy kit very well. Only minor clean up of the thread and priming were needed. Eduards also provides a command pennant, by the way, which I didn't use. For those building a regular German Schwimmwagen, note that the interior fittings seem to be meant to hold an MP40 and Panzerfaust, and that an MG would probably have been fitted. Personal gear, like canteens and gas masks would be fitted in the (by then) crowded interior. Some minor additions/modifications were performed at the very end. I replaced the exhaust stubs with bent styrene tubing, to make them point to the rear. For those who want to go even further, two small pegs might be added to the top of the windscreen (which held the canvas top in place), and a horn placed below the right front fender. (The picture of "my" vehicle didn't show this area.)
Painting and markings The vehicle was first painted in dark yellow (Humbrol 83) on top of which I sprayed an ad hoc mix of olive green acrylics. Decals (and extra information) were provided by Elliott Winthrop, to whom I am very grateful for that kind act of selflessness. I admit that I failed to notice that I had chosen a bull insignia that faces in the opposite direction as in the picture, but I guess you just could call that artistic licence (or plain stupidity).
References
|
| Back to Academy Kit List Back to Eduard Acessory List Back to MK72 Acessory List |
Back to Construction Review Page |
Article Last Updated: 19 April 2012 |
Back to Home Page |


.JPG)
.JPG)
.JPG)
.JPG)
.JPG)