| Painting small scale
AFV's really is not much different than painting larger
models. In fact, the techniques I use to paint my models
were taught to me by a 1/35th scale armor modeler many
years ago. The main difference is just a smaller
tolerance for error. In larger scales, a small slip of
the brush can easily be missed, or handily covered up. In
our smaller scales, such slips become more obvious,
especially when photographing the model, since we have to
use close-up photography, which magnifies the entire
image, mistakes included. Numerous times I have finished
a model, thinking that it turned out pretty good. Only to
take some photos for posting on this site, and the photos
show numerous flubs and mistakes which need correcting. The most important tip I can give
for painting models is this: use an airbrush. The smooth
finish provided by airbrushing is extremely difficult to
replicate with hand brushing. Some camouflage schemes,
and small details obviously must still be hand painted,
but for the base colors, and for the painting technique I
describe below, the best way to accomplish them is with
an airbrush.
Painting
a Model, Step-by-Step
I will use a very simple
resin kit to demonstrate my painting methods. The model
is a Polish TKS Tankette, manufactured by Al.By. Refer to
its construction Review for more photos of the completed model.
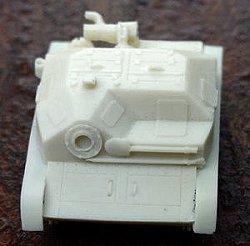 |
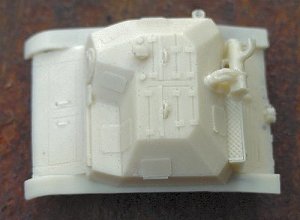
Step 1. The
initial step is the preparation of the model for
painting. For plastic kits, obviously the
construction needs to be fairly complete, with
all seams filled and sanded smooth. Resin kits
need to have all air bubbles filled and smoothed,
all flash removed, and again, all construction
complete up to the painting stage. Wash the model
in soapy water to clean off any dust,
fingerprints, and oily residue. (Fingerprints, in
particular, show up remarkably well under the
paint.) |
 |
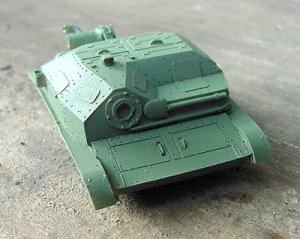 |
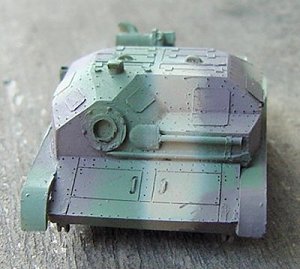
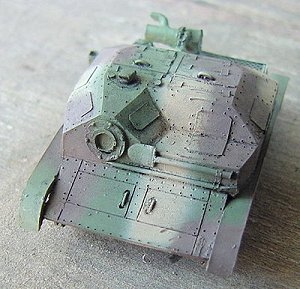
Step 2. Paint
the base color. In this instance, I used Panzer
Green, which has an olive tint to it. I don't
have access to Polish paint standards, so this is
as close as I can come to paintings I have seen
of Polish vehicles. Not shown in the scans are
the wheel/track assemblies, which I also painted
green. The late-war German three-color paint
scheme, although very similar to this early
Polish scheme, used the yellow (tan) as the base
color, with green and brown applied over the top
of the base color. The Polish vehicles used green
as the base color, and additional camouflage
colors applied over the green. |
 |
 |
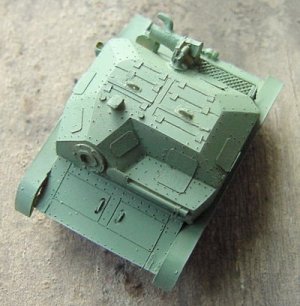
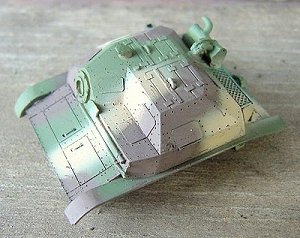
Step 3. Paint
the camouflage colors. I have seen paintings of
Polish vehicles with a neat geometric pattern of
camouflage, so I wanted to replicate it on this
kit. I used a dark Panzer Brown (not the Panzer
Red-Brown; but more of a chocolate brown), and
U.S. Desert Storm Tan. Again, I know these are
not authentic, but they are very close to
paintings I have seen. Notice where the brown
paint has splattered and run a bit. This will be
fixed with the highlight coat of paint. |
 |
Color Selection
I am not a hard-core
purist when it comes to color selection of paints I use,
for several reasons. First, does anybody truly know what
the actual colors were 60 years ago? I'm sure that some
people will argue "yes" and I agree that more
and more information is being discovered every year for
various paint standards of different nationalities. But
there are so many exceptions to rules. Second, can model
paint manufacturers ever exactly duplicate the original
colors? I doubt it. Third, most people are aware that
paint fades over time, but what is not often mentioned in
model manuals is that it also discolors. Just adding
white to a base color to fade it may not be enough. Some
green colors fade to a very bluish-tone. Tans can fade to
something with a distinct yellow cast. So I don't care if
the color I used doesn't exactly match the Federal
Standard number, or other such nonsense. Striving to make
your model as exact of a replica as possible is a
laudable goal, but we each must draw our own line between
what we consider "reasonable effort towards
perfection" and "not worth the time".
That being said however,
I do try to follow general guidelines. For example, the
colors used by the German Afrika Korps [apparently] had a
very yellowish tint to it, although not as yellow as the
Panzer Yellow color used in Europe. So I look for a tan
or sand-colored paint with a yellowish cast. You know
what I found works well for Afrika Korps? The British
Gulf War Desert Tan by Testors Acryl. It has a very
yellow tone to it but yet is still obviously a tan color,
not yellow. So my "reasonable effort towards
perfection" is tending to stick to general color
descriptions. If a certain color is described as being an
olive-green, for example, then I will likely use any
green which has an olive tone to it, without worrying
about an exact match to the Official Government
Standards.
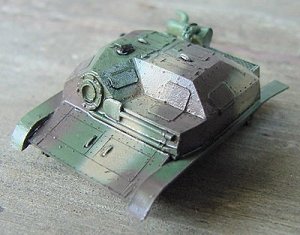 |
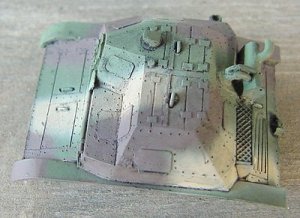
Step 4. Apply
the wash. As mentioned on the airbrush page, I
can do this immediately after painting the base
color. Usually, by the time I finish cleaning the
airbrush from spraying the base color, the paint
is dry enough to proceed directly to the wash.
These first two photos show the model right after
the wash was applied, and is still wet. |
 |
 |
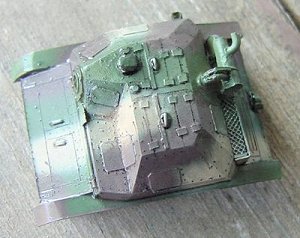
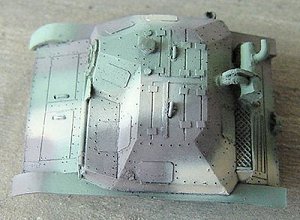
These two
photos show the model after the wash has dried,
which takes a couple of hours at most. |
 |
 |
Step
5. The highlight paint. Notice how I have taken
care of the brown splatters, and covered up the
unwanted wash stains. |
 |
 |
Step 6.
Drybrushing. I used a light gray for the
drybrushing, as it seems to go well with all
three of the camouflage colors. This step always
seems to me to be the most impressive procedure,
because it sort of brings everything together. It
blends the camouflage colors, compliments the
effects of the wash to add dimension to the
model, and also adds weathering, all in the same
step. |
 |
 |
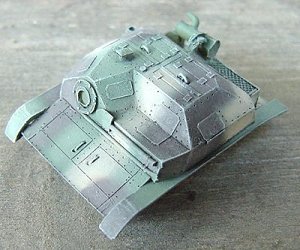
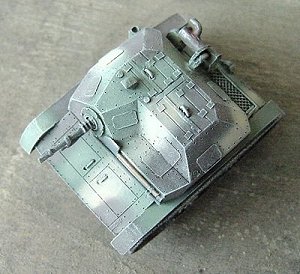
Step 7.
Finished. I have glued on the tracks and machine
gun. The gun and shovel balde were painted dark
gray, given a black wash, and then rubbed with
metalizer residue. The wheels were painted the
same as the hull, and the tracks were done the
same as the machine gun, with an additional light
rust wash. I am not entirely plased with the
tracks, which appear too highly polished. I will
likely add more brown and black washes, and also
some chalk to weather them some more. The muffler
was painted dark gray, given a black wash, buffed
with metalizer, and then given a couple of rust
washes. |
 |
To
prepare the vehicle for storage, or display, I use a flat
clear coat. After I wash, and highlight, I apply the
decals if any. Then I spray on the dullcote to seal in
the decals. Putting on the chalk after the decals is an
excellent way of making the markings blend into the
overall "grungy" appearance of the vehicle. As
for which dullcote to use, I find it difficult to control
the spray cans of Testors Dullcote. I tried airbrushing
the same product, but with dismal results. I've tried
every brand of clear flat that I could find, including
some intended for model railroading. I've found that once
again, Polly Scale (or AeroMaster Warbird Acrylics) Clear
Flat gives the best, and "dullest" results.
Most of the others come out with a semi-gloss or satiny
appearance. A warning: do NOT use Tamiya Flat Base. This
is not a clear flat coating, but rather an additive that
you put in other colors to make them flat. I didn't know
that when I bought it. I sprayed a 1/72nd Ki-44 Shoki
with it, and the whole thing turned pure white, like
frost. I was able to rub most of it off with a towel, but
I couldn't get it out of all the crevices and panel
lines. It actually makes the plane look very dusty, like
it's operating from a desert airfield.It also makes a
pretty good winter whitewash.
And that's all there is
too it. Granted, this was a simple kit, so construction
was easy, but that's also what made this article easy to
write. More complicated kits are obviously done in the
same manner, but the timing of events may vary depending
on the construction sequence (i.e., before or after
attaching the wheels and tracks, etc.)
|