| Background As most of you already know, this paste or compound was introduce in the 2nd half of September 1943, but most probably only from October 1943 was it in full application on new or rebuild vehicles. Its aim was to protect heavy tracked vehicles of the German Army - like Pz.Kpfw.V "Panther"; Pz.Kpfw.VI "Tiger", Sturmpanzer IV "Brummbaer", StuG and Pz.Kpfw.IV - from the depravations of hand held magnetic mines. Until it's demise, in the 2nd week of September 1944 - as after the 7th of September the application of the compound was cancelled - the characteristic rough finish of the Zimmerit, was a most common sight of German AFV. What is less know, is that the factories, and also workshop responsible for the overhaul and rebuild of damaged AFVs, used different patterns in the application of the Zimmerit, but this is a different story ... Modelling Zimmerit in Small Scale The problem in Small Scale is that very few kits depicted this characteristic right from the moulding process. To my knowledge only some resin and white metal models have until now appeared with this finish on the kit surface. In view of this the resourceful modeller and/or wargamer must reproduce it. There are some different ways to depicted it, from the "Hot needle", engraving, to the use of card cut to the correct dimensions and glued over the kit or the use of some compound - epoxy based, from the Milliput© or some polyester resins. I've almost tried all the possible solutions, but the I never liked any of them, because in most cases a mistake will mean, if not ruin a model, at least a lot of work removing the compound from the kit, always a messy job. This is particular true in vehicles like the StuG and Panzer IV with a lot of rivets and small details. The present approach, started from an idea from Pedro Oliveira, a fellow modeller, that was experimenting with replicating Zimmerit in 1/35 (disgusting…), using modelling clay (the light grey variety) and a screw driver to mark the clay in the "classic pattern" (the vertical columns) in a Sturmpanzer IV. After looking at his kit, I liked the look of it, so a begin my own model, trying it first in an old ESCI Panther, which I was intending to use only for wargames, and after some experimentation in others types of models. After looking at some photos, and doing some experiences, I decide to replicate the Daimler-Benz pattern, as this was the easiest and the cleanest. In the case of the Panther, this represents at least 30% of the "zimmerited" produced vehicles, and, most important, will mean a lot of long and almost panels, few round corners and a few tools areas. First, before starting to replicate Zimmerit, study some photos specially of the intended subject, there are some good sources of photos in the Web, just have a look at the links in this Site or on the Missing Links or AFV news. In some cases, you will discover that some areas or panels, will not receive any Zimmerit, like under the tool areas, the exhaust pipes, and so on. Also another area of interest is that the real thing does not have clean and parallel lines, as the human factor was also there. So, you must prepare yourself and the kit according to this info. Also it will helps if you scribe some lines in the plastic surface, as to increase the adherence of the modelling clay.
Material used:
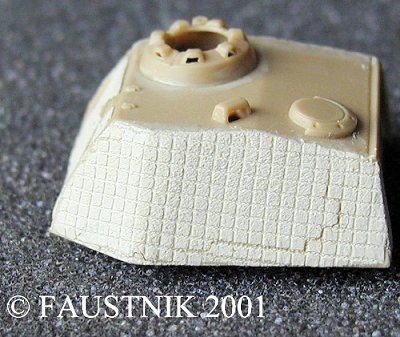
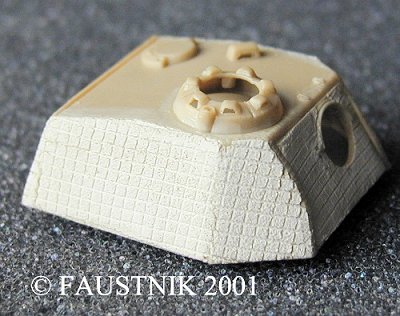
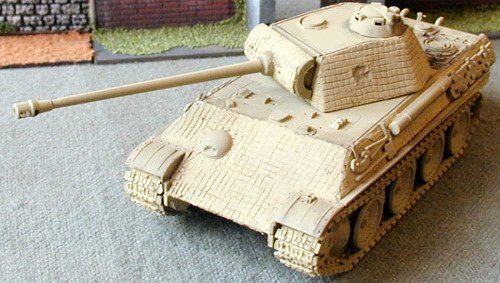
How to: 1. Roll the clay, over a clean and flat surface (I used the wax paper and the spatula) to the desired thickness (around 0,1-0,3mm in 1/72). If you find that the clay has hardened while sitting in, simply apply a little of water, with a brush, over the clay surface, as the clay is a paper compound, and as such is reversible with water). 2. Place parts of the clay, (I have used the spatula) over the desired kit surface. Try to work small areas each time, like the front hull, side turrets and so on, cut excess clay (that could be reused, after sprinkle some water over it). Using the green scouring pad imprinted the surface with their irregular lines. After this, using the scalpel or a very sharp x-acto (be careful with the blade) simply trace the lines according to the pattern. If the clay is pulled out by or action, this is because it have hardened - use some water - or have to much water - left to hardened. In another model I've used a Tulle mesh, with the size of pattern to mark the clay, and it worked.
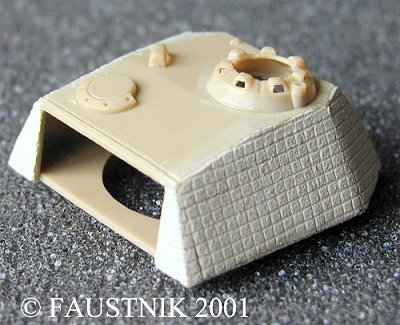
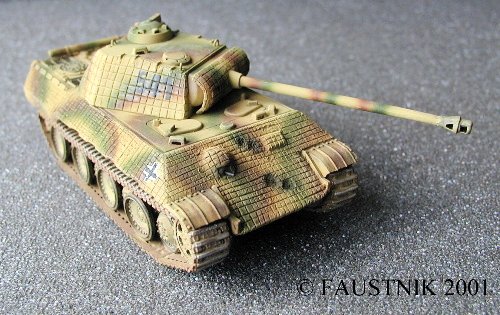
3. While the clay is hardening, you could correct some areas, like joins between panels, battle damage and so on. If you simply do not like the look of it, just use a little of water (with a small brush) and start all over again. 4. After drying out, if you don't fix it, the clay will fall out, so you need to "glue" it. I've use some liquid glue, the some as used in plastic kits, but enamel thinner will do in most of the cases, but do not overdue, as you could do some damage to the kit. The next step is to paint some primer over the area - I airbrushed with Humbrol Matt 83 - and applying your normal camouflage patterns. My experiences in the end. As you can see, I'm simply didn't have the patient to make the Turret pattern, so…
The same about the damage on the glacis…
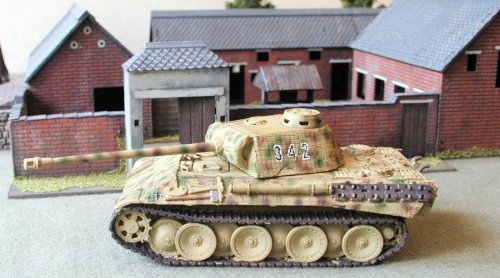
A Pz.Kpfw.V Ausf. G from Revell with the same technique (model by Artur Ramos):
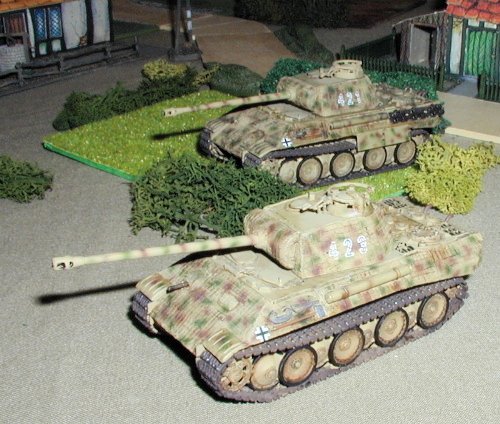
Another Pz.Kpfw.V Ausf. D, from Revell (Model by Artur Ramos):
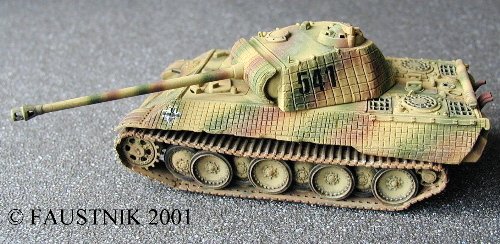
A Pz.Kpfw.V Ausf. A, from Revell, after painting and some oils applied to give a deep effect to the pattern (model by Artur Ramos):
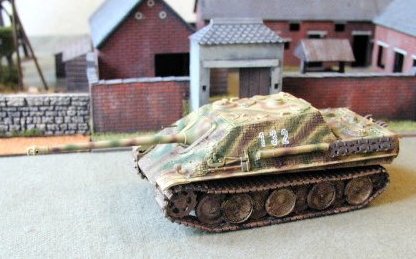
The same process, this time to replicate a similar pattern on a Jagdpanther early (model from Revell, modelled by Artur Ramos):
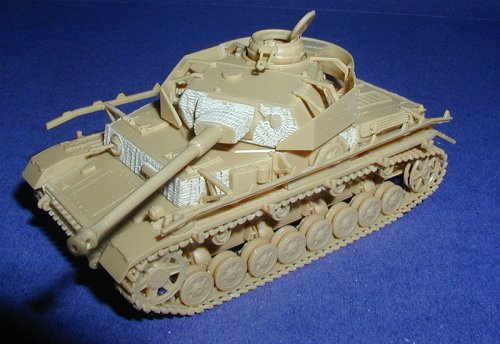
As can be seeing, any of the more linear patterns could be replicated with this process, indeed, either in the StuG/StuH Ausf. G family, as on the Panther family, almost all could be made, using the modelling clay approach. In the horizontal/vertical columns, originally made with a small trolley, one could use an impression pattern, made in plastic or other material (in an experiment I use a screwdriver), as using the original process will peel of the clay, from the kit surface. In the Missing Links Braille Forum, some one pointed out that the sides from a CD plastic case, could be used this way, or you could made yourself a matrix for "waffle plate" pattern or other similar pattern. Just use your imagination… The screwdriver approach on a Revell Pz.Kpfw.IV Ausf. H from Revell:
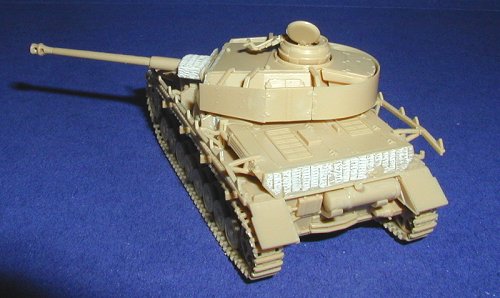
Another view of the Pz.Kpfw.IV Ausf. H:
|