|
Building a Sherman-Pershing hybrid
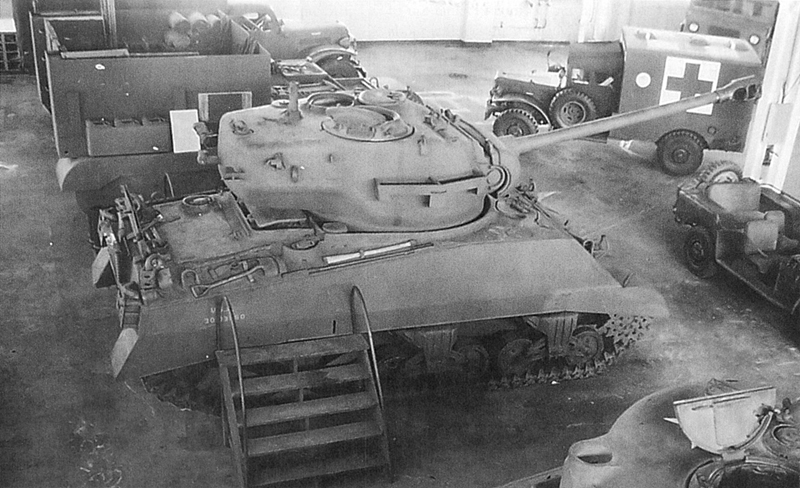
Shermanholics can sometimes be a pain with their nit picking, so when I saw this photo of a very rare Sherman, my first thought
was a great way to have some playful fun with this picky group. My next thought was - I have some Trumpeter Pershings and Dragon
Shermans in my stash! This could be an easy conversion and have those Shermanholics scratching their heads, plus make this a FUN build!
First of all, some history behind this "one off" Sherman.
"As a result of the crisis in Normandy, Brig. Gen, Joseph A. Holly returned to the US in July '44. As Chief of the Armor Section for the ETO,
he was directed by Gen. Eisenhower to expedite the production and shipment of more powerfully armed tanks and tank destroyers, particularly
those with 90mm guns. During his visit to the Detroit Arsenal, Gen. Holly viewed a Sherman armed with the 90mm gun M3. This was an M4 fitted
with a Pershing type 90mm gun turret. Since both tanks had 69 inch turret rings, such an installation required only stowage changes and
modifications to obtain adequate clearance between the turret assembly and some components on the tank hull."
(from Sherman - A History of the American Medium Tank, by R.P. Hunnicutt)
It was decided that this modification would not be ready for production before the Pershing, so the project was dropped.
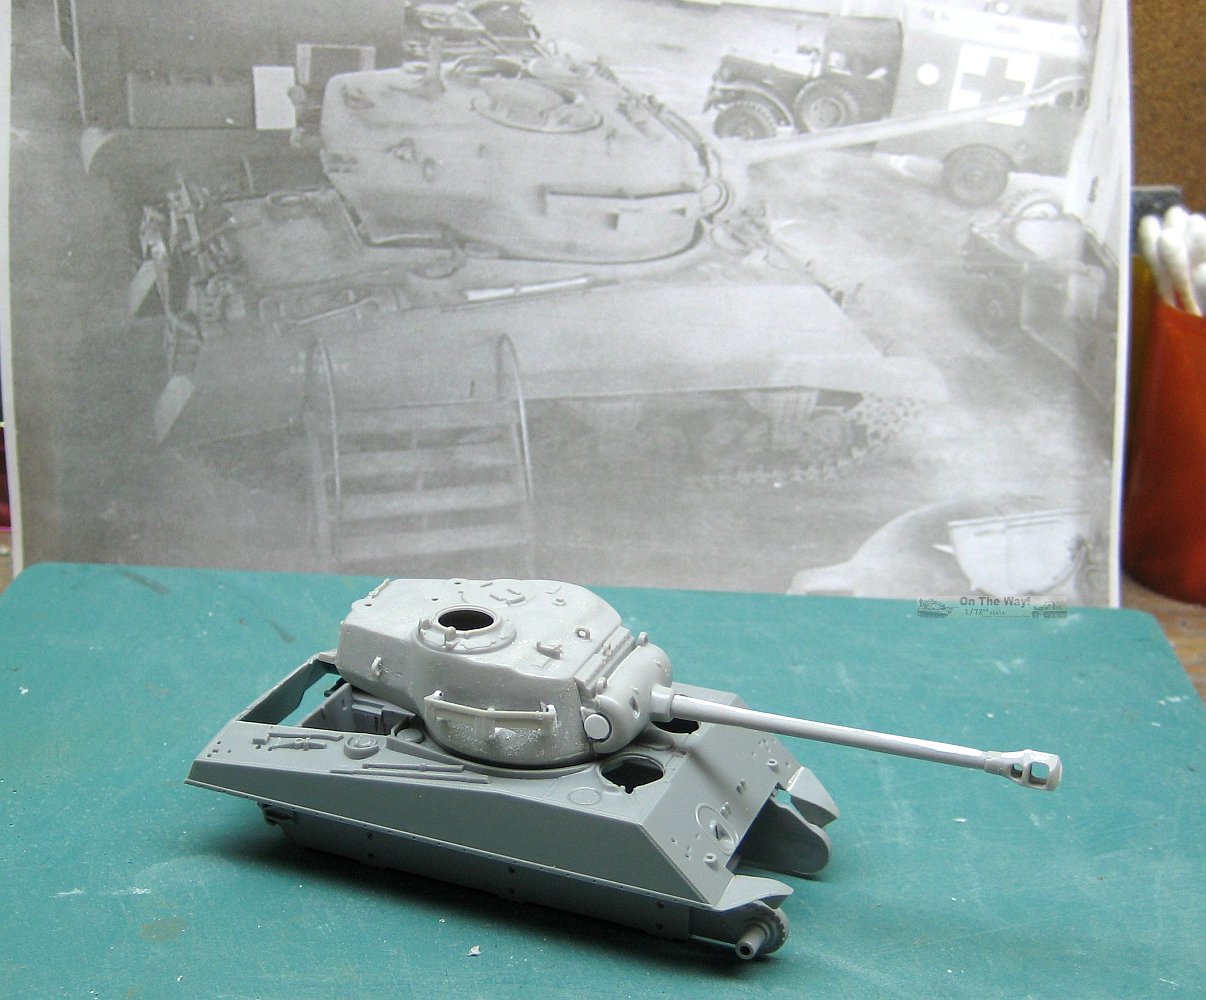
This was an easy and fun conversion. I used the turret/gun from Trumpeter, and
two Dragon kits, one for the upper hull, the other for the lower hull and engine
deck. Wow, this is an expensive conversion!
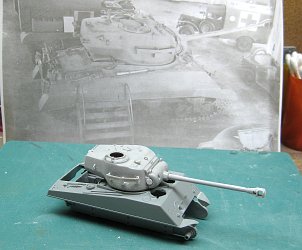
The Pershing turret was used from the kit, "as is". The Sherman upper hull
required an increase in the diameter of the "turret race". Once that was done, the
Pershing turret dropped in easily. Some changes were required to the rear of the
lower hull so the upper would match the lower.
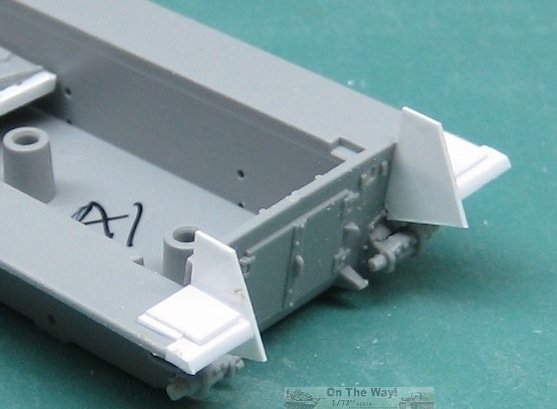
The most difficult change was cutting out the engine decks on two Shermans and
swapping them. The Dragon kit did not have the extra fuel? filler on the rear
deck so a new one was scratch built. And, if that one looks better, why not replace
them all, which I did.
All the little detail on the kit, lift eyes, light guards, lifting handles, etc. were
replaced with bent brass rod or flat bar. The Pershing's gun brace was added.
I replaced all the gun splash shields around the turret and radiator door with strip
plastic.
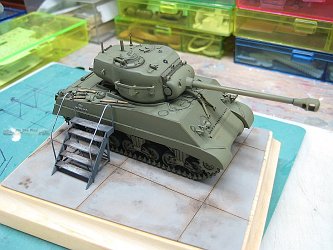
The base and stairs were made to duplicate the photo. Tamiya paints were used with slight tonal variations, no weathering. The tank was to be inspected by a
General, so it would have been pristine! Note in the photo, the glass observation ports are either masked or painted over. As for markings, I used a serial
number from one of the kits. It was close enough (the lettering is way too small to piece together such a looong number!). For those wishing to build this with the
proper serial number it can be found on this 1/35 Sherman-Persing conversion at
panzerserra.blogspot.ca.

Working on changes to the rear
|

Swapping engine decks
|
Work on the turret
|
The finished conversion
|
|