
|
RPM Staghound III conversion |
||||
| Article by Bill Powers - Jwp968(at)aol(dot)com | ||||
|
|
|
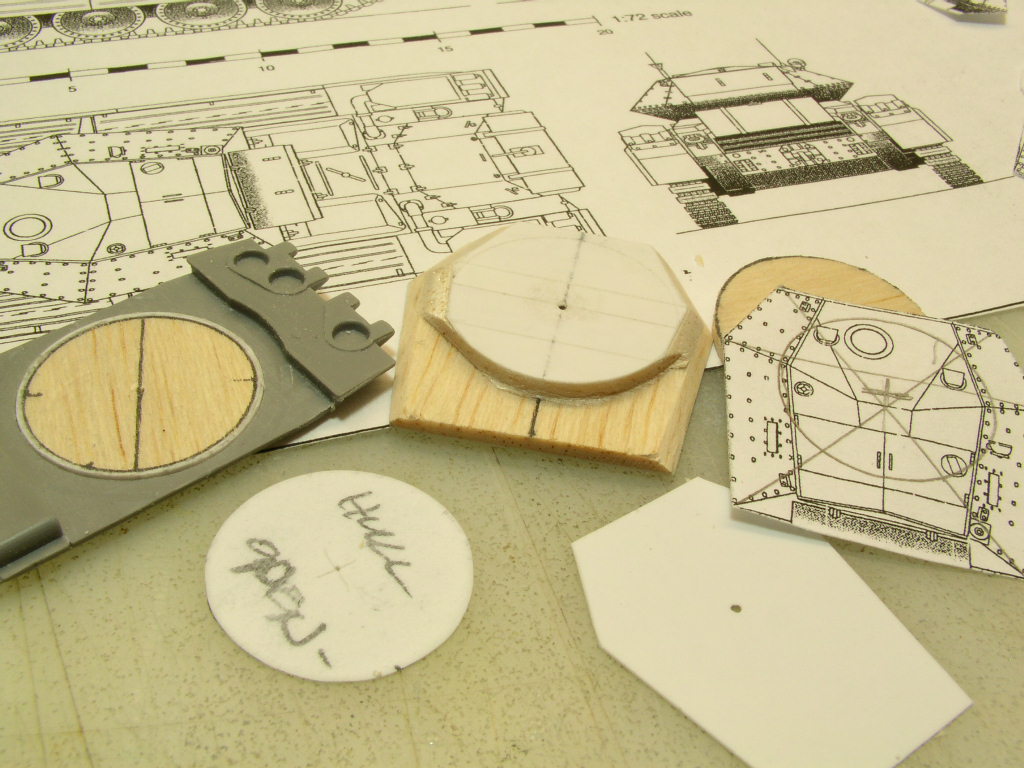
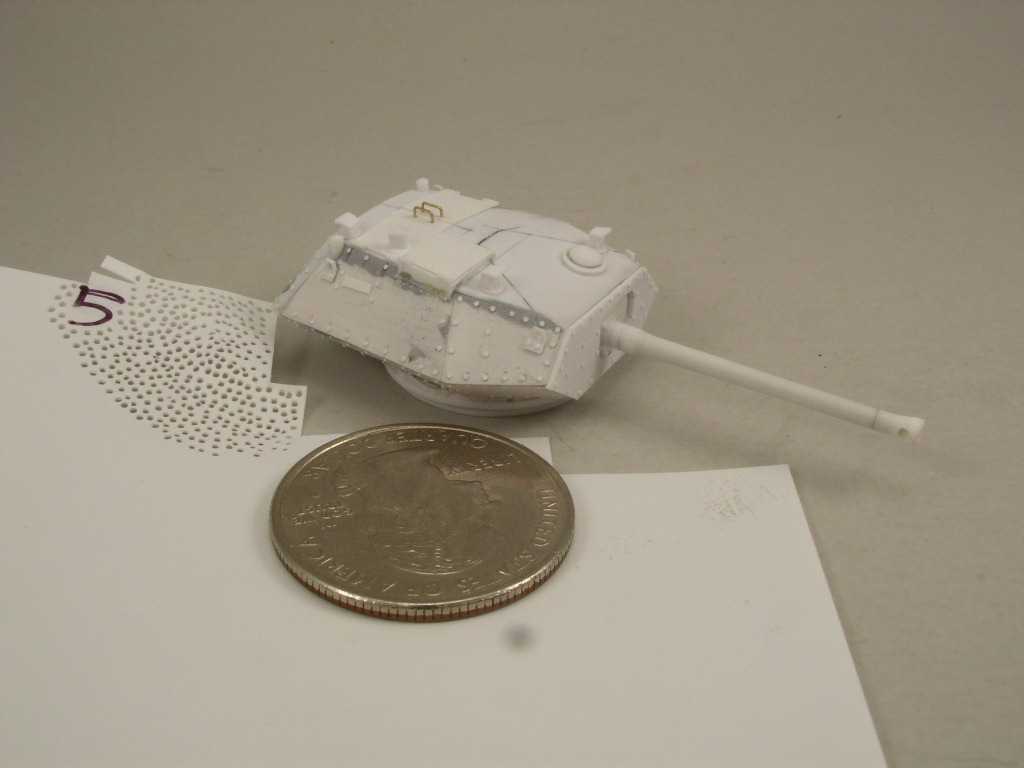
In my opinion the Staghound looks much better with a large turret, so I made the Mk.III version by scratch building a Crusader turret using plans from Bradford's plan book for British armored vehicles. The turret was built using the "Harry Woodman" method of a balsa wood core plated with plastic sheet. I used two layers of balsa with a piece of white plastic in the middle.
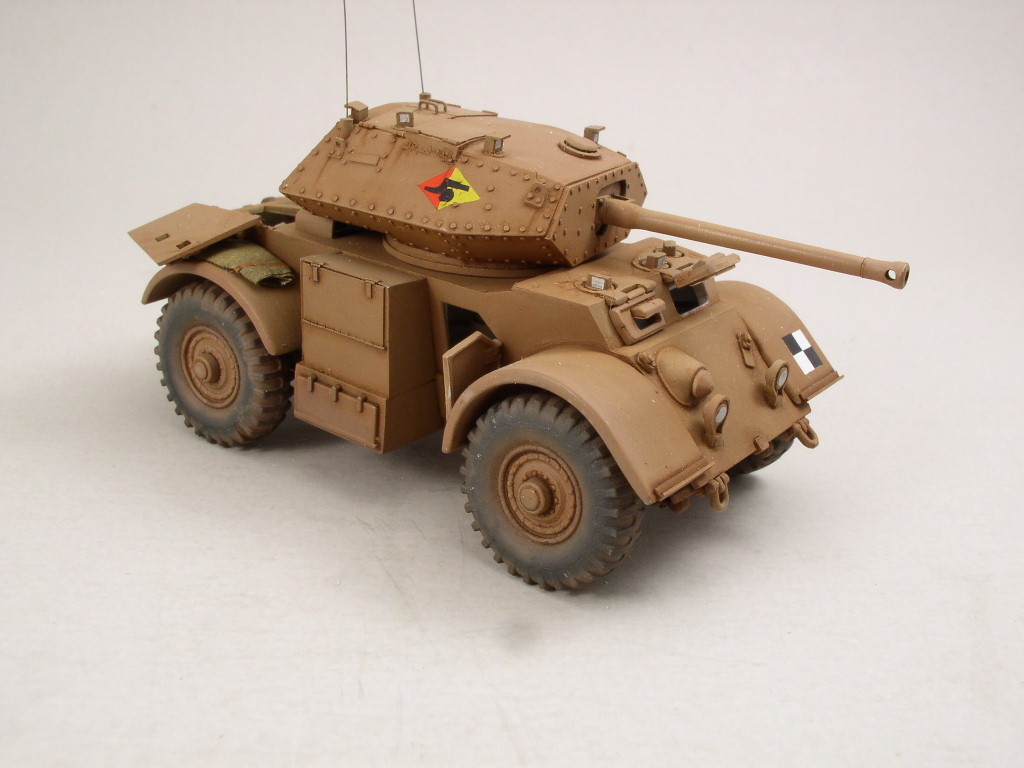
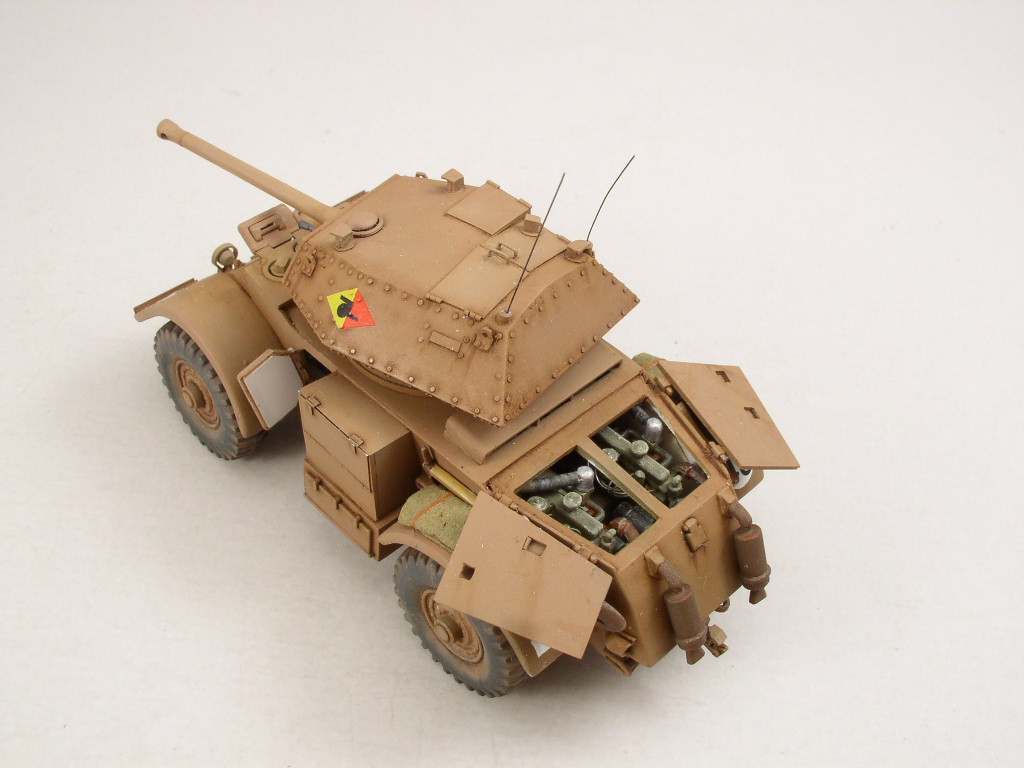
All this could be avoided by using the Hasegawa Crusader turret I guess. The markings were made from colored decal sheet. The idea for the markings came from a web page that showed the decals in the Bronco kit for a Mk.III of the RAC Gunnery Schools. The paint is Tamiya's Deck Linoleum Brown with some Buff added. Then a Burnt Umber wash followed by pin washes of Burnt Umber and Black. Shading was done with the base color further lightened with Buff. The model was sprayed with Dullcote and further weathered and shaded with a dusting of Dullcote plus a drop of Model Master Radar Tan. The RPM kit goes together very nicely. There were no problems in fit or assembly. Unless the sides are thinned, the engines will not fit! But you can always close the engine doors which would be a shame because the kit engines are beautiful! |
||||||
| Back to Articles Page | |
Article Last Updated: 05 November 2009 |
Back to Home Page |